Using GitHub Actions to Create Sentry Releases

*UPDATE: We have an official Sentry GitHub Action. Learn more here. *
At Sentry, we're big fans of continuous integration and deployment. We're also big fans of GitHub — and not just because we employ a number of notable GitHub alumni. We use our own GitHub integration to link issues, identify suspect commits that likely introduced new errors, and suggest assignees who can best resolve each issue.
Last month, GitHub released GitHub Actions for general availability. Much like Sentry's own Integration Platform, GitHub Actions lets developers create their own customized, automated workflows and combine their favorite third party tools — in this case, directly from within a GitHub repo!
In this blog post, we'll walk through how to use GitHub Actions to automatically create Sentry releases.
Writing a GitHub Actions workflow file
GitHub Actions are defined in a .yml or .yaml "workflow" file stored in your repository's .github/workflows directory.
These workflow files allow you to define commands to run on a GitHub-hosted virtual machine, triggered by various workflow events within GitHub. For example, in our example GitHub Action workflow file, we run our commands whenever a commit is pushed to the master branch:
name: New Sentry Release and Deploy to Heroku
on:
push:
branches:
- masterSee GitHub's documentation on workflow event triggers to explore the other events you can work with.
The main body of our workflow file defines which environment to run in, a list of environment variables, and the sequence of steps to run. These steps can be pre-defined GitHub Actions, like the checkout action that checks out a copy of the current repo, enabling you to run commands like git push within the workflow.
jobs:
  release:
    runs-on: ubuntu-18.04
    env:
      SENTRY_AUTH_TOKEN: ${{ secrets.SENTRY_AUTH_TOKEN }}
    steps:
      - uses: actions/checkout@v1.0.0
      - name: Create new Sentry release and deploy
    run: |
      # Run some commands here
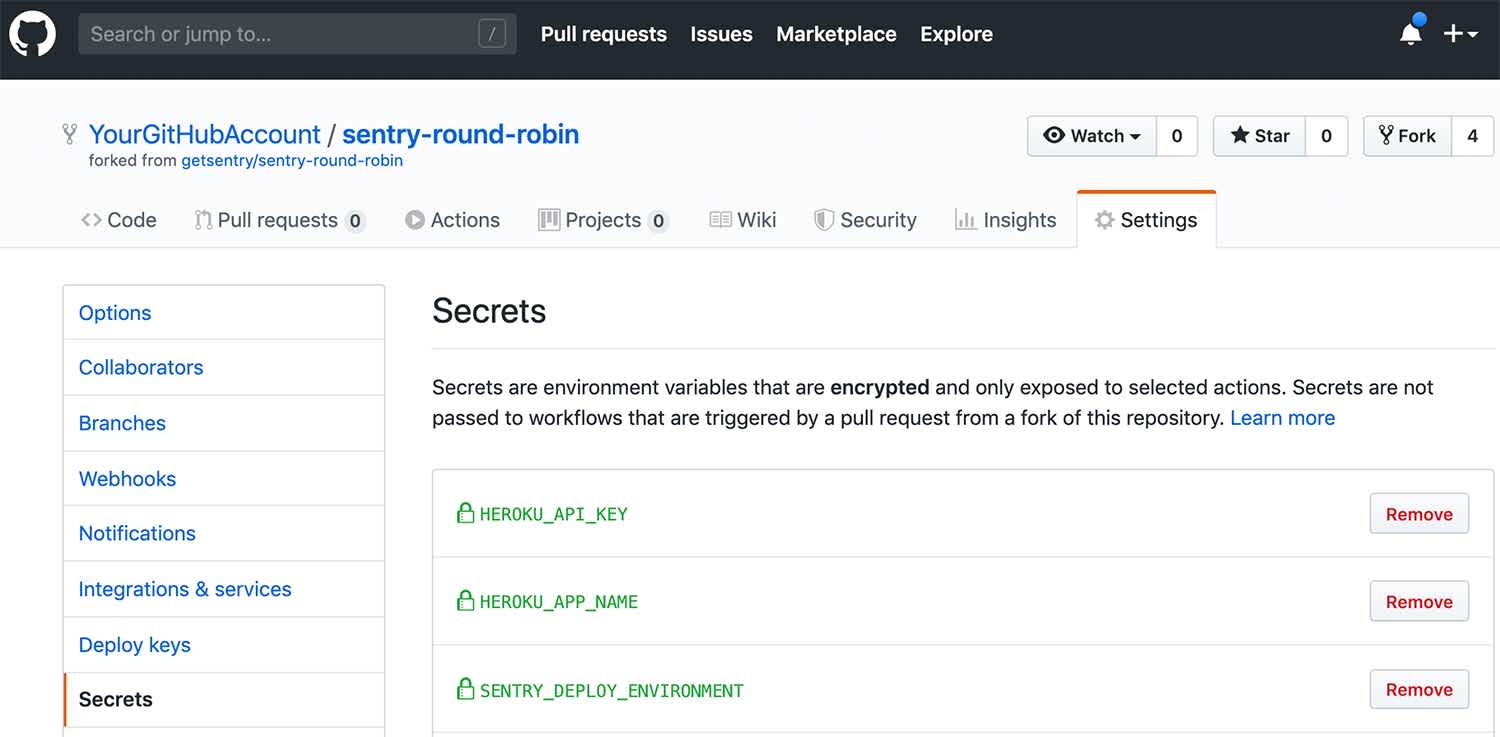
To store any authentication tokens (for example, your SENTRY_AUTH_TOKEN) or other sensitive information, go to your GitHub repo and navigate to Settings > Secrets. There you can save any required information and pull them into your GitHub Actions virtual machine as environment variables.
In our example workflow, we use the following environment variables for the Sentry CLI:
SENTRY_AUTH_TOKEN- Your Internal Integration token.SENTRY_ORG- Your Sentry organization slug.SENTRY_PROJECT- Your Sentry project slug.SENTRY_DEPLOY_ENVIRONMENT- Optionally, you can set the name of the environment (for example, "production") that will show up in your Sentry deploys.
Creating a Sentry Internal Integration
Our Integration Platform allows developers to connect Sentry with third-party tools — either as Public Integrations that anyone can use, or as Internal Integrations built only for one organization to combine Sentry with their internal tools and custom workflows.
To create a new Internal Integration, navigate to Settings > Developer Settings > New Internal Integration within Sentry. There, you'll give your new integration a title (for example, "Create Sentry Releases with GitHub Actions"), choose which permissions to use, and get your token for authenticating with Sentry's API.
Setting permissions
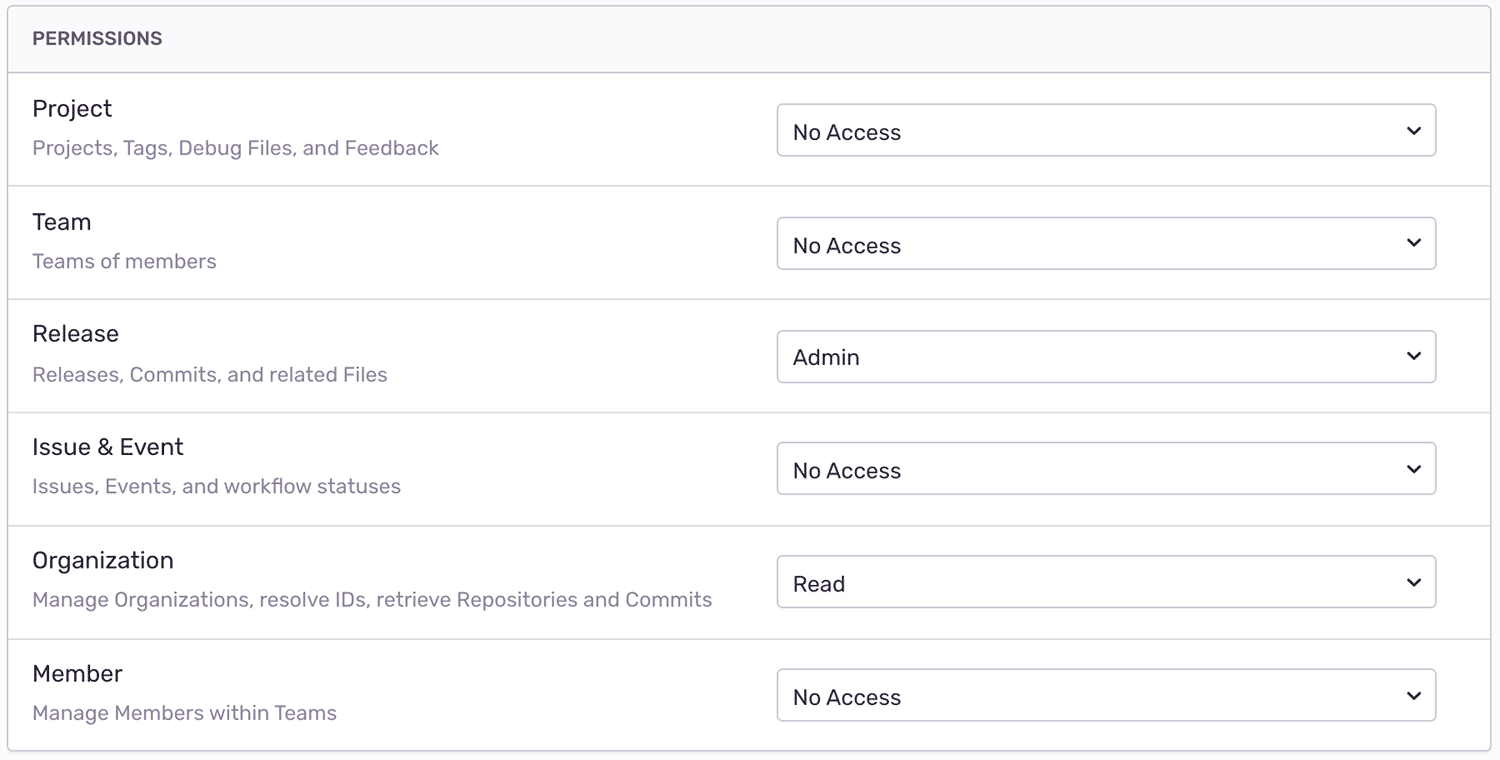
You can apply different sets of permissions for each integration. For this one, we'll need Admin access for "Release" and Read access for "Organization":
See our docs page on permissions to learn more about scopes for Sentry's API endpoints.
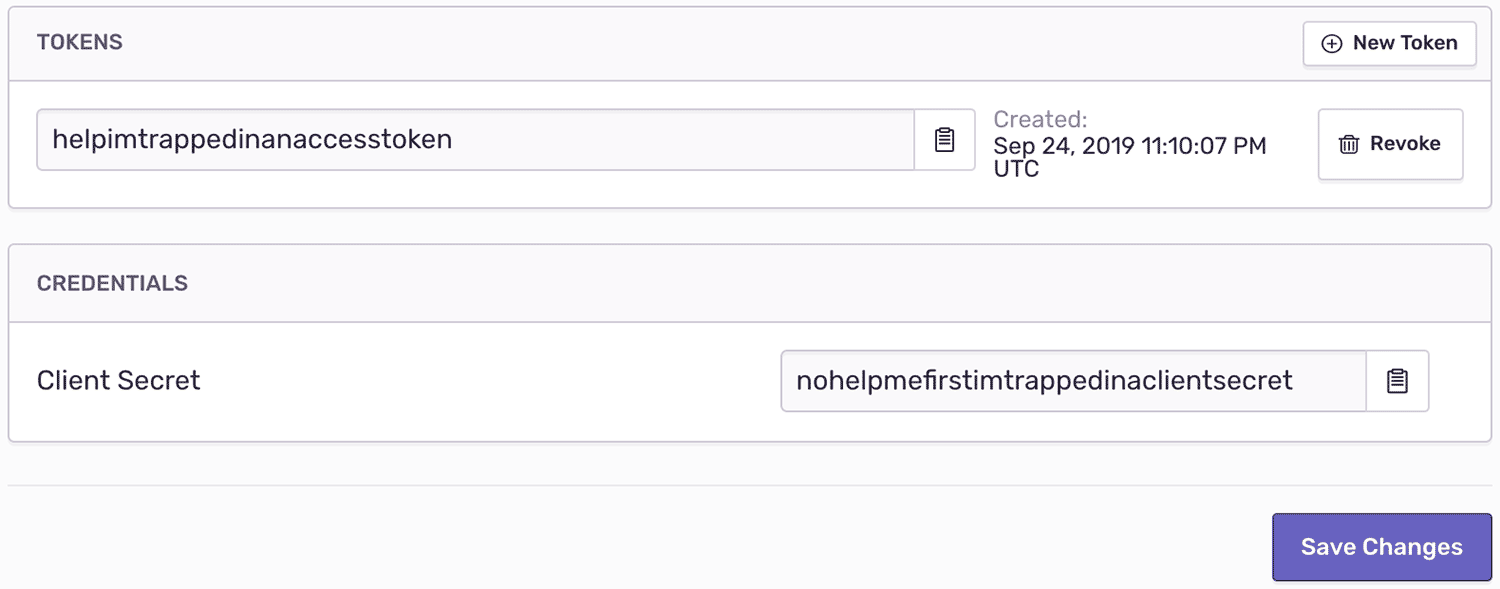
Next, click "Save" at the bottom of the page and then grab your token:
In the next section, we'll use this Internal Integration token to enable our GitHub Actions workflow to authenticate with Sentry's API when creating a new Release.
Creating a new release within a GitHub Actions workflow
First things first: if you're going to use GitHub Actions, it'll work best if you're also using our GitHub integration so that new releases can automatically be associated with your project's latest commits. Be sure to add the GitHub integration to Sentry (see instructions in our docs here) and then configure the GitHub integration to use your repository.
Our example workflow installs Sentry's command line interface on GitHub's virtual machine, creates a new Sentry release, and then creates a new Sentry deploy linked to that release:
run: |
  # Install Sentry CLI
  curl -sL https://sentry.io/get-cli/ | bash

  # Create new Sentry release
  export SENTRY_RELEASE=$(sentry-cli releases propose-version)
  sentry-cli releases new -p $SENTRY_PROJECT $SENTRY_RELEASE
  sentry-cli releases set-commits --auto $SENTRY_RELEASE
  sentry-cli releases finalize $SENTRY_RELEASE

  # Create new deploy for this Sentry release
  sentry-cli releases deploys $SENTRY_RELEASE new -e $SENTRY_DEPLOY_ENVIRONMENT
See our documentation for more details about Sentry release management.
If we also wanted to deploy our app to (for example) Heroku, we can take advantage of the fact that Github's virtual environment includes the Heroku CLI by default. Just a couple more commands will update Heroku's environment variable for the SENTRY_RELEASE and then deploy the app to Heroku:
run: |
  # ... previous Sentry commands

  # Update Heroku env var for SENTRY_RELEASE so future events are linked to the latest releast
  heroku config:set SENTRY_RELEASE=$SENTRY_RELEASE -a ${{ secrets.HEROKU_APP_NAME }}

  # Deploy to Heroku
  git push https://heroku:$HEROKU_API_KEY@git.heroku.com/${{ secrets.HEROKU_APP_NAME }}.git HEAD:master
Checking that the GitHub Action worked:
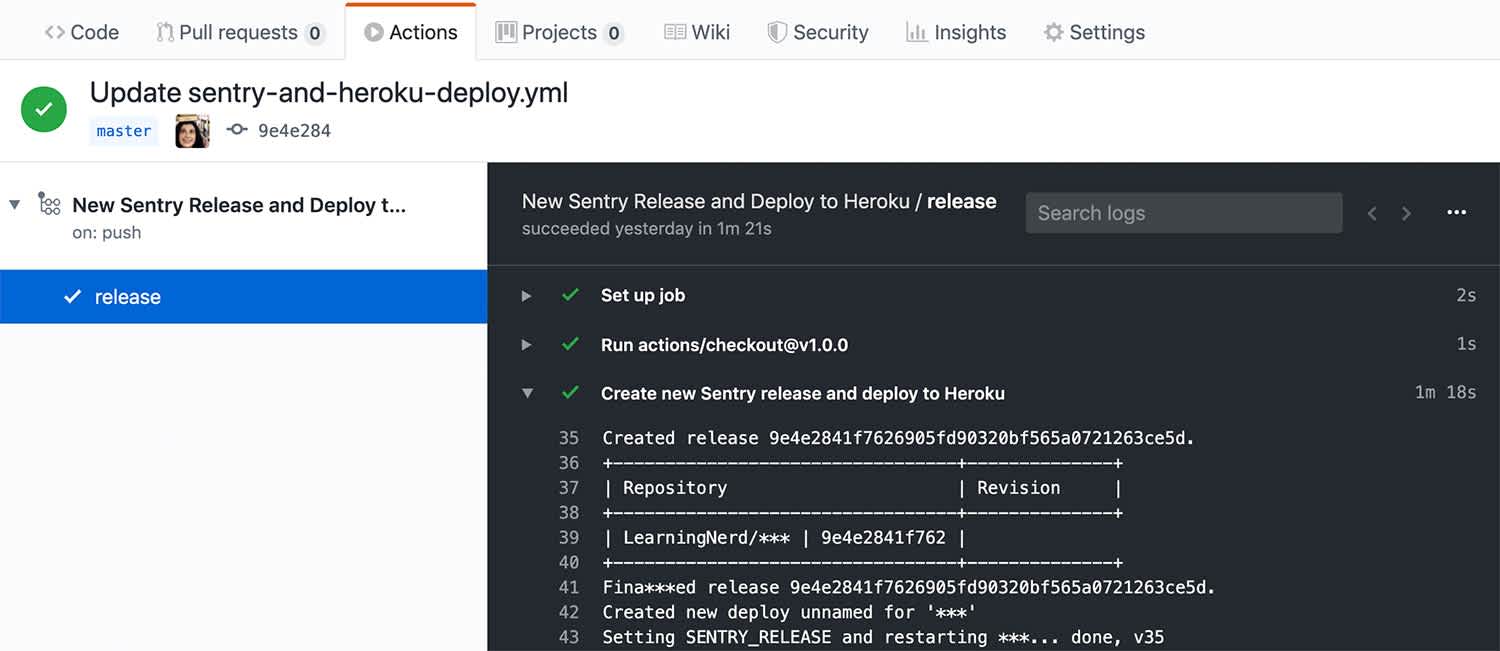
To run your GitHub Action, you'll need to invoke the triggering event — for example, pushing a new commit to the master branch. Navigate to the "Actions" tab via your GitHub repository page to see the status of your workflow.
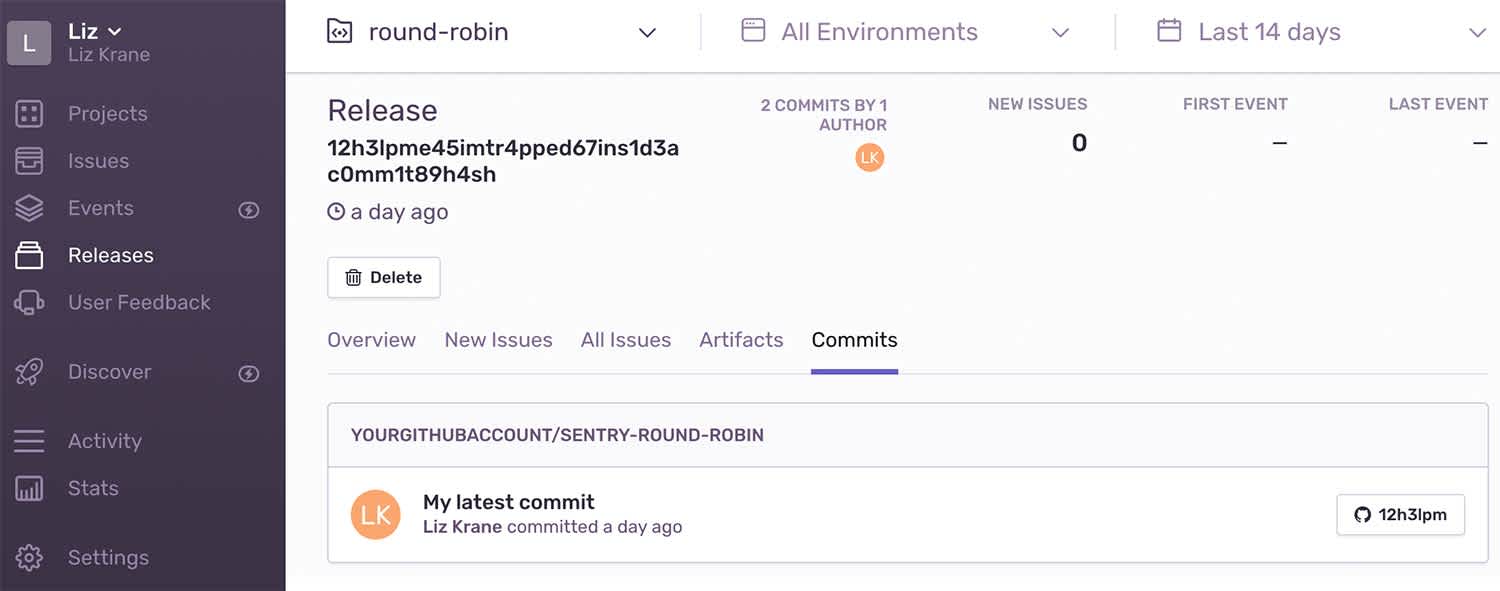
Once the workflow completes, navigate to your Sentry project and click "Releases" on the left-side menu. You'll see a brand new release listed for your project, which will also show the environment to which you most recently deployed the project. (In our example workflow, this is whatever value is entered for the SENTRY_DEPLOY_ENVIRONMENT value in GitHub Secrets.)
To check that new events from your project are associated with the latest release, you'll need to trigger an error in your project.
For example, if you're using an Express app, you can add the following Express route:
app.get('/debug-sentry', function mainHandler(req, res) {
  throw new Error('Sentry error!');
});
See our docs for the complete Nodejs/Express example code.
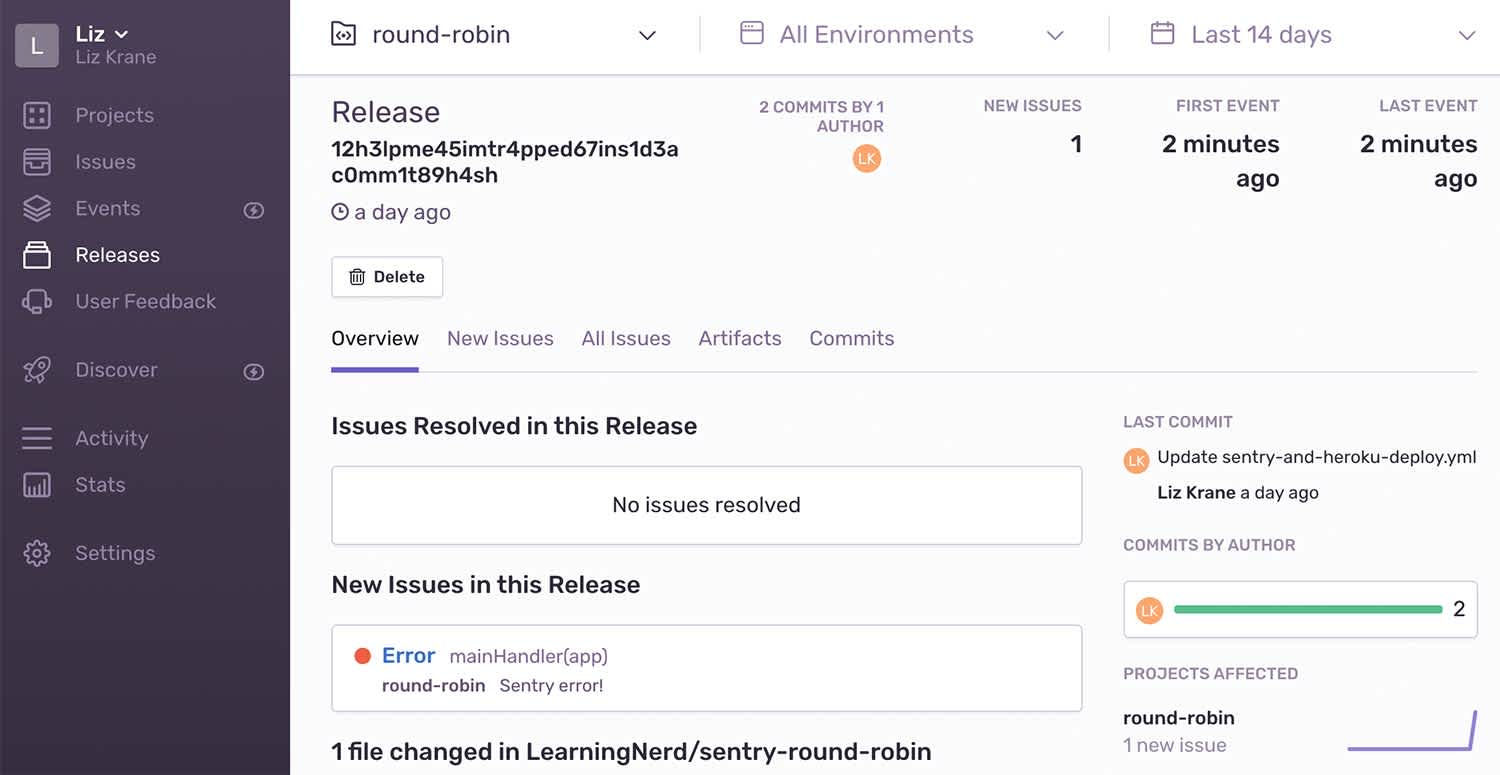
After triggering a new error, check your project's "Releases" page again in Sentry. On the page for your latest release, you'll see a new unresolved issue associated with the release:
Using pre-defined GitHub Actions
In addition to creating your own workflow files as part of your codebase, you can also use pre-defined GitHub Actions created by others. The GitHub Marketplace features many public Actions that do run common tasks like running tests, deploying code, sending notifications, and publishing npm modules. A community member even created an Action to create Sentry releases.
Many popular cloud computing platforms already have GitHub Actions available to help you automate deploying your code:
Pre-defined Actions that exist in dedicated repositories can be referenced by {owner}/{repo}@{ref}. For example, in our workflow we referenced the checkout action:
steps:
  - uses: actions/checkout@v1.0.0
To learn more about creating and using GitHub Actions, check out GitHub's documentation which features several step-by-step tutorials.
The future is Action-packed
By combining Sentry's Github integration with Github Actions, Sentry's command line interface (or REST API), and your other third-party tools of choice, there's no limit to the vast array of customizations you can create for your own development pipeline! Is your team using Github Actions and Sentry in other ways? Let us know; we'd love to hear from you!
And if workflow customization is your jam, be sure to check out our Integration Platform for more ways to combine other tools with Sentry.

