I’ve been getting some version of this question a lot lately, mostly in our Seer preview webinars. Different audiences, same handful of questions:
“Should I use Seer or just connect the MCP to my agent?”
“Is there a point to Seer if I’m already in Cursor?”
“Can’t I just have Claude Code pull from Sentry and call it a day?”
Worth answering all three in one place.
Honestly, I needed to write this down for myself too. Things are moving fast around all of us and answers seem to get more nuanced by the week. This is an attempt to codify the difference: what each option is and when it makes sense to reach for one over the other.
tl;dr:Seer, the Sentry MCP (set up by the agent plugin), the Sentry CLI, and coding agent integrations aren’t competing options. They can improve your debugging workflow differently depending on your goals. The question isn’t which one is best. It’s knowing what each one does that the others don’t.
Start here: three questions
1. How are you diagnosing the issue? Pointing a general-purpose agent at raw stack traces and event data could work for simple bugs, but it’s not the same as diagnosis and missing critical application context. Seer reasons across your errors, traces, logs, profiles, and linked repositories to find the root cause so that your team or your agents can act on it.
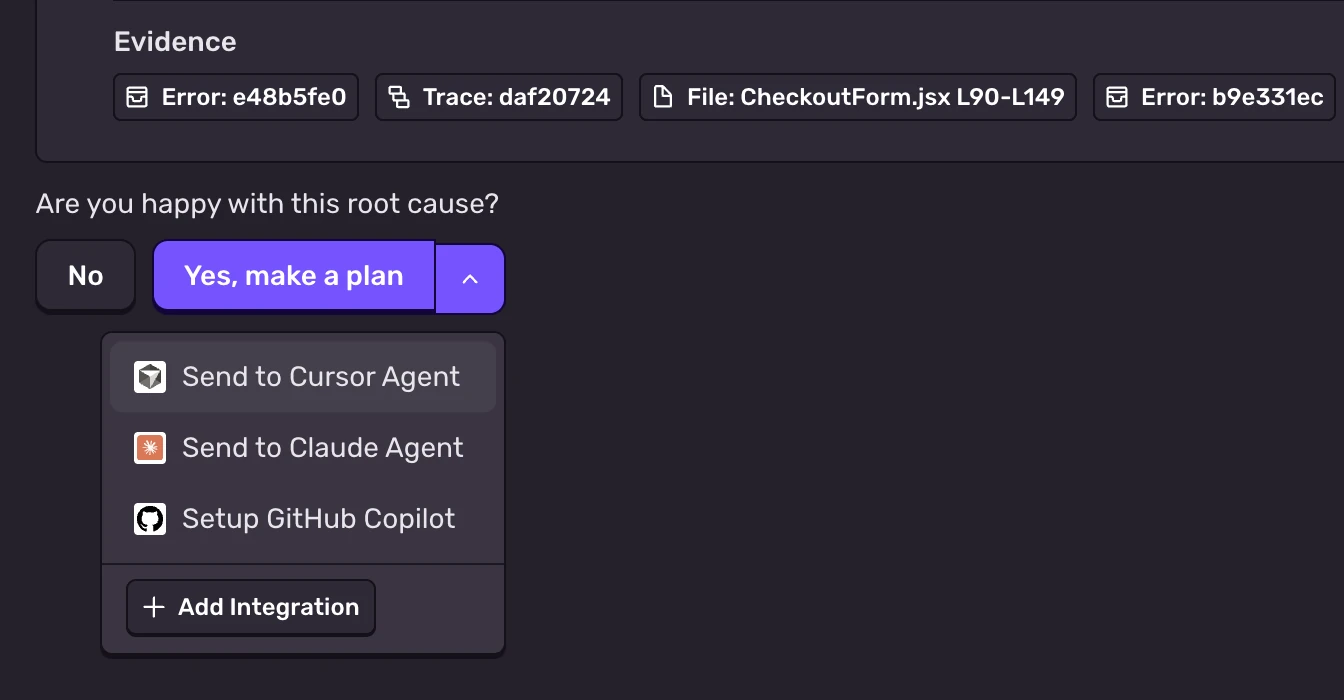
2. Who writes the code? You might still write code. You’re on track to opening an Etsy store where you barter artisanal hand-crafted artifacts. Or you could hand Seer’s plan to a cloud agent (Claude, Cursor, or GitHub Copilot) and let the agent you already use do the implementation, or let Seer open the PR itself if you’d rather skip the handoff.
3. How many surfaces do you touch while debugging? The Sentry UI, Slack, your coding agent, and your terminal. The Seer Agent covers the first two, the agent plugin and the MCP bring it into your coding agent or editor, and the CLI brings it to your terminal. The goal is weaving Sentry into whichever ones you already use. Adding automation or a webhook-driven pipeline ties things together so a draft PR is waiting before anyone opens a laptop.
Seer: let Sentry figure out what went wrong
Seer is Sentry’s own agent debugger. It has deep, connected access to all of your Sentry telemetry: errors, traces, profiles, logs, your codebase, and more. It doesn’t just retrieve data, it reasons over everything to tell you why something broke.
Seer Agent: when you don’t know what’s wrong yet
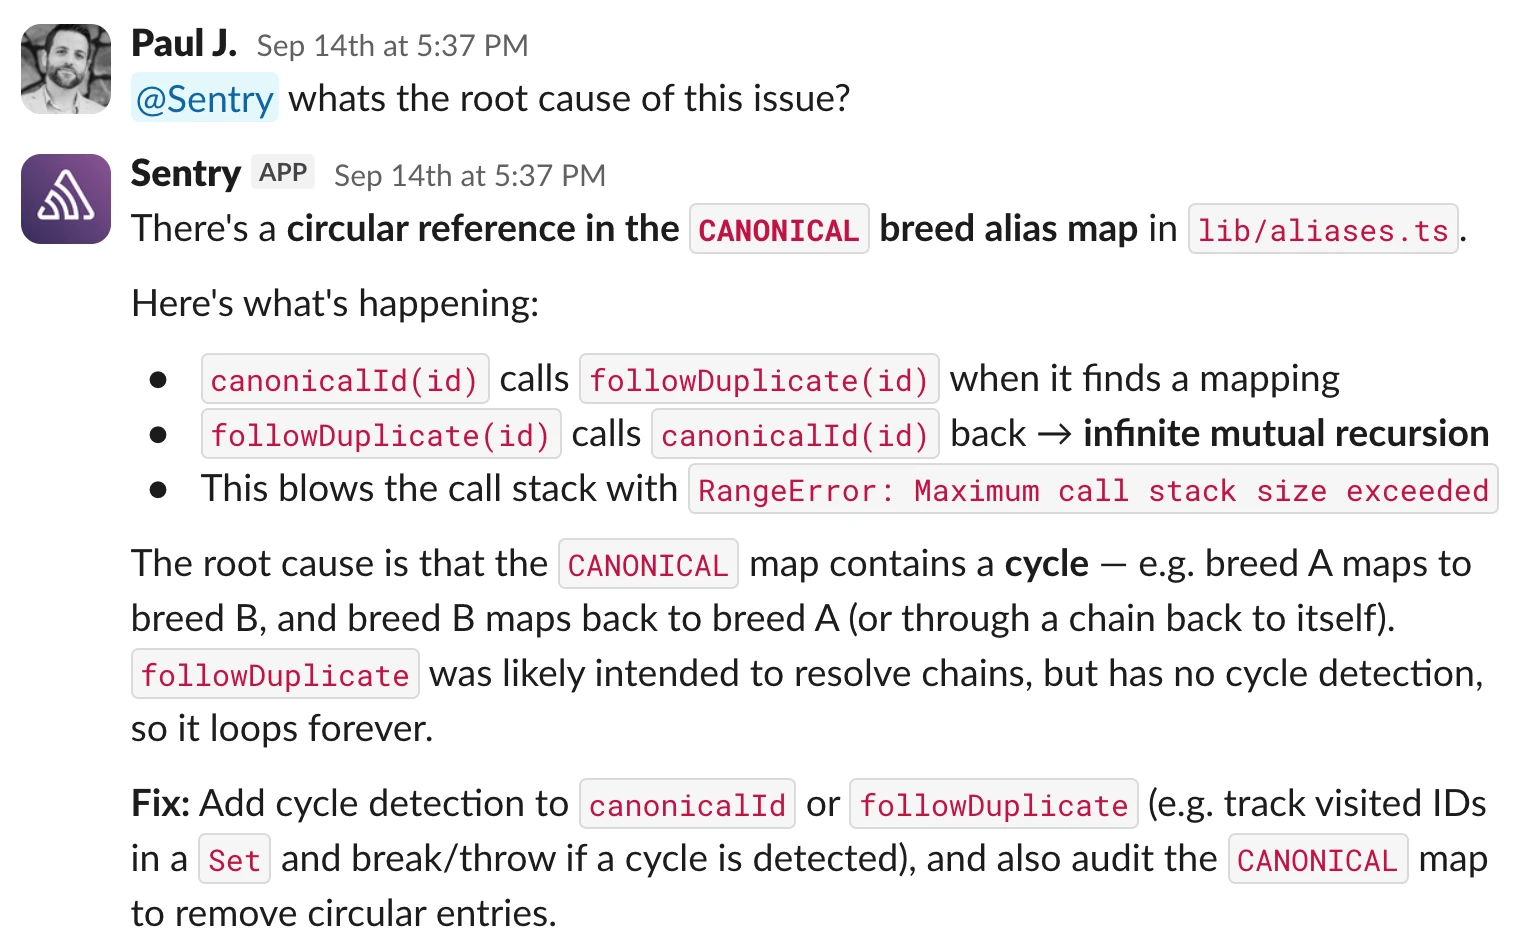
Seer Agent is a chat interface that runs in Slack or in the Sentry UI, and it can reason over your entire Sentry instance.
Some things it handles well:
“What started spiking after last night’s deploy?”
“Which commits and PRs landed in the last release?”
“Which of these open issues should we fix first and why?”
“Walk me through the latency in this trace.”
Seer Agent can take action for you:
“Set up an alert for when checkout p99 goes above 2 seconds.”
“Build a new dashboard for these database errors over the last 7 days.”
“Create an explore query for me that finds the slowest spans on my account.”
“Reassign this to the mobile team and add a comment why.”
In Slack it goes multiplayer: anyone on your team can jump into the thread, add context, or steer the investigation in a new direction. That’s what makes it actually useful during incidents, when three people are already in the same channel trying to figure out what’s on fire.
Add the Slack integration in Sentry and @Sentry in any channel, or click Ask Seer on any page in Sentry to get started.
In the Sentry UI, Seer Agent is a one-to-one conversation. It’s context-aware too: it knows what page you’re on in Sentry, so if you’re staring at a trace and ask “what’s causing this?”, it already knows what this is.
Autofix: from broken issue to open PR
An issue lands in Sentry, Seer analyzes it, and depending on how you’ve configured it, you either get a root cause or fix plan waiting for you, or you have a draft PR waiting for review.
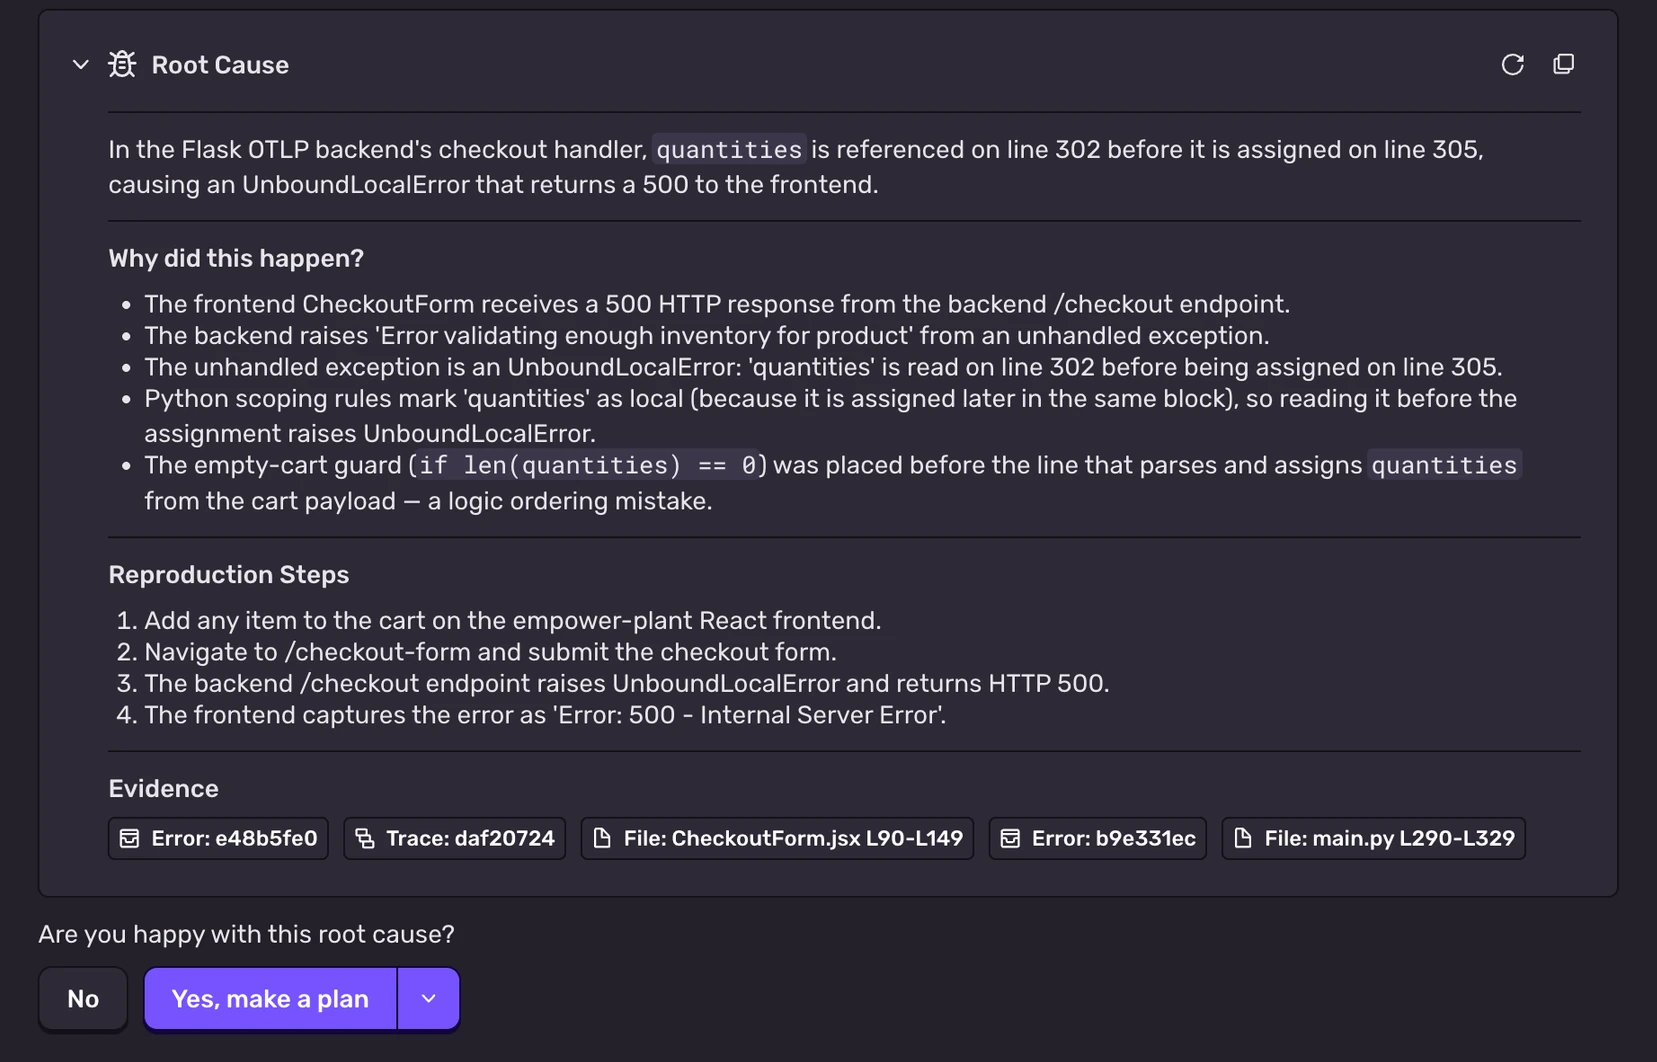
Open an issue and under Seer Autofix click Start Analysis. Seer works autonomously, pulling together errors, stack traces, distributed traces, span information, structured logs, profiles, performance metrics, and code from your linked repositories.
When it’s done, you see the evaluated root cause. We’re not talking just the frame that threw the error, but what actually caused it. You may find a shopping cart checkout failure that’s actually a missing database index two services away.
From there you choose: hand the plan to a coding agent to execute, or let Seer write the fix and create a PR itself. More on that handoff later.
Seer can also run on its own, without any clicking involved. It triggers on issues with 10+ events, within the last 14 days, and above a fixability score threshold. You can configure it to stop after establishing a root cause, after forming a plan, or after a PR is drafted.
If you’re already deep in an agent workflow: Seer reads whatever coding conventions you’ve already documented for your agents. AGENTS.md, CLAUDE.md, and rules files from Cursor, Windsurf, and others work too. You don’t have to restate your standards anywhere new, and Seer’s fixes come out looking like the rest of your codebase.
Coding agents: hand Seer’s plan to the agent you already use
Autofix’s last step is code generation, and Seer doesn’t have to be the one doing it. If you’ve connected a coding agent, Seer packages the root cause and solution plan as a structured prompt and triggers that agent instead.
The work happens in the agent’s own cloud environment, not on your machine, so your editor doesn’t even need to be open. Basic configuration, like providing an API key, can vary based on which supported coding agent you integrate with Sentry. What comes back is a branch or draft PR for you to review. Depending on which agent you use, you can iterate in the cloud agent session, through PR comments, or by continuing the work yourself locally.
Reach for this when the fix benefits from actually executing the code, when it spans multiple repos, or when your team already routes work through a particular agent and you want these fixes landing on the same path.
Trigger a fix from Slack alerts
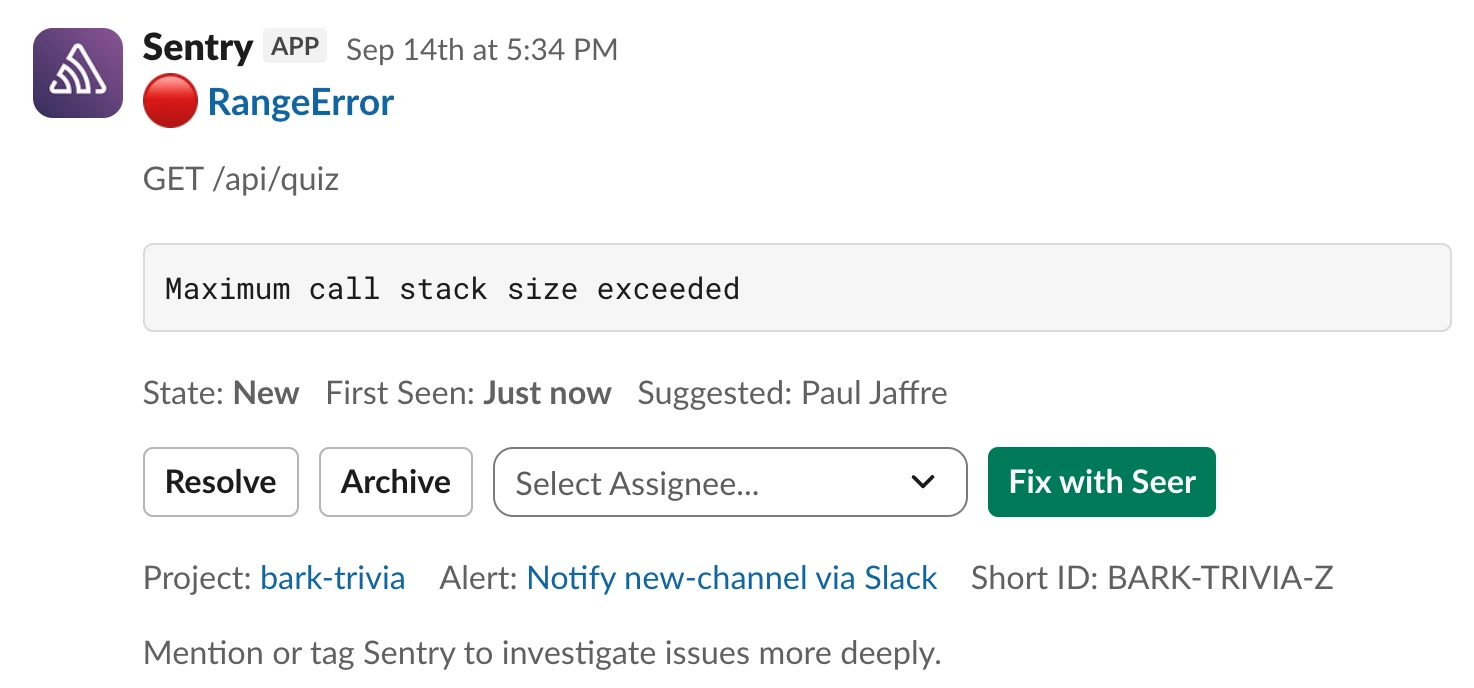
In Slack, when a new issue appears in your alert channel, there’s a Fix with Seer button right there in the thread, and it follows your Seer automation settings in Sentry. No browser tab required. You can also check in with Seer Agent here if you want deeper issue context before having Autofix get busy.
Sentry in your tools: the MCP and the CLI
This is how you get Sentry’s data into the environment you’re already working in. These are your bridge between Sentry’s production intelligence and your agent, terminal, or pipeline.
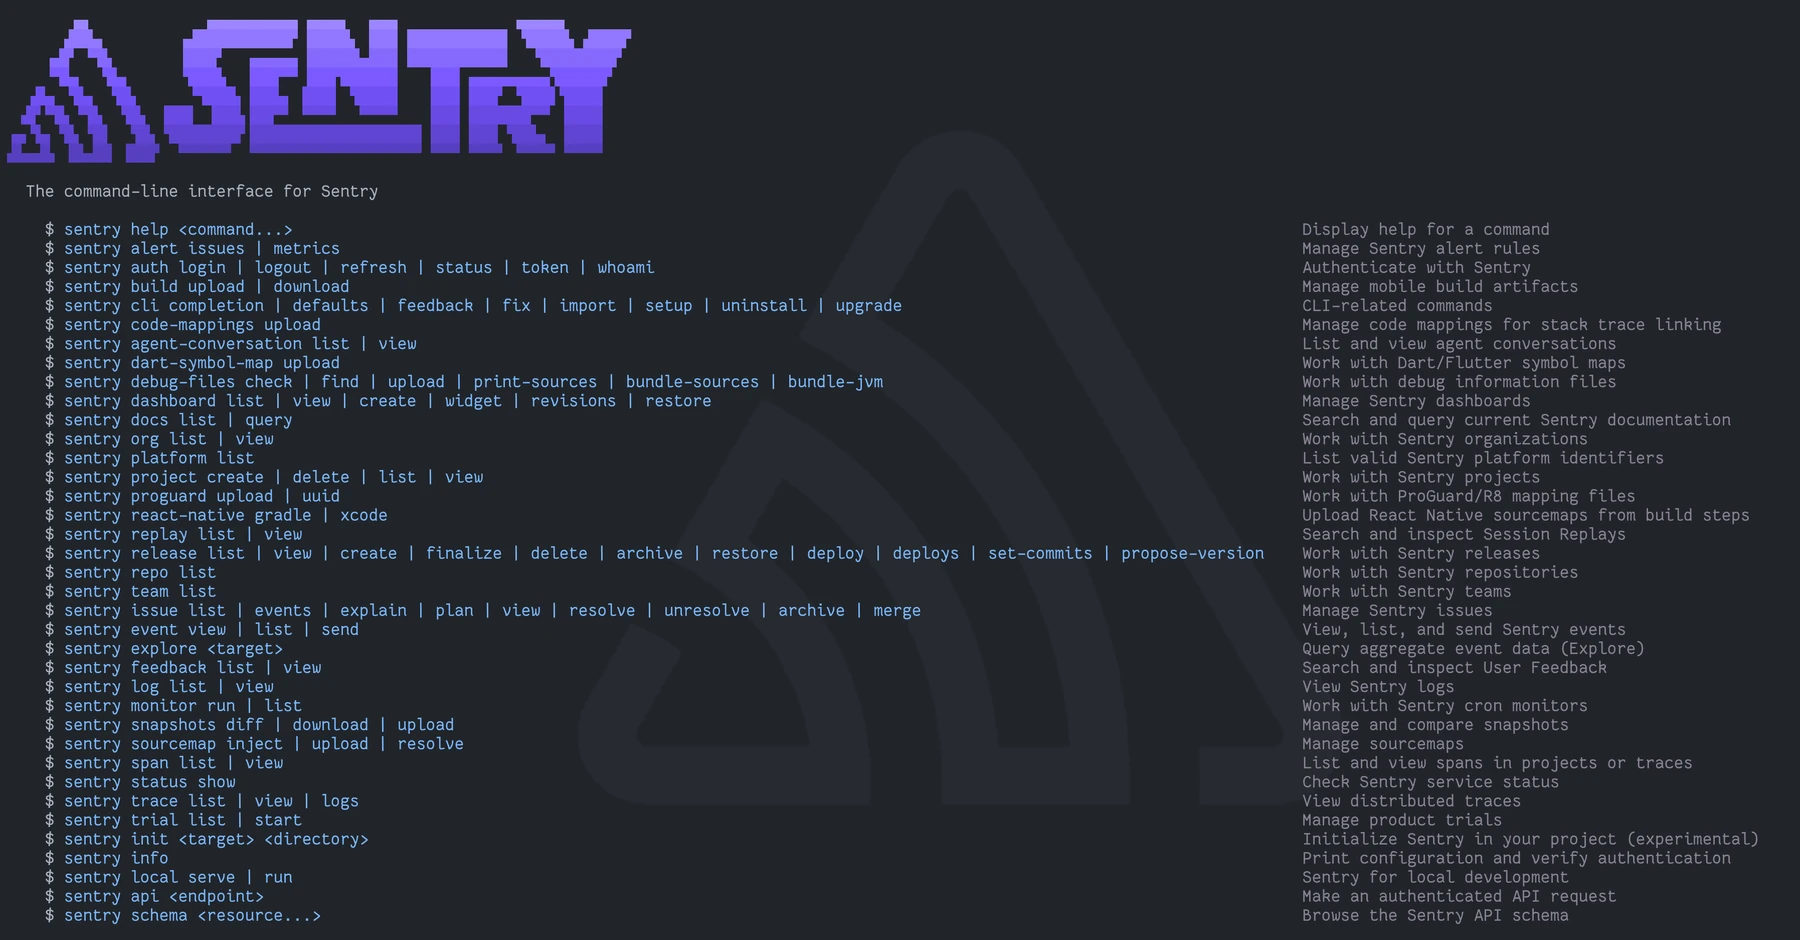
The Sentry Agent Plugin is the one-command setup that wires up the MCP and teaches your tool how to use it with relevant skills and capabilities. The new Sentry CLI is for the terminal: just talk to it with natural language and it works out which project you want from your environment, takes plain selectors instead of IDs, and puts Seer’s analysis a few keystrokes away without a browser.
Both work without Seer, but they’re a lot more useful when Seer is enabled, because instead of just retrieving raw event data, your agent can invoke a full root cause analysis and get back a structured diagnosis.
The agent plugin: skip the setup
The MCP works with Claude Desktop, Claude Code, Codex, Cursor, Amp, VS Code with Copilot, Warp, Windsurf, Vercel v0, and anything else that supports OAuth and remote MCP.
If you already work in an AI coding tool, don’t wire it up by hand. Run:
npx @sentry/ai install
The installer detects which coding tools you have on your machine, lets you pick the ones you want, and wires the plugin into each. If you already have it installed, the same command updates you to the latest version. Restart your tools afterward so they pick it up.
Connecting the MCP is the easy part, though. What makes the plugin worth using is what comes with it: Sentry’s skill library, a set of instructions your tool loads when it needs them.
That matters most for setup. Ask your agent to add Sentry to a project and it detects your framework, installs the right SDK, and turns on the features that suit your stack using Sentry-maintained instructions and references. The same library covers debugging workflows, alerting, OpenTelemetry, and working through the PR comments Seer leaves during code review.
So you can ask for things like:
> Add Sentry to my Next.js app> What are the top errors in the last 24 hours?> Fix the recent Sentry errors> Review PR #123 and fix the Sentry comments> Create a Slack alert for new high-priority issues
A few of the workflow skills also want the GitHub CLI (gh) installed for reading and replying to PR comments. The whole thing is open source in sentry-for-ai if you want to add a skill or fix one. If your team wants to pin skill versions so everyone gets the same behavior, look at dotagents.
If you still want to set up the MCP manually you can connect it without a local install at mcp.sentry.dev, or add it via any MCP-compatible client:
npx add-mcp https://mcp.sentry.dev/mcp
Without Seer, you drop an issue URL into your agent (“fix https://sentry.io/issues/CHECKOUT-P1”) and the MCP pulls the stack trace, event details, and tags so the agent can work with them. For simple bugs, that’s often enough.
With Seer enabled, you ask the agent to call Seer’s analysis tools via the MCP first. Seer does the full diagnosis, returns structured findings, and your agent implements the fix with that context already baked in. You never leave your coding agent or editor.
CLI: Sentry without leaving the terminal
The Sentry CLI is our new natural-language-powered command line tool, and it’s built for humans and agents. It resolves your org and project from your DSNs, .env files, and working directory, so there are no slugs to memorize and almost no flags to look up. Selectors like @latest and @most_frequent let you point at an issue without going to find its ID.
sentry issue list # each issue with its fixability scoresentry issue view @latest # details, suspect commits, releasesentry issue explain @most_frequent # Seer's root cause analysissentry issue plan FRONT-ABC # a step-by-step fixsentry issue resolve FRONT-ABC --in @next # resolve in the next release
sentry issue explain is Seer’s analysis in your terminal, and plan picks up where it leaves off, running the analysis first if it hasn’t happened yet.
Agents that can run shell commands get all of this without needing MCP support, and every data command takes --json so scripts and CI jobs can act on the output.
Hands free: all of the above, but wired together
The options above largely include a human in the loop. This one removes that component until a review is ready and waiting, and redefines what on-call looks like.
There’s nothing new here but the workflow becomes more dependable, while being powered by Seer. Seer automation kicks things off with triage just as it would in the Autofix flow. Then a webhook takes the finished diagnosis over to whatever automation pipeline you already use. Now your coding agent picks up the completed root cause analysis, fills in any gaps with MCP, authors the fix, runs your tests, and opens a draft PR. Now you just review and merge.
Seer remains in the loop doing what it was designed to do. It provides all of the deep context required to solve real production issues, spread across multiple services. The ones that keep you up at night, and your agent isn’t stuck reasoning through stack traces alone.
Teams like Cursor and Factory are already running versions of this in production. Cursor’s client infrastructure team built a daily loop on Sentry crash data and cut their out-of-memory crash rate by up to 80% from its peak, attributing roughly 30% of their app-stability gains to Sentry. Factory’s agents handle Sentry errors end-to-end without a human ever opening a browser. The full picture is worth reading in how teams are building self-healing software.
Where this leaves you
This is the part I keep coming back to: most tools tell you what broke. Seer tells you why, across your whole stack, before you’ve opened a single file. We even had Seer debug a Seer outage once. It traced a region blocklisting bug through 42,000 errors back to six missing lines of code that standard monitoring never would have found.
For most teams, Seer plus the agent plugin covers everything. For teams with serious alert volume or on-call pain, the automated pipeline is where this pays off the most. Seer diagnoses and you fix it. Seer diagnoses and your agent fixes it. Nobody has to be involved until there’s a PR to review. Pick the handoff you’re comfortable with and adjust when the results earn it.
Every version rests on the same thing: the diagnosis has to be right. An agent with a great fix for the wrong root cause is worse than no agent.
If you’re on the fence, start the 14-day Seer trial and throw your backlog at it. You won’t be charged when it ends.
FAQs
If I already have the Sentry MCP in Claude Code or Cursor, do I need Seer? ▾
For simple bugs, maybe not. You can drop an issue URL into your agent, let the MCP pull the stack trace and event details, and have it write a fix. That works.
The more complex your issue is, the more this changes. The MCP gives your agent data. Seer gives your agent a diagnosis. If you're staring down a cross-service regression with a root cause that's a couple hops away from where the error threw, a general-purpose model with only raw event data is going to struggle to identify the right repo, the right file, and the right change. Context is king. Seer was purpose-built to make exactly that connection.
Use them together. Run Seer first, then have your agent implement the fix. You stay in your workflow, Seer does the diagnosis, the agent does the implementation. That's the workflow that actually saves time.
Sentry UI or the plugin in my coding agent — which should I use? ▾
Less of a gap than you'd think. npx @sentry/ai install sets up the Sentry MCP server with debugging skills that can call Seer root cause analysis directly from Claude Code, Cursor, Codex, or Grok, so you don't need to open Sentry at all. Same underlying integration but it comes down to personal preference.
However, two things don't follow you into your coding agent in this case.
Automation. Seer picks the incoming issues worth analyzing and leaves the root cause on the issue, so the work is done before anyone opens it. You could approximate this with a routine, but then the triage logic is yours to invent and the answer lives wherever your routine put it, not where your team already looks.
Seer Agent. "Ask Seer" isn't limited to whatever you pointed your editor or harness at. It ranges across every project, release, and trace in the org, and it's a conversation, either in Sentry or in a Slack thread your whole team can join mid-incident.
Does Seer work for performance issues, or just errors? ▾
Both. Seer covers errors and performance issues, and profiles and performance metrics are part of what it reasons over when diagnosing either one.
What does Seer cost, and what counts as an 'active contributor'? ▾
$40 per active contributor per month, unlimited use. An active contributor is anyone who opens two or more pull requests in a month in a Seer-enabled repo, or merge requests if you're on GitLab. A repo counts as Seer-enabled once it's connected to Sentry with at least one Seer feature turned on. The count resets at the end of each month, and you can see the current tally on your Subscriptions page. Seer requires a paid Sentry plan, and there's a 14-day Seer trial that doesn't charge you when it ends.
Can I change how Seer works? ▾
Yes. You can limit the scope of repos it has access to and adjust how it handles things like PR creation. More info is available in the Seer Autofix documentation.
Are there any requirements or limits? ▾
All in one place:
Autofix: GitHub.com and GitLab.com cloud only.
Coding agent handoff: GitHub only, and requires Seer.
Seer Agent: open beta. Unavailable if your org has Open Team Membership disabled, because it makes org-wide queries and doesn't have finer-grained access controls yet. In Slack, update your Sentry app to the latest version.
Automation triggers: 10+ events, seen within the last 14 days, above the fixability threshold, and never further than the stopping point you set.
Self-hosted: the MCP itself can point at a self-hosted instance, but Seer's tools aren't available there, so you'd disable those skills.
Plan: Seer requires a paid plan (Team, Business, or Enterprise).
Five months after launch, Seer Agent can now take action on your behalf in Sentry, and pull in infrastructure data from outside Sentry to diagnose issues faster.
The all-or-nothing sendDefaultPii boolean is going away. dataCollection replaces it with a dial for each category of data, so you can keep the headers you debug with and drop the values you would rather not store.
A full roundup of everything that shipped for Sentry Logs this summer — log pinning, overhauled exports, chart enhancements, terabyte-scale search, and a pile of usability fixes.