How to Publish Your Unity Game to Google Play
For this tutorial, we will publish the "Tap (Frog)" game I developed in my previous Unity series, which you can explore here.
You need to have a Google developer account (which requires one-time payment of $25). After setting up your account, you can start adding and publishing your applications to Google Play. Before doing so, let’s prepare your game for publishing.
Prepare your game
Landscape Orientation
The “Tap (Frog)" game we developed is currently in landscape mode. Meaning, if a player were to rotate their phone, the game would automatically rotate and the player wouldn’t be able to play properly as the game screen would be cropped. To fix this issue, we want to adjust the game’s orientation to landscape only.
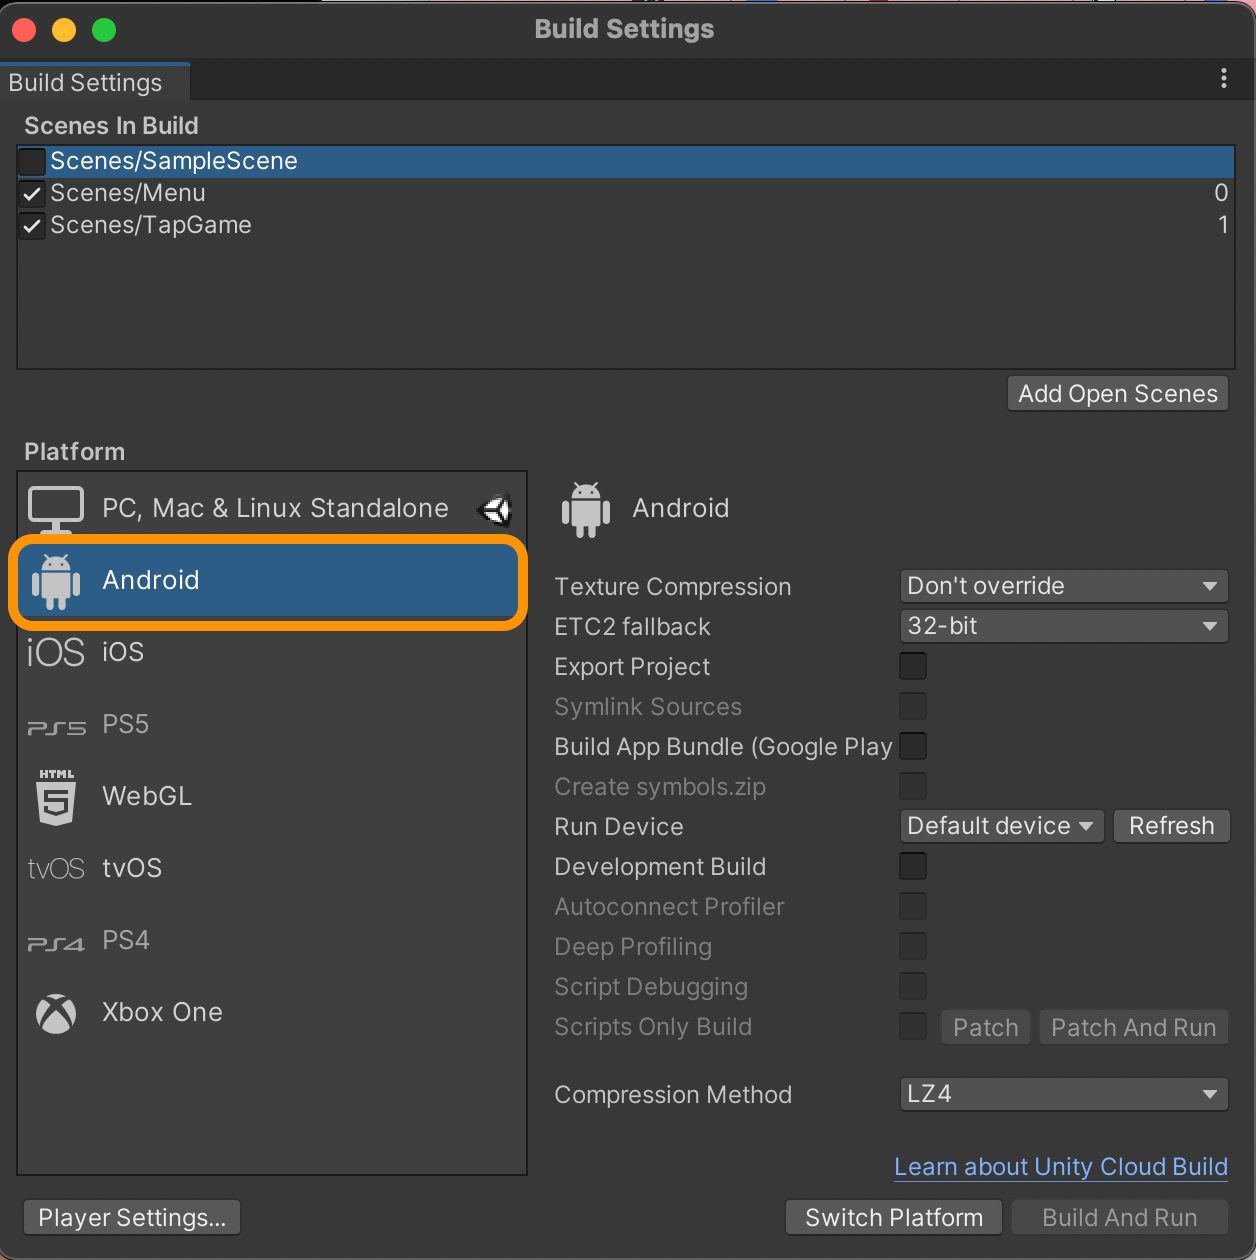
Open the game in Unity, click on File > Build Settings. Select "Android" as shown in the image below since we want to publish this game on an Android platform:
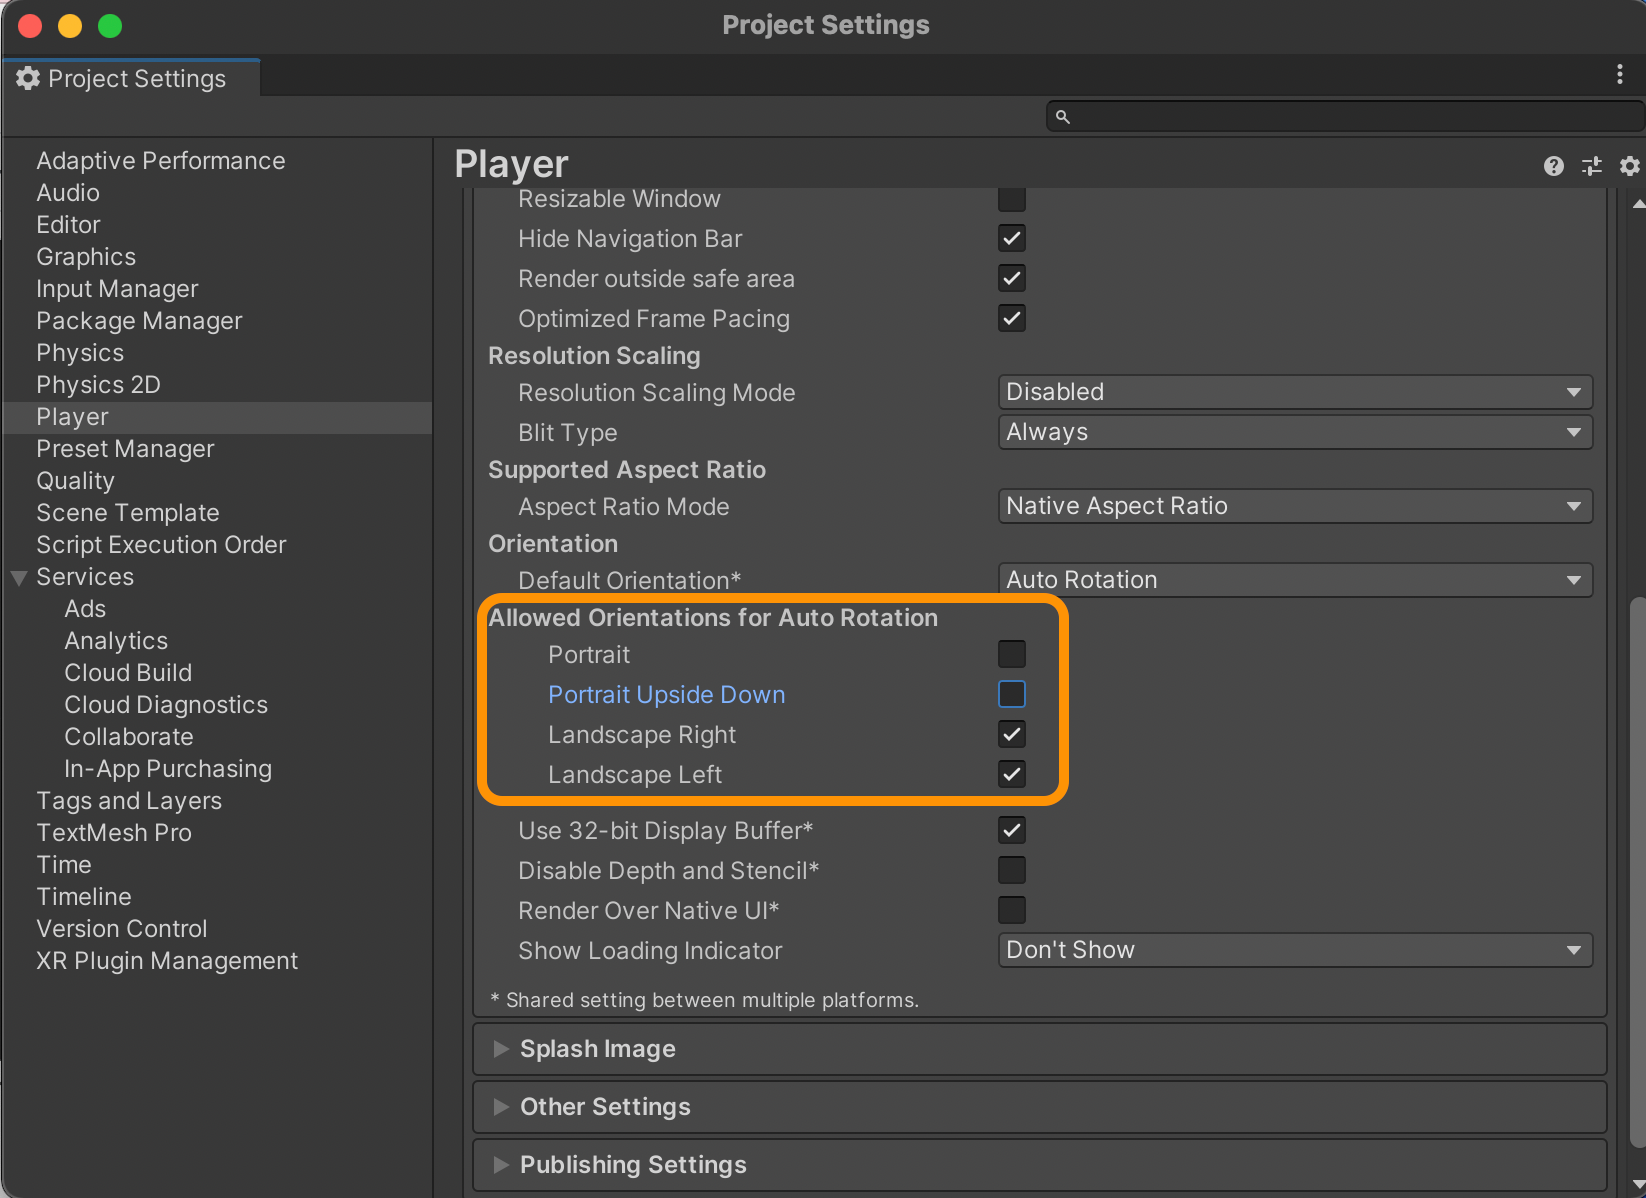
Next, click on Player Settings > Resolution and Presentation. Scroll down until you find “Allowed Orientations for Auto Rotation”. Uncheck “Portrait” and “Portrait Upside Down”. The game is now locked to a landscape orientation only.
Switching to Android Platform
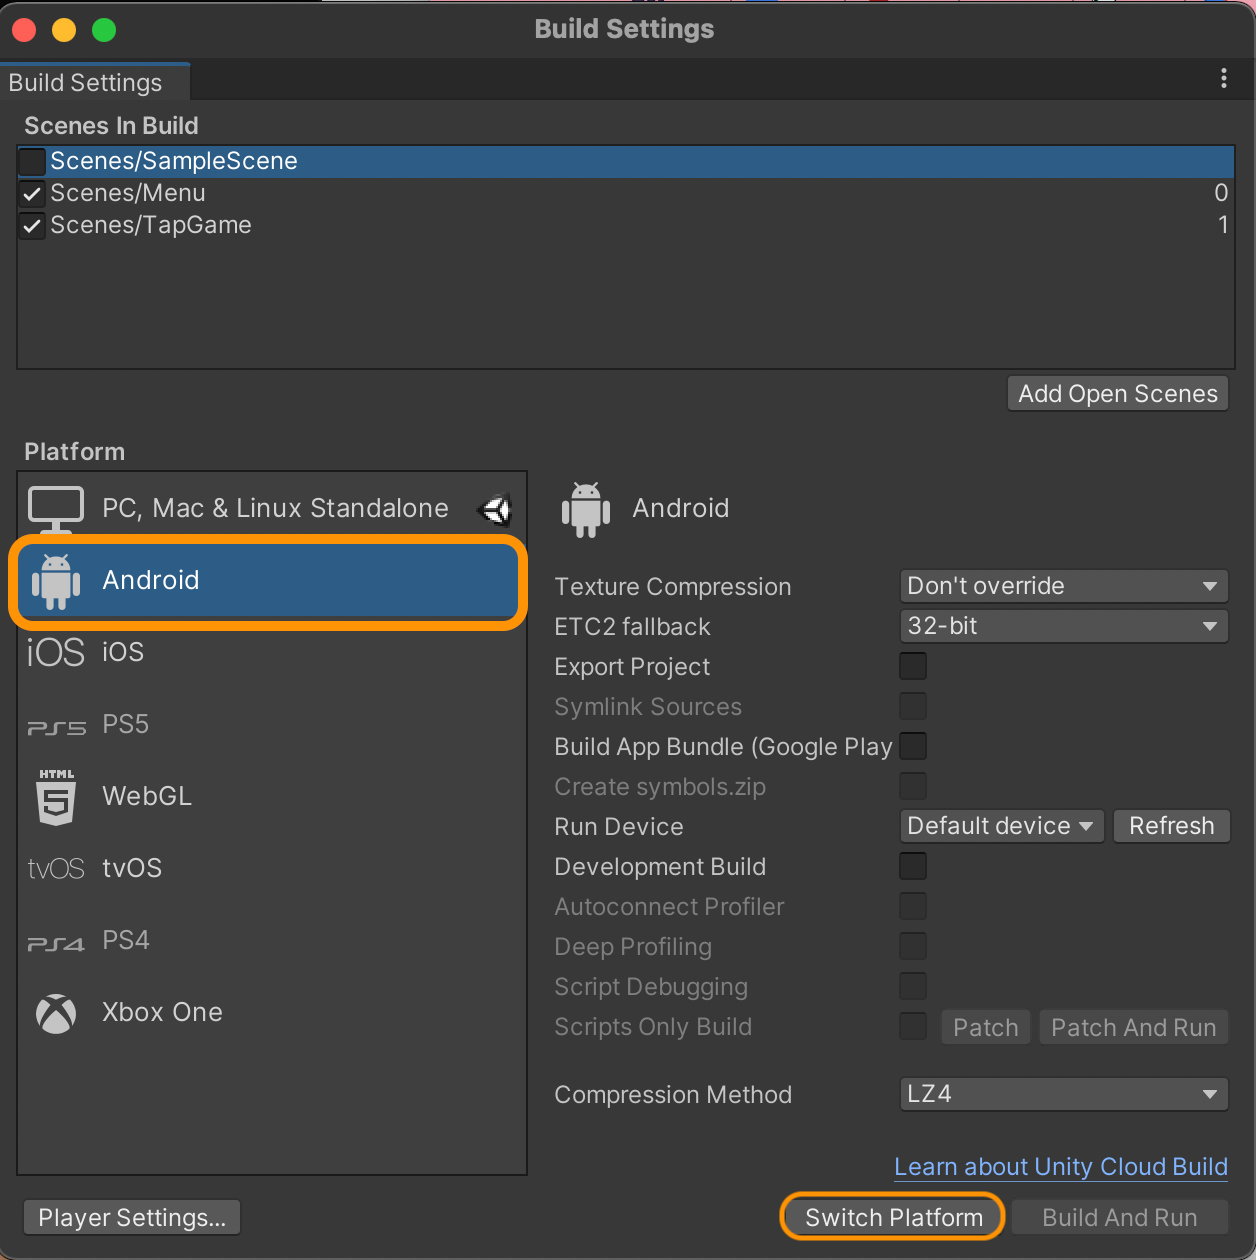
The default for a Unity game is “PC, Mac & Linux Standalone”, so we need to switch to the Android platform. Return to the build settings window and click on Switch platform.
Other Player settings
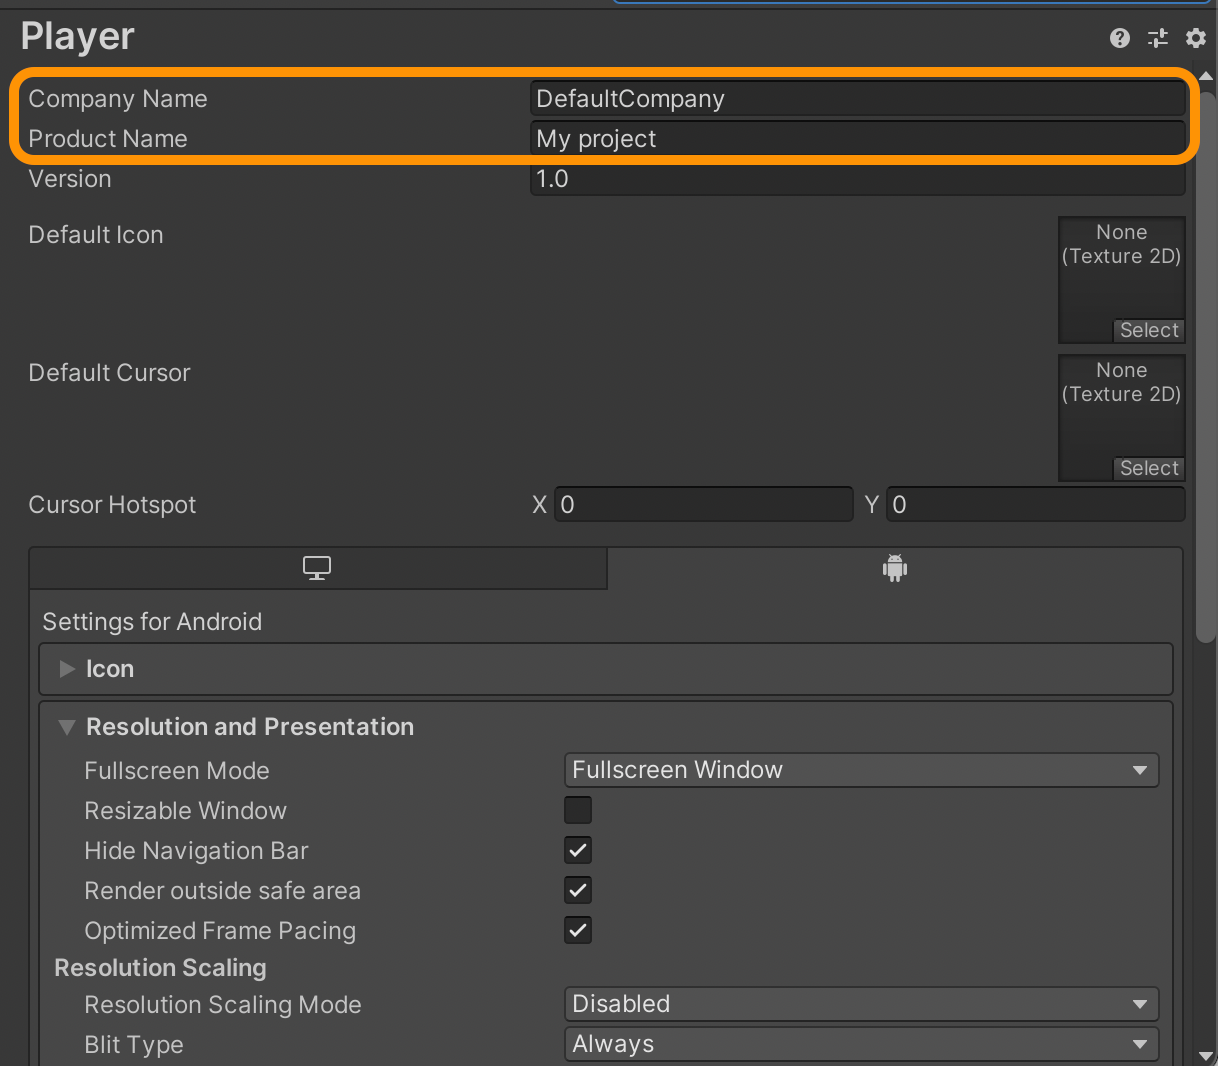
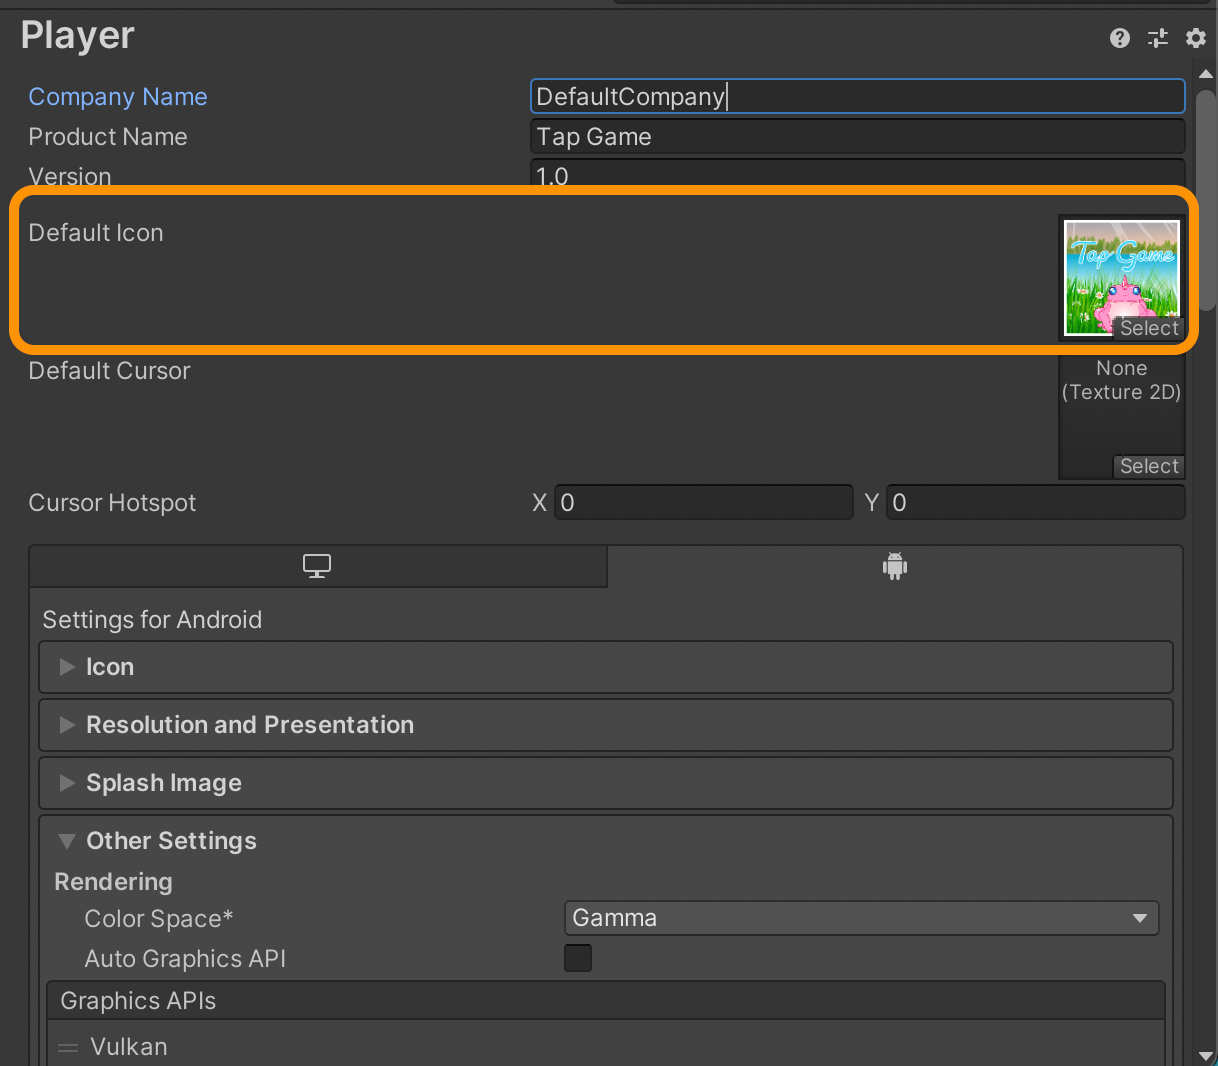
Let’s return to the Player Settings and finish setting up the application. First, write the “Company Name” and “Product Name” as shown below. You won't be able to change these after you upload the game, so make sure you're pleased with your name(s).
Now you need to add the game icon which will appear on the user’s phone. You can either add one icon in the “Default Icon” field and it will resize automatically for the rest of the sizes, or you can click on "Icon" below and fill all the sizes for the different Android versions under Adaptive, Round and Legacy. Google requires the application icon to be 512 x 512 px, so this is what we will upload in the “Default Icon" field, as shown below.
Publishing Settings
Scroll down to “Publishing Settings” in the same window and click on "KeyStore Manager". A keystore is a container file for keys used to sign the applications that identifies you as the developer. You will need a key and password for this.
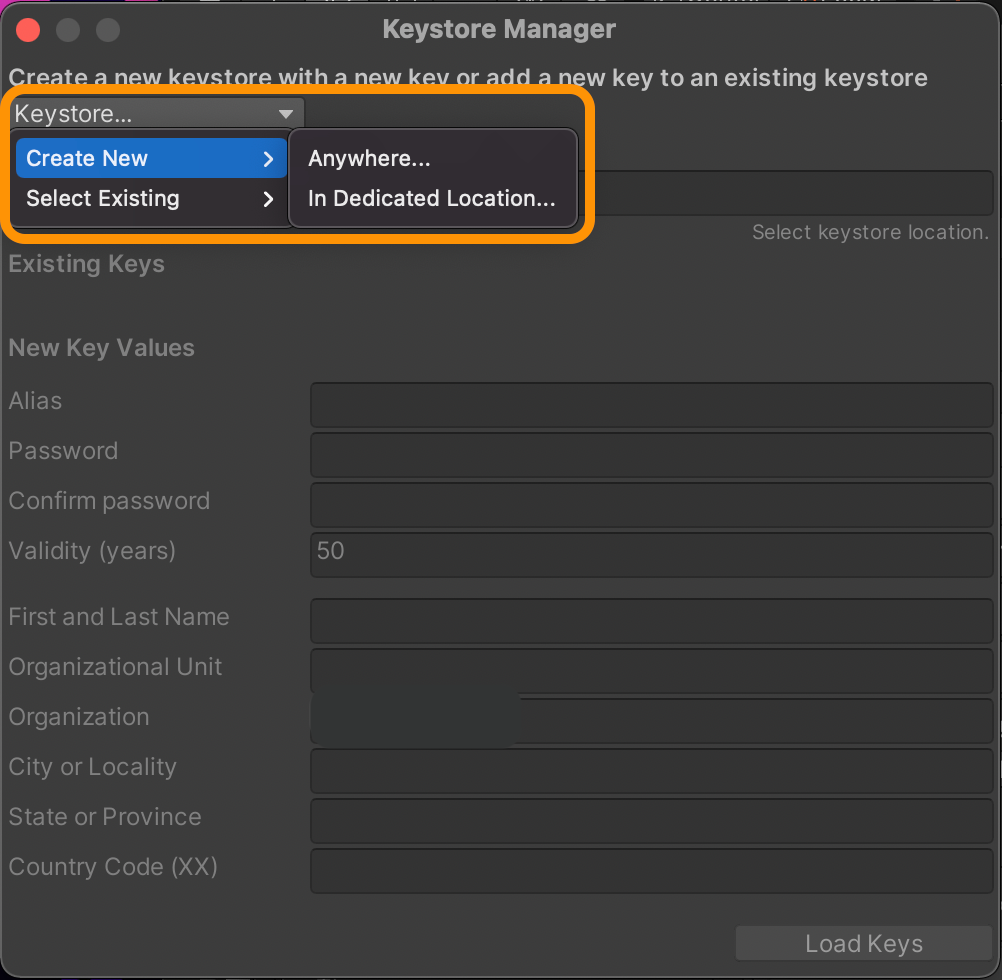
Let’s create a keystore by clicking on the Keystore dropdown > Create New, and save somewhere for referencing later.
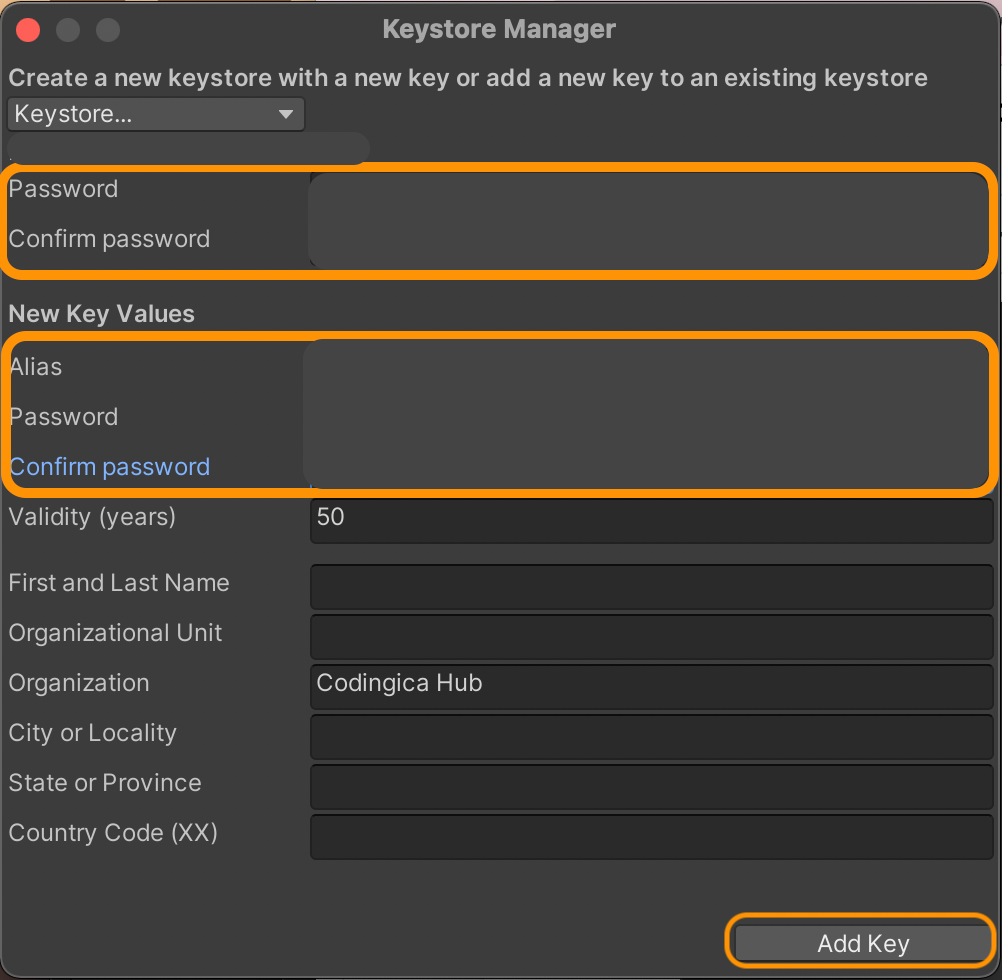
Next, setup and confirm passwords, and an alias, as shown below, before clicking on "Add key".
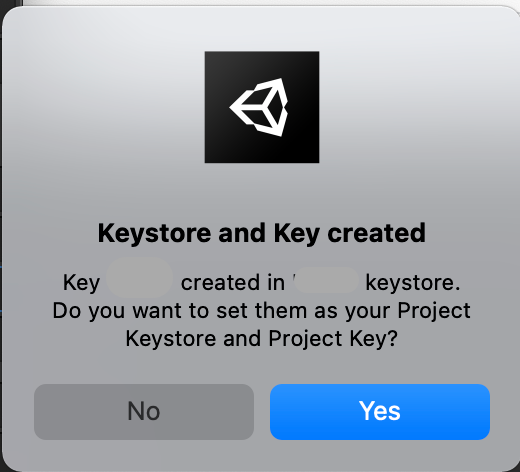
A confirmation window will popup; click yes:
Now we can build the application. Head back to the build settings window and check "Build App Bundle (Google Play)" as shown below:
Click on “Build” in the build settings window. When the build is done, you will have a file with an .aab extension. You're now ready to upload your application to the Google Play Store.
Video
Debugging in Unity
Catch Bugs Before Your Players Do
See how Sentry can help you debug a Unity game without digging through endless logs.

Upload Your Application to Google Play Console
Head over to the Google Play Console, click on “Create app”, and fill in all the necessary details for the app on the first page.
Before publishing, we'll release our application for internal testing (you can test it with up to 100 internal testers).
Testing your application
There are three types of testing options in the console.
Open Testing, where anyone on Google Play can join and test your application.
Closed Testing, where you can release several versions of your application at the same time to test different features with a specific group of testers you choose.
Internal Testing, where you test with up to 100 internal testers (this is what we'll do).
Internal testing
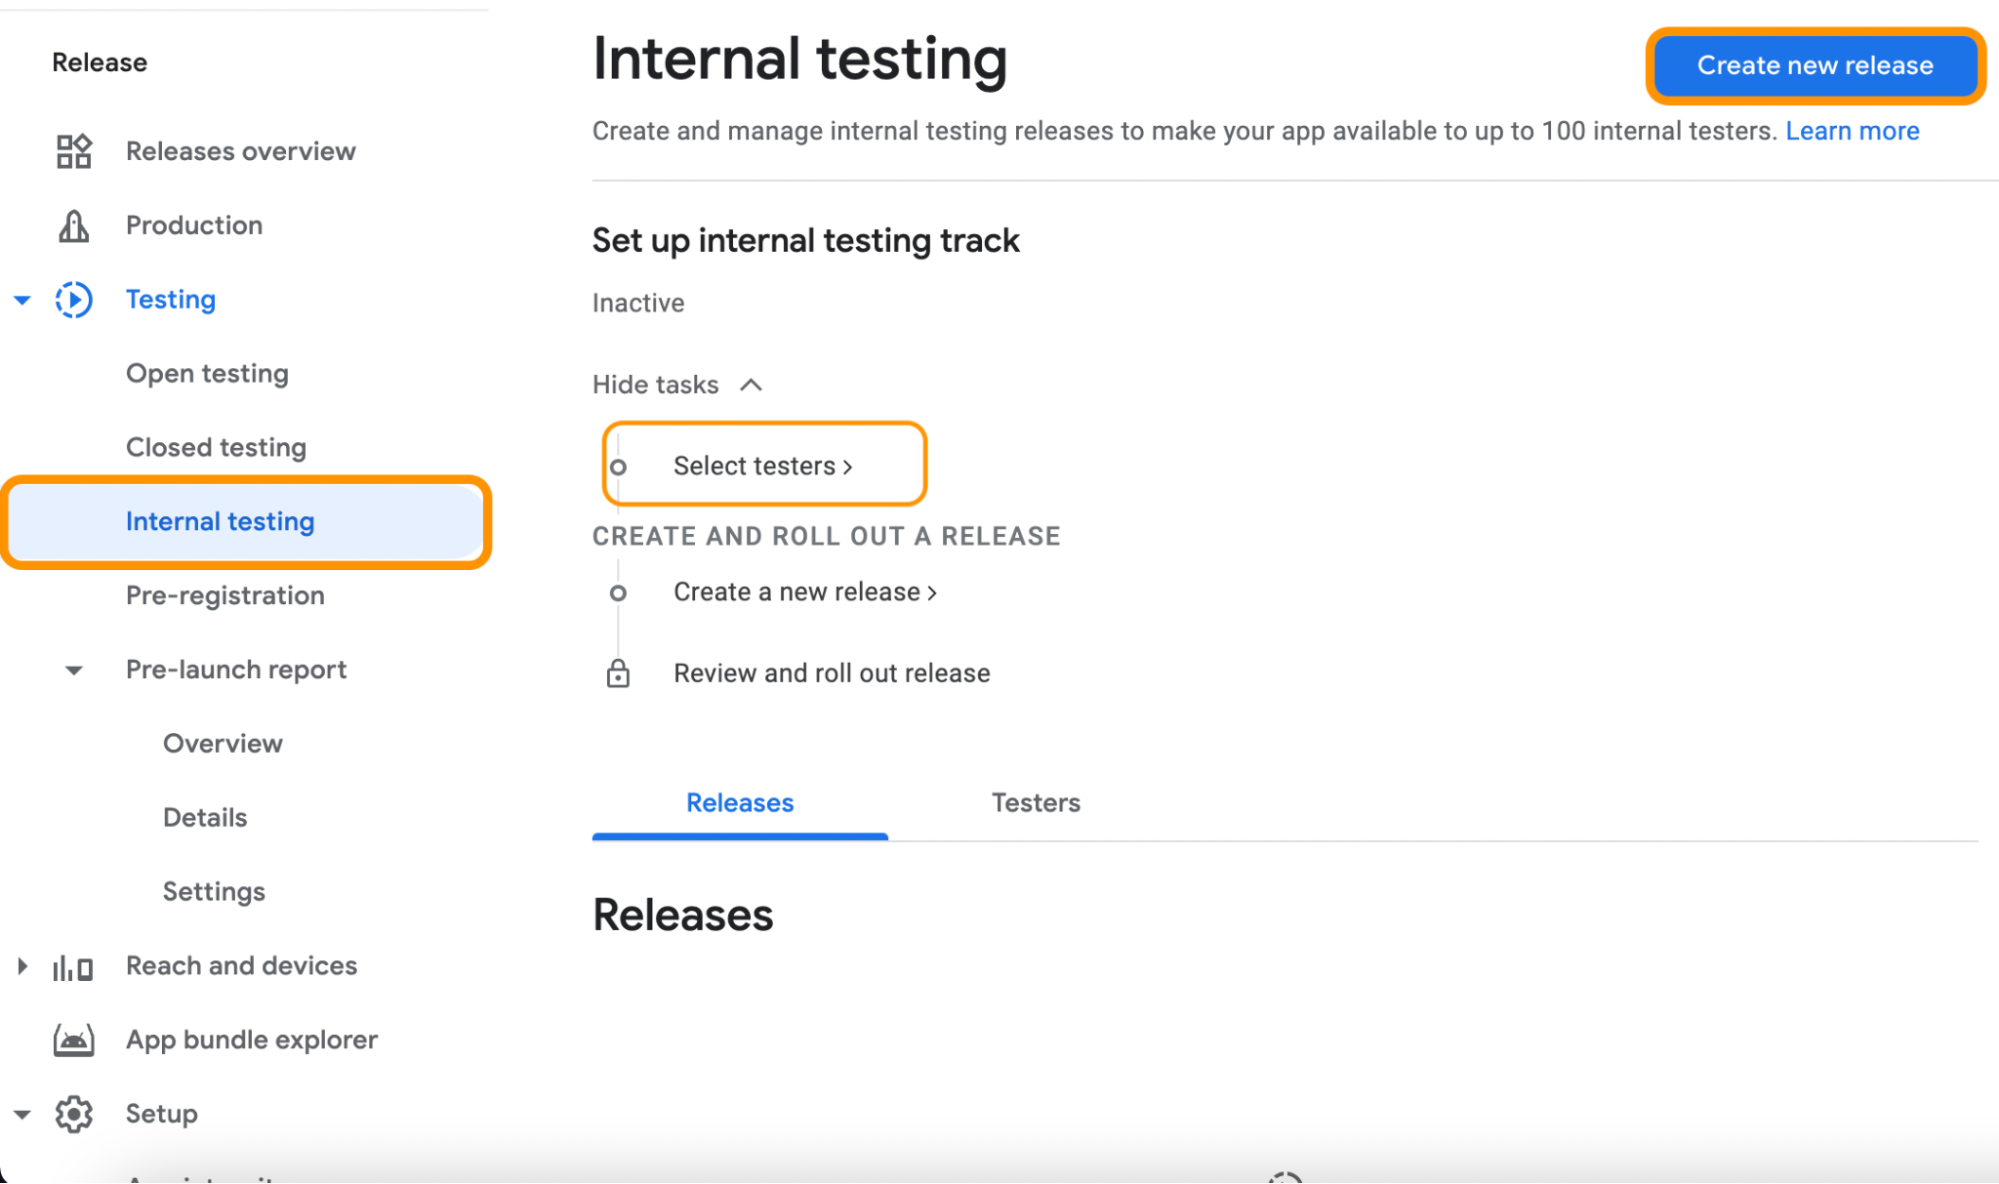
First, let's create a release for internal testing and add yourself as a tester so you can test it yourself. Feel free to add additional testers to this track. Select “Internal testing” from the side menu, then click on “Select testers”:
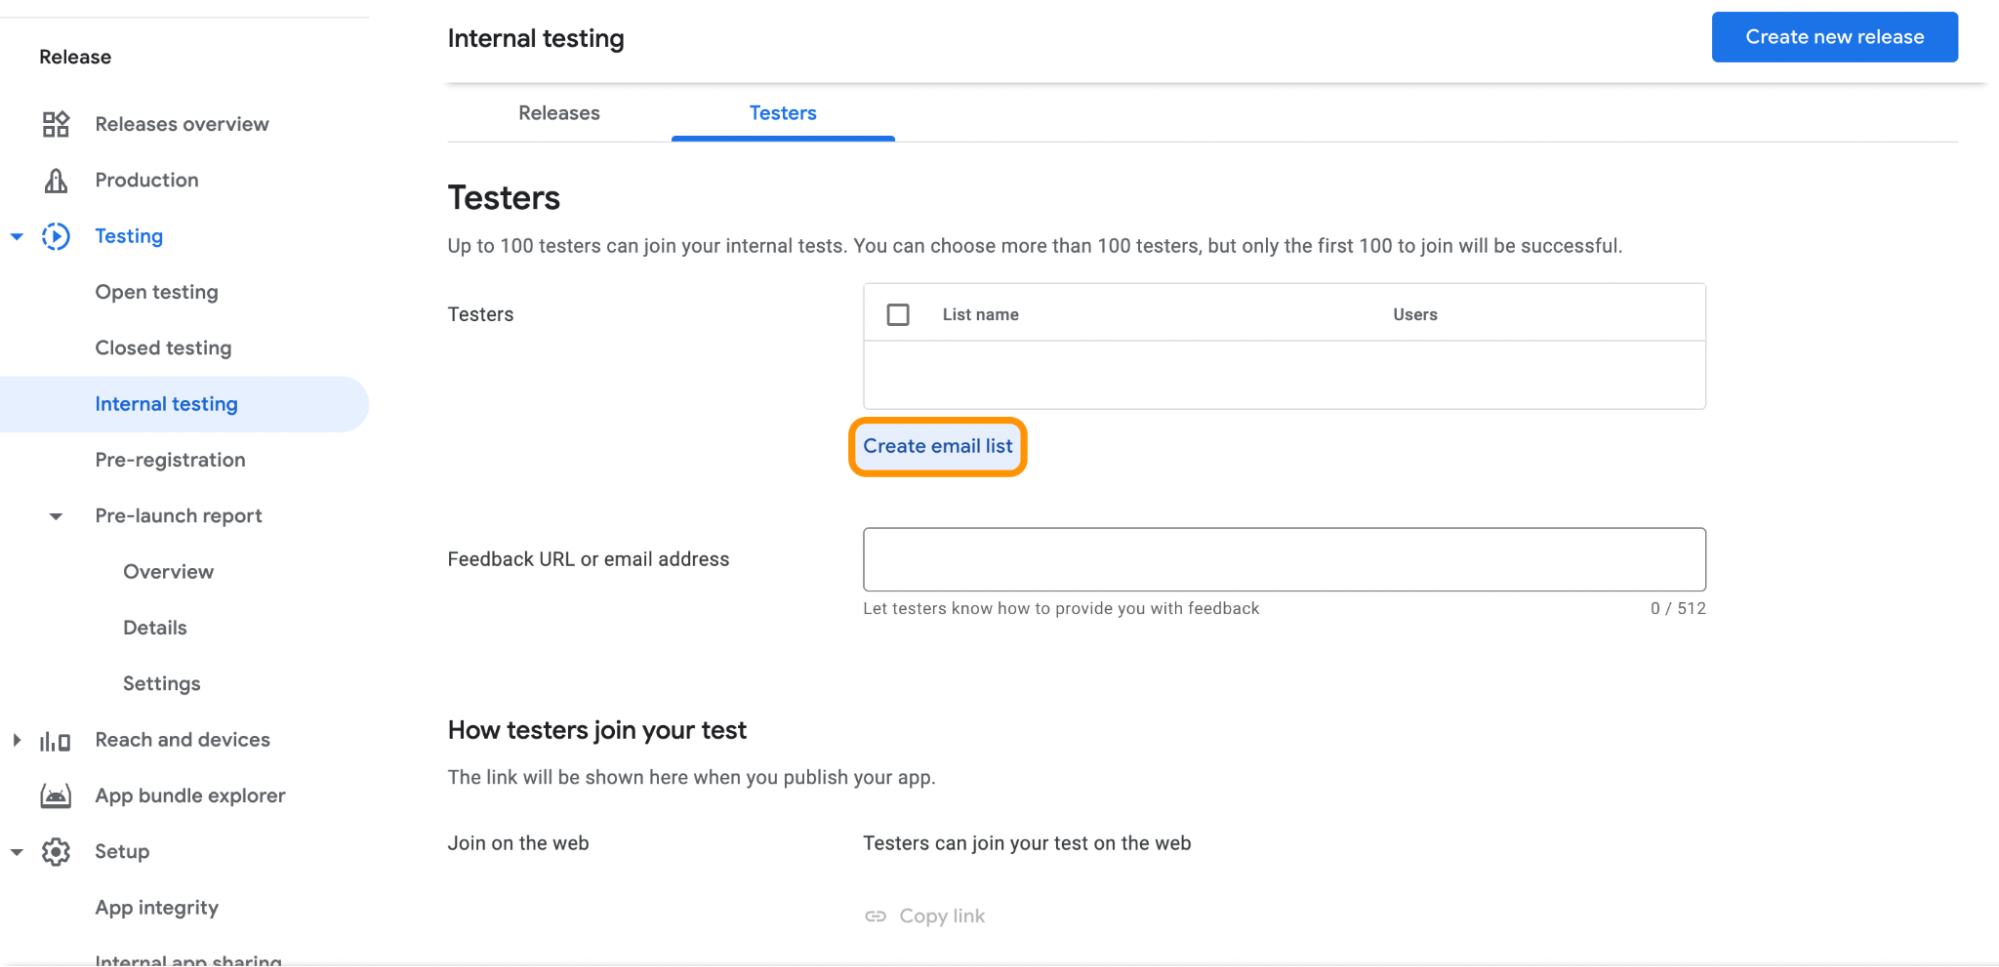
We'll create an email list of our testers, or upload via a .csv file.
A few more setting changes before uploading our game:
In your Build Settings > Player Settings, change the “Target API Level” to “Android 11.0 (API Level 30)”. You may need to update your Android SDK to API level 30. Each time you upload a new app bundle, make sure you increase the “version” from the Build Settings > Player Settings window. Otherwise, you'll encounter an error.
While in your build settings, change the scripting backend from "Mono" to “IL2CPP”. In short, Mono is a better setting for iterative development, but if you care about performance, IL2CPP is the choice. Plus, the Google Play Store requires this for upload.
Lastly, check “ARM64” to make the game available on 64-bit devices.
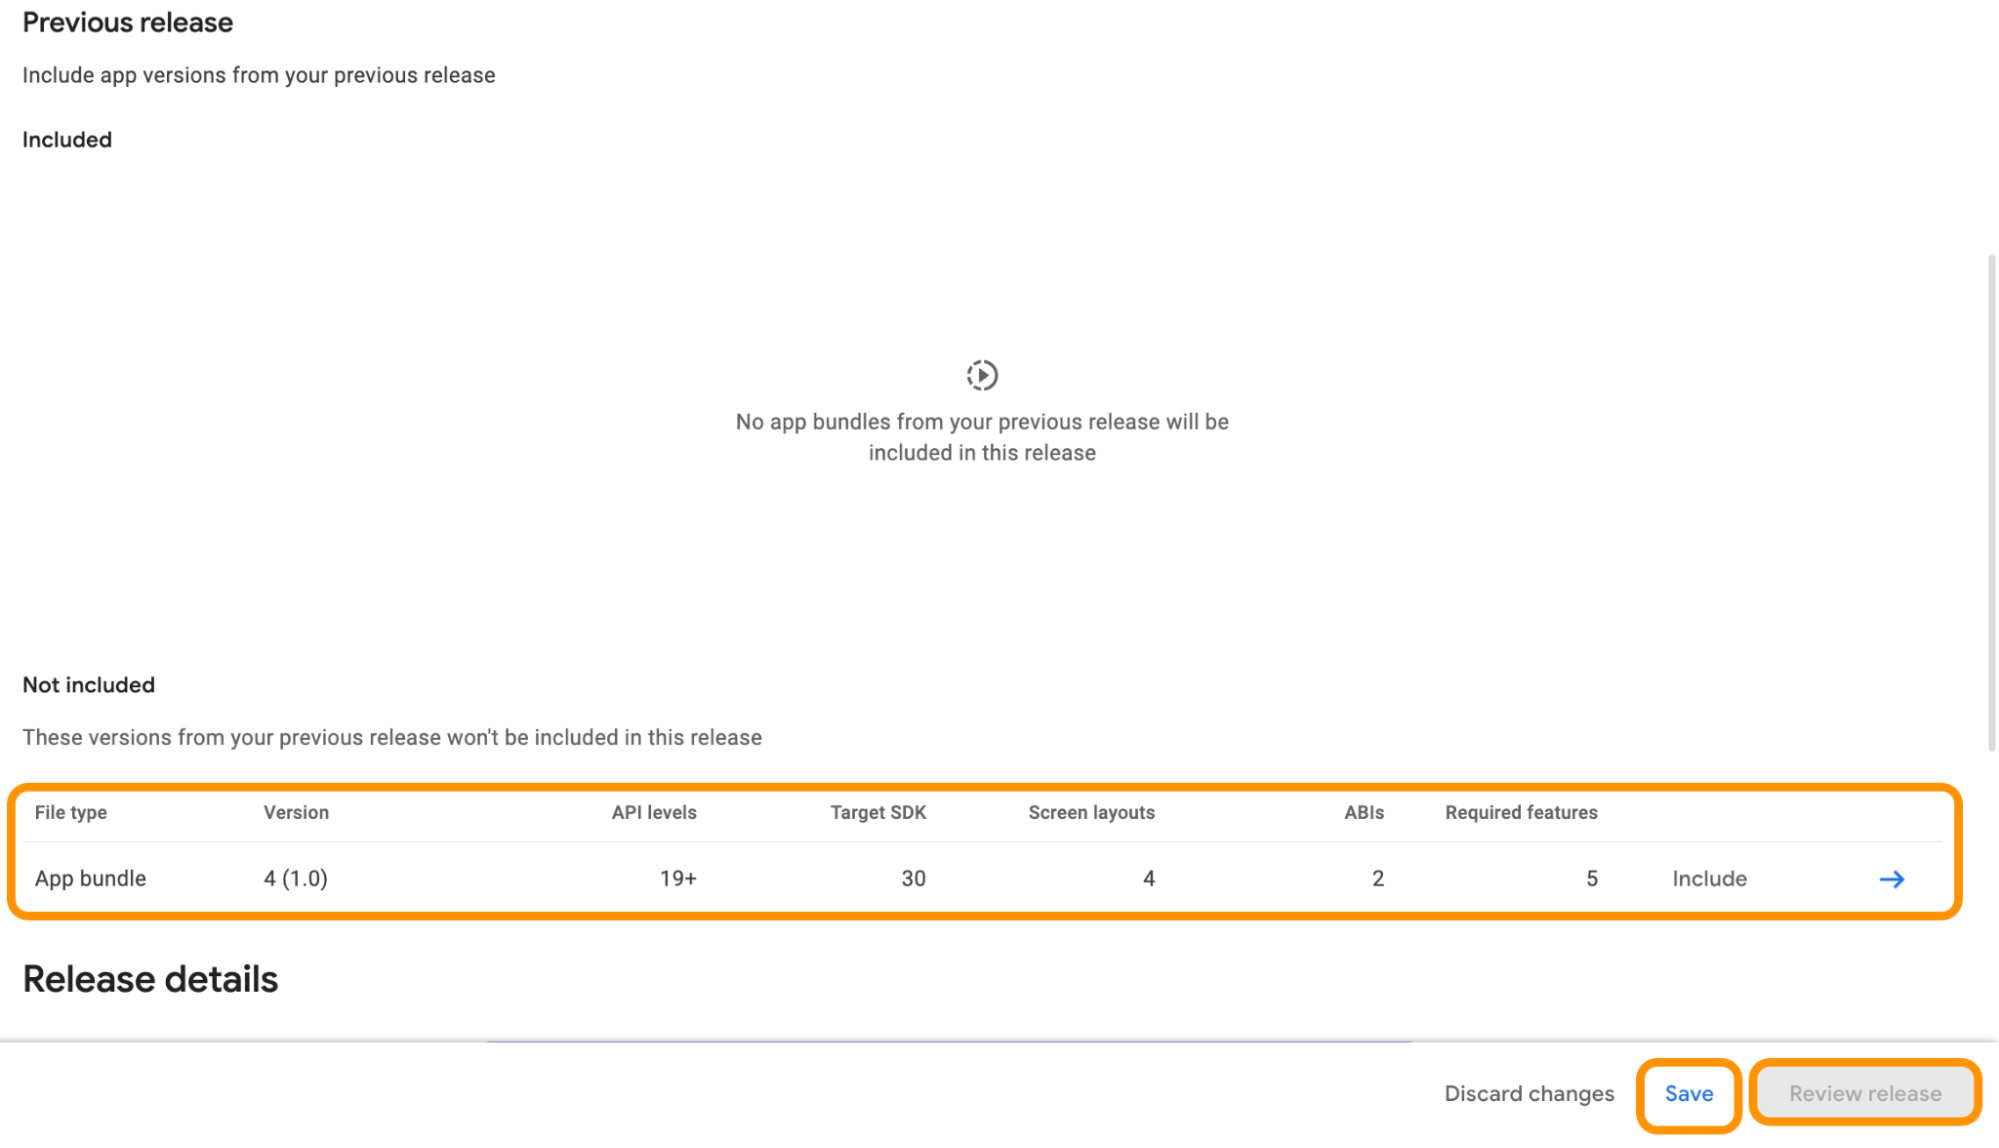
Now click “Create new release”, where we can upload our application bundle build file, name the release, and write in any release notes.
If everything looks good and the upload was successful, “Save” then “Review Release” as shown below:
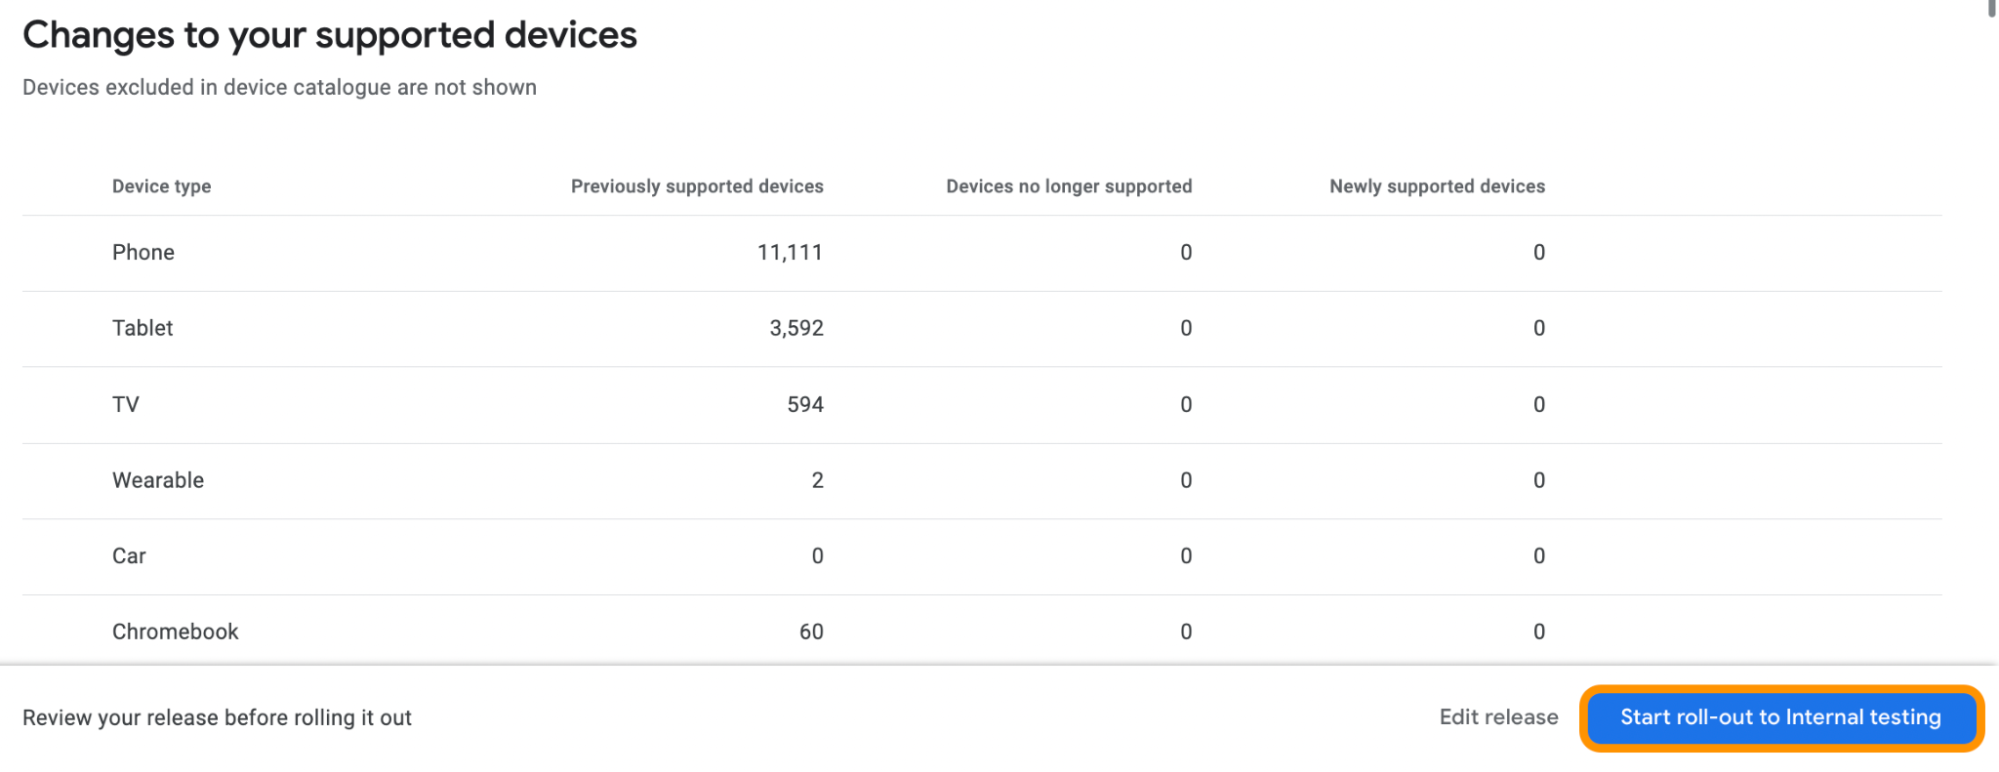
Next we'll roll-out internal testing
:
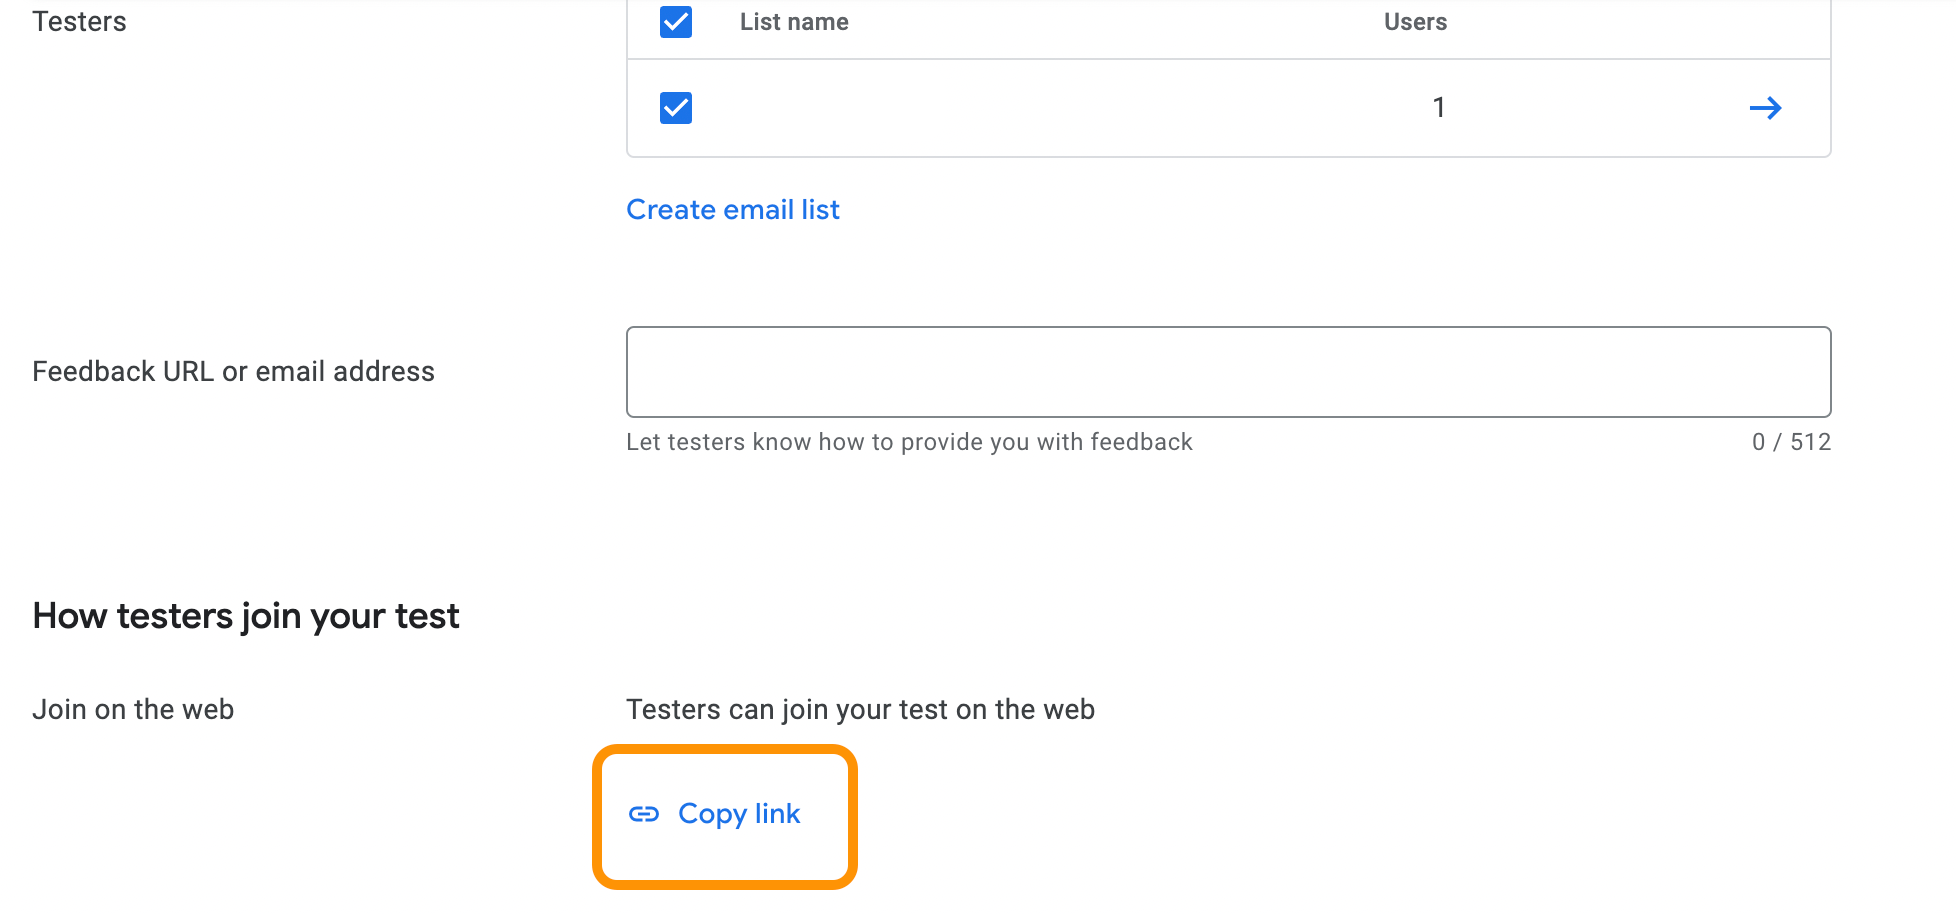
Head to the testers tab, select the testers, copy that link, and open the link from your Android test device to begin testing your application.
The Dashboard
From the dashboard page, you can publish your store listing before you release the game and let users pre-register for your application. They will get a notification to download when your application is available.
Setting up your application’s content
On the dashboard page under “Set up your app”, there are tasks you need to complete. Finish these tasks and your application will be ready to be published.
After you finish testing and have setup your applications’s content, you are ready to create a release and publish to Google Play. Bear in mind that Google will take a few days to review your application and if there are any issues you'll be notified about what to fix before submitting again.

