Django Performance Improvements - Part 4: Caching in Django Applications

In the first three parts of this series around improving performance in your Django applications, we focused on database, code optimization, and frontend optimization. In part 4, we will focus on ways to improve the speed of the Django applications. We will cover the following:
What is Caching?
Importance of Caching
Types of Caching in Django
How to Implement Caching in Django with Django-redis
View Caching
Per site Caching
Template Fragment Caching
What is Caching?What is Caching?
Many factors can contribute to slow applications, including slow API calls and database queries. Retrieving data from the database can be very expensive and slow as applications grow in size. A better way to speed things up is to store the most requested data or data that doesn't change for every user in a cache. Data stored in memory is easier and faster to retrieve.
Caching is the process by which fetched data is stored in a cache so that subsequent requests fetch from the cache instead of from the source.
Suppose you had an online bookstore that gives an overview of books and their descriptions; initially, the application works fine, but as you add more books to the application, the site starts getting bogged down and becomes slow.
The database has to run queries to retrieve book details with every user who visits the site. A better way to serve your users would be to cache the data for a certain period.
During this period, users will be served data from a cache, and the database will be free to perform other functions.
Importance of CachingImportance of Caching
With good caching, you can relieve the database from a high load. It also relieves your application server from a higher load and makes it possible to serve a website to more people with the same hardware. It also reduces page load times, which is always good.
Caching also makes websites perform requests and deliver data with minimal delay. If your application serves many API calls for data that doesn't change, it's more efficient to cache the data so that subsequent calls fetch from the cache.
Types of CachingTypes of Caching
Before using caching in your Django application, you must set up the cache most suitable for your application needs. There are different levels of caching depending namely:
Memory Caching
Database caching
File system caching
Memory CachingMemory Caching
Memory caching stores the cached data in memory. The most efficient type of memory cache supported by Django is Memcached. Memcached is a fast memory-based cache server that can handle high loads of data and hence increasing performance in Django applications and, at the same time, decreasing database load.
Memcached caching is suitable for dynamic websites and can also be used to share a cache on multiple servers; however, It is not permanent storage as it is susceptible to data loss if the server crashes.
It is also not suitable for caching large files.
To set up Memcached as your default backend, you need to set it up by adding the following configurations in settings.py of your Django application:
CACHES = {
'default': {
'BACKEND': 'django.core.cache.backends.memcached.PyMemcacheCache',
'LOCATION': '127.0.0.1:11211',
}
}You also need to install Memcached on your server .The BACKEND key specifies the caching backend, while the LOCATION defines where the specified backend is running.
In the LOCATION setting above, localhost is specified as the cache location at port 11211. Memcached supports caching on multiple servers. If you are using multiple servers to cache data, you specify the host servers as shown below:
CACHES = {
    'default': {
        'BACKEND': 'django.core.cache.backends.memcached.PyMemcacheCache',
        'LOCATION': [
            '172.19.26.240:11211',
            '172.19.26.242:11211',
        ]
    }
}
One thing to note about Memcached is that it does not persist data, so if Memcached is restarted, the cache is empty again and needs to be repopulated.
Database CachingDatabase Caching
Database caching involves using the database to store cache data.
To set up database caching, specify the backend in your CACHE settings.py file, as shown below.
CACHES = {
    'default': {
        'BACKEND': 'django.core.cache.backends.db.DatabaseCache',
        'LOCATION': 'cache_table',
    }
}
The LOCATION specifies the name of the database table where the cache data will be stored. To create the table cache_table specified above, run the following command:
python manage.py createcachetableFile System CachingFile System Caching
As the name suggests, this caching involves serializing and storing individual cache values in a file. Unlike other types of caching, which require lots of configurations, file system caching requires that you specify the path to the directory to be used to store the cache as follows:
CACHES = {
    'default': {
        'BACKEND': 'django.core.cache.backends.filebased.FileBasedCache',
        'LOCATION': '/var/tmp/django_cache,
    }
}
In the code above, the cache is stored in the directory var/tmp/django_cache. The directory should already exist and be writable and readable. Alternatively, the system user should be able to create it.
Local Memory CachingLocal Memory Caching
Local memory caching is the default cache used by Django if no other caching is configured. It gives fast local memory cache capabilities, but it possibly consumes a lot of memory and is therefore unsuitable in production, however if you have enough RAM on your server, local memory caching is suitable for production. Add the following CACHE configurations to set up local memory caching in the settings.py file.
Local memory will cache data in the memory of the web server process that Django is running, so there is no need for a separate cache in your server.
The speed and memory usage of Memcached and file system caching is the same, but with this file system caching, you do not need to set up a Memcached server because it just uses the memory of the server process django is running in.
CACHES = {
    'default': {
        'BACKEND': 'django.core.cache.backends.locmem.LocMemCache',
        'LOCATION': 'ecom',
    }
}
How to Perform Caching in Django Applications with Django-redisHow to Perform Caching in Django Applications with Django-redis
Even though Django supports several caching backends, such as Memcached and others described above, Redis is the most popular caching backend. Redis is used by over 47% of Python developers, according to the Django Developer Survey 2021.
Redis is an in-memory caching backend that allows you to cache data in terms of key-value pairs. We will use Redis as our caching backend for the rest of this tutorial.
django-redis is a Redis cache backend for Django. You need to install Redis on your operating system. Follow the Getting Started Guide on the Redis website to install a Redis server and make sure it is working as expected.
In this section, we will create a Django application and demonstrate how to perform different levels of caching in Django applications, such as
Per site caching
View caching
Template caching
The first step is to create a project directory where your files will reside. Next, create a virtual environment in the project folder with the venv library. Virtual environments are essential for separating project dependencies from system packages.
Create a virtual environment in the env folder:
python -m venv envActivate the virtual environment:
source env/bin/activateCreate a new django project called django_redis:
django-admin startproject django_redisInstall the required dependencies namely django and django-redis with pip:
pip install django django-redisWe are going to create an application that displays product records, and then we will query to see the different ways of using a cache to retrieve data faster using a cache
Next create a django app called ecommerce:
cd django_redis
django admin startapp ecommerce
Add the app ecommerce to the list of installed apps in settings.py as shown below:
INSTALLED_APPS = [
    # …
    'ecommerce'
]
Cache ConfigurationsCache Configurations
Add the cache configuration in the settings.py file by setting the cache BACKEND as shown below.
CACHES = {
    "default": {
        "BACKEND": "django_redis.cache.RedisCache",
        "LOCATION": "redis://127.0.0.1:6379/1",
        "OPTIONS": {
            "CLIENT_CLASS": "django_redis.client.DefaultClient",
        }
    }
}
By default, Redis runs on port 6379.
ModelsModels
In models.py add the following models
class Category(models.Model):
    name= models.CharField(max_length=150)
    def __str__(self):
        return self.name

class Book(models.Model):
    title = models.CharField(max_length=150)
    author = models.CharField(max_length=150)
    category= models.ForeignKey(Category, on_delete=models.CASCADE, default=1)
    description= models.TextField()
    price= models.FloatField(default=0)
    image= models.ImageField(upload_to='images')

    def __str__(self):
        return self.title
Since we have an ImageField that requires the pillow library, install the pillow package with pip:
pip install pillowPerform migrations (necessary for pillow):
python manage.py makemigrations
python manage.py migrate
Django Admin and SuperuserDjango Admin and Superuser
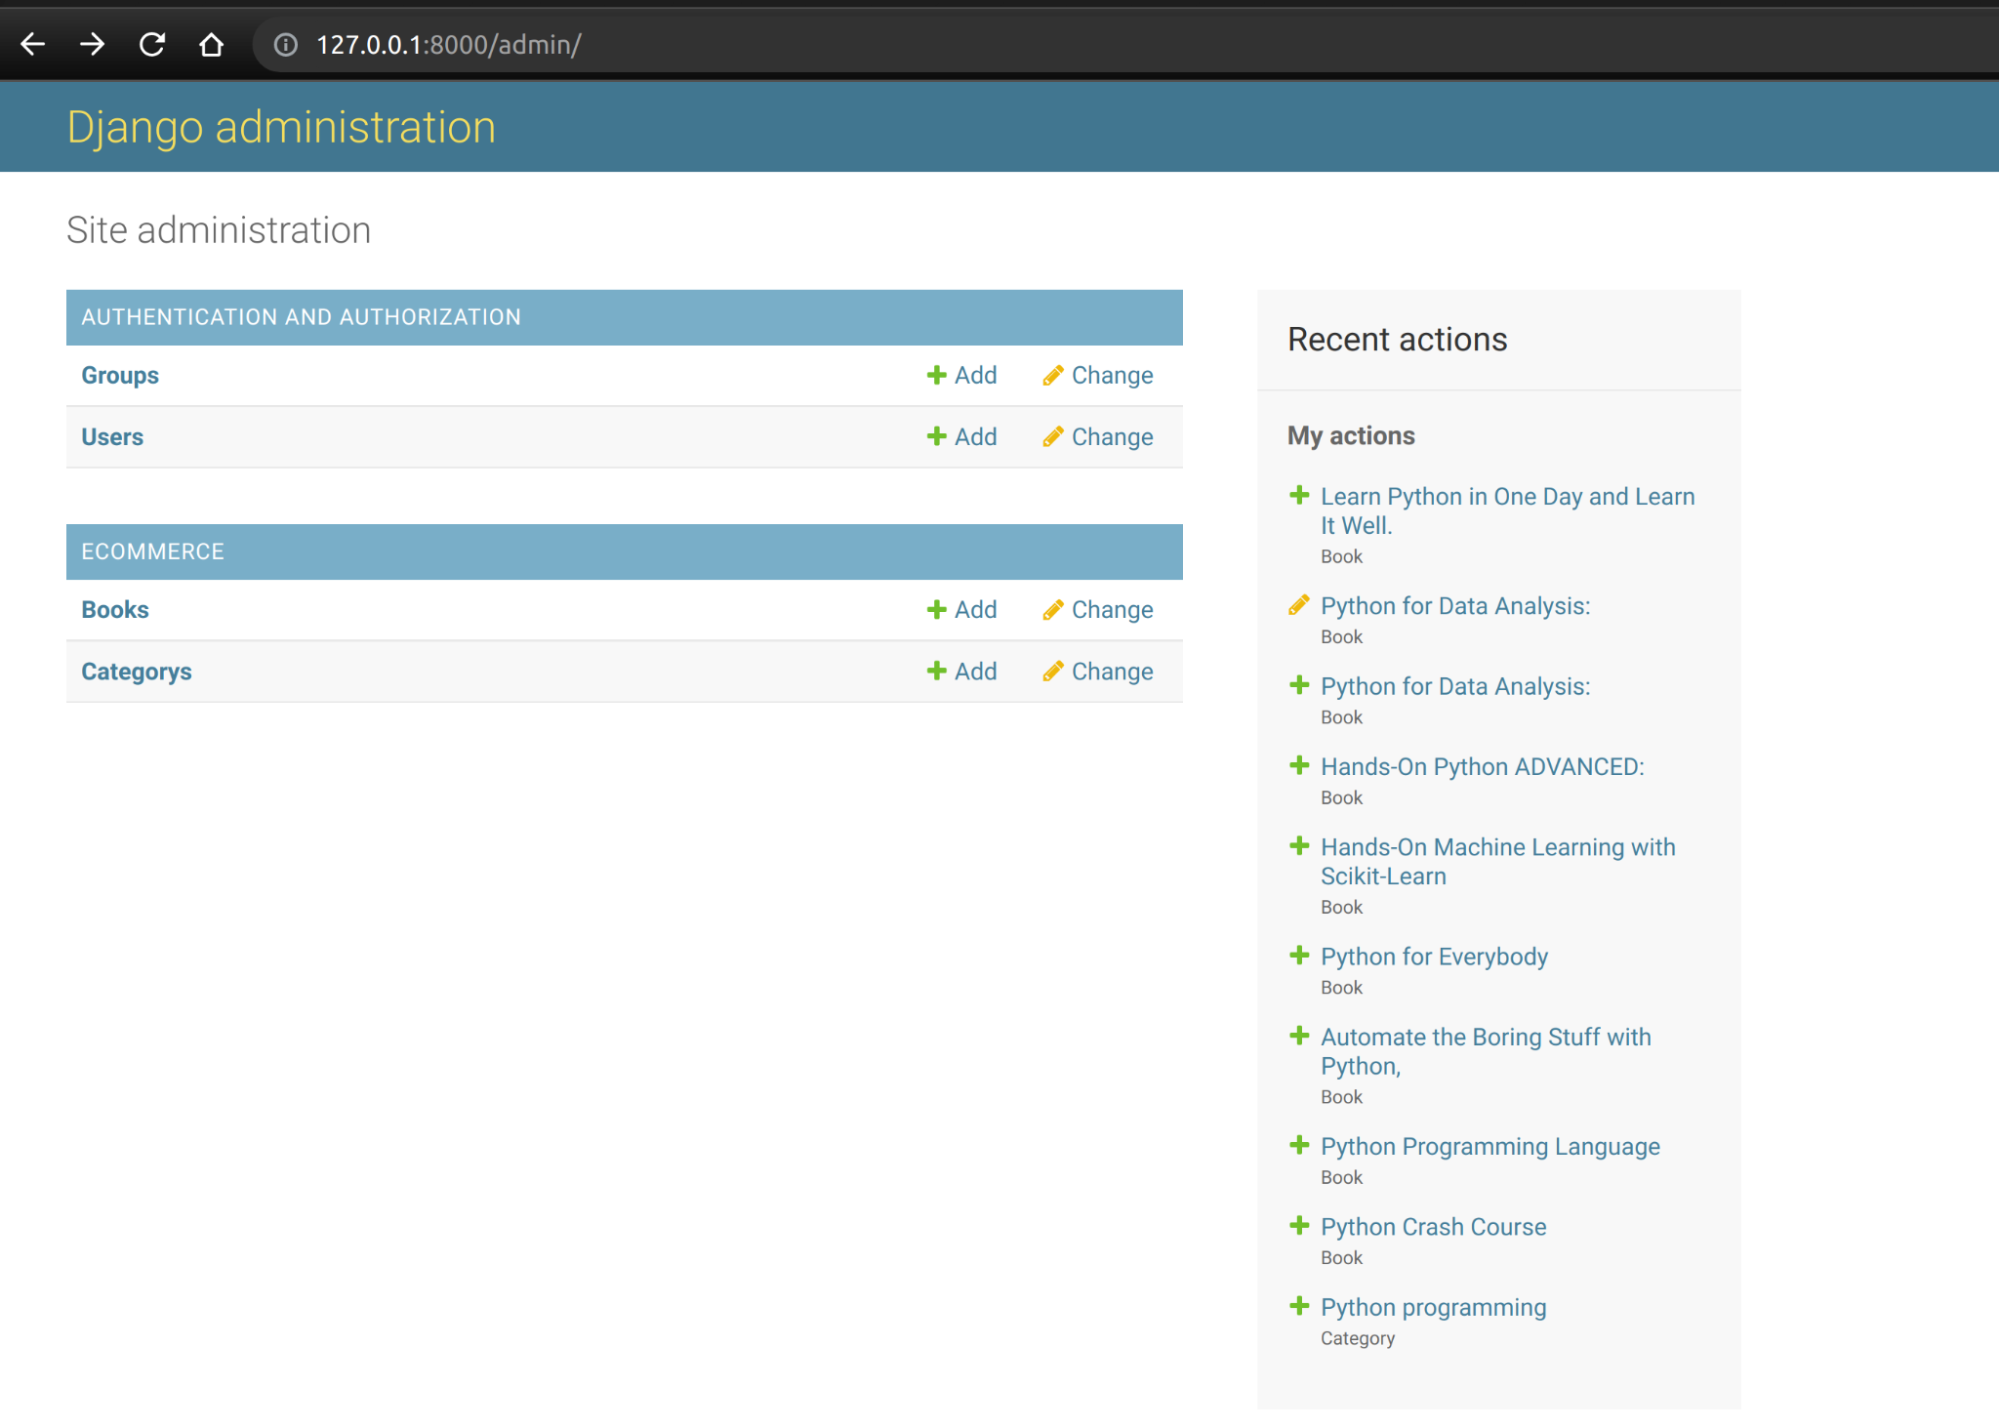
To add some sample data, we will use the Django admin site. Let's start by registering the two models in the ecommerce/admin.py file, as shown below.
#ecommerce/admin.py

from django.contrib import admin
from .models import Book,Category

# Register your models here.

admin.site.register(Book)
admin.site.register(Category)
Next, create a super user who will grant us access to add data to the Django admin site:
python manage.py createsuperuserNext, start the development server:
python manage.py runserverNavigate to the admin site https://127.0.0.1:8000 and add some data.
In ecommerce/views.py, write a function that retrieves all the Book entries from the database:
from django.shortcuts import render
from .models import Book

def book_list(request):
    books = Book.objects.all()
    return render(request, 'ecommerce/book_list.html', {
        'books': books
    })
Django will automatically search for templates in the template directory of the app. Add a template book_list.html in the following directory structure.
ecommerce/
templates/
ecommerce/
book_list.html
Next, add the following code to book_list.html which renders the data from the view:
<html>
   <head>
      <title>BOOKS</title>
   </head>
   <body>
      <table class="table">
            <thead>
               <tr>
                  <th>Book</th>
                  <th>Title</th>
                  <th>Author</th>
                  <th>Category</th>
                  <th>Price</th>
               </tr>
            </thead>
            <tbody>
               {% for book in books %}
               <br>
               <tr>
                  <td><img style="height: 100px;" src="{{book.image.url}}" alt=""></td>
                  <td>{{book.title}}</td>
                  <td>{{book.author}}</td>
                  <td>{{book.category}}</td>
                  <td>{{book.price}}</td>
               </tr>
               {% endfor %}
            </tbody>
         </table>
         ---
   </body>
</html>
Next, map the view to the urls in the url.py file as shown below.
from django.contrib import admin
from django.urls import path, include

from django.conf import settings
from django.conf.urls.static import static
from ecommerce.views import book_list

urlpatterns = [
    path('admin/', admin.site.urls),
    path('books', book_list),
] + static(settings.MEDIA_URL, document_root=settings.MEDIA_ROOT)
Install Django Debug ToolbarInstall Django Debug Toolbar
Django debug toolbar is a Django query monitoring tool that allows developers to perform different types of checks in your Django application by measuring how long it takes to run queries. By installing the Django Debug Toolbar, we can compare the time it takes to run database queries and retrieve templates if there is a no-cache and when a cache mechanism is introduced.
Install Django debug toolbar with pip:
pip install django-debug-toolbarAdd Django debug toolbar to the list of installed apps in settings.py
INSTALLED_APPS = [
    # …
    'debug_toolbar',
]
Update the urls.py file as follows to include the django-debug-toolbar’s URLs:
import debug_toolbar

urlpatterns = [
    path('admin/', admin.site.urls),
    path('books', book_list),
    path('__debug__/', include(debug_toolbar.urls)),
] + static(settings.MEDIA_URL, document_root=settings.MEDIA_ROOT)
Add DebugToolbarMiddleware:
MIDDLEWARE = [
    # …
    'debug_toolbar.middleware.DebugToolbarMiddleware'
    # …
]
The order of MIDDLEWARE is important. You should include the Debug Toolbar middleware as early as possible in the list. However, it must come after any other middleware that encodes the response's content, such as :class:~django.middleware.gzip.GZipMiddleware.
Now, if you navigate to http://127.0.0.1:8000/books, you can see that the view has done a total of 11 SQL queries that took 0.77ms.
This time may seem fast, but as the application grows, the SQL queries grow too, and with each request, it doesn't make sense to keep querying the exact data for every user if the data doesn't change often.
View CachingView Caching
View Caching is a more efficient way of caching as it only caches the results of individual Django views. This is done by decorating the view with the cache_page decorator from django.views.decorator.cache
The cache_page decorator takes in a single parameter, the timeout in seconds.
Let's apply the cache_page decorator to the book_list view and cache data for 15 minutes.
from django.views.decorators.cache import cache_page
@cache_page(60*15)
def books_list(request):
    books = Book.objects.all()
    return render(request, 'ecommerce/book_list.html', {
        'books': books
    })
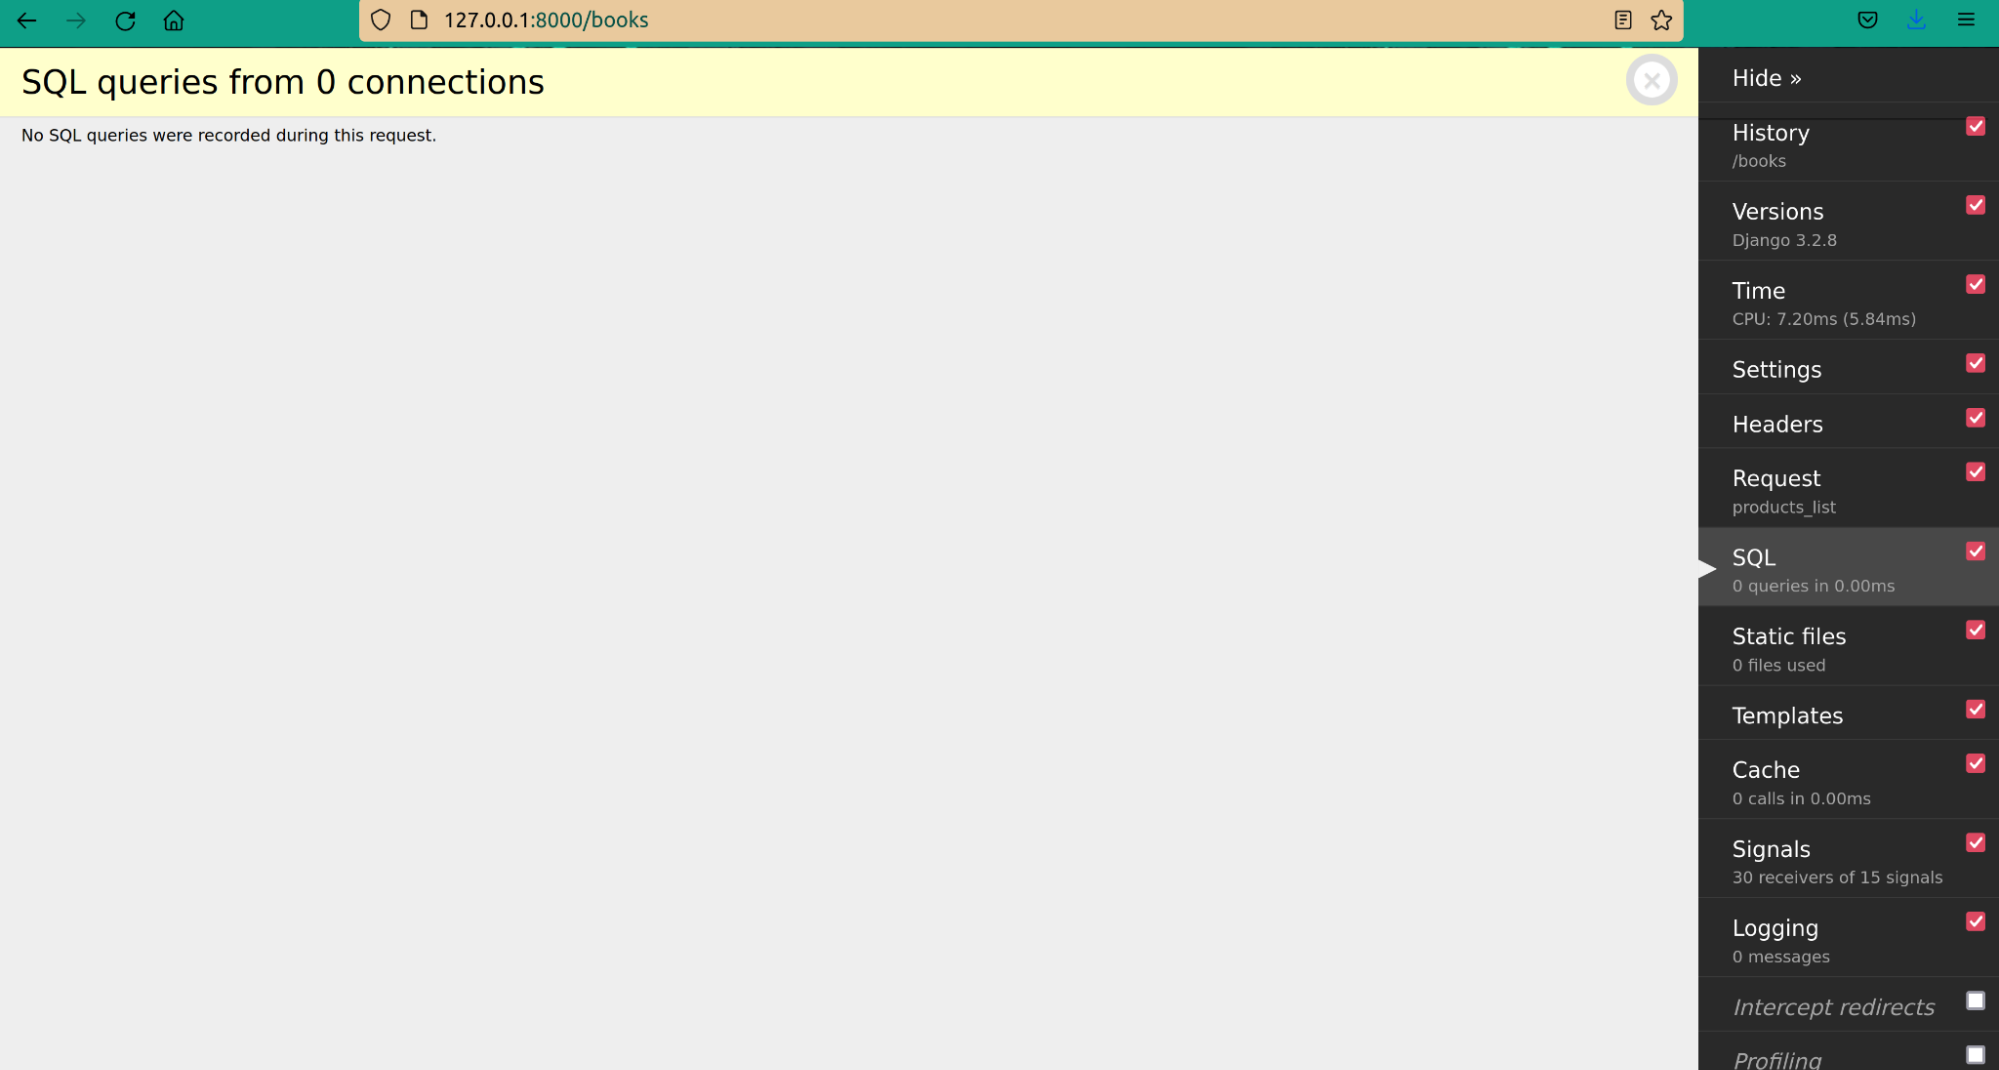
Navigate to the page which displays the list of books, and you should see that no SQL queries were run since the data is now being fetched from a cache. The view doesn't touch the database hence freeing up the database to perform other critical tasks.
The CPU time also decreases from 68.18ms to 7.20ms. This represents almost 10 times faster to process a CPU request.
Per-Site CachingPer-Site Caching
Per-site caching is another way to implement caching in Django applications. Per-site caching caches everything in your Django application. But first, you need to add some middleware configurations in the middleware settings, namely:
'django.middleware.cache.UpdateCacheMiddleware' and 'django.middleware.cache.FetchFromCacheMiddleware'
MIDDLEWARE = [
    # …
    'django.middleware.cache.UpdateCacheMiddleware',
    'django.middleware.common.CommonMiddleware',
    'django.middleware.cache.FetchFromCacheMiddleware',
    # …
]
Both sets of middleware enable site-wide caching in your Django site. The UpdateCacheMiddleware is responsible for updating the response cache for each successful response (status 200), while the FetchCacheMiddleware is responsible for updating a page from the cache.
You also need to add the following settings in the settings.py file.
CACHE_MIDDLEWARE_ALIAS  = ' ' # cache alias
CACHE_MIDDLEWARE_SECONDS = 600 # number of seconds each page should be cached.
CACHE_MIDDLEWARE_KEY_PREFIX = ''  # name of site if multiple sites are used
Template Fragment CachingTemplate Fragment Caching
Template caching involves caching some parts of a Django template by specifying the cached fragment and the cache time.
To cache template fragments, apply the {% load cache %,} tag where caching is required. The {% load cache %} will cache the enclosed contents for the time specified. For example, we can apply the cache as follows for our book list template.
{% load cache %}
{% cache 900 books %}
<div class="container">
<table class="table">
   <thead>
      <tr>
         <th>Book</th>
         <th>Title</th>
         <th>Author</th>
         <th>Category</th>
         <th>Price</th>
      </tr>
   </thead>
   <tbody>
      {% for book in books %}
      <br>
      <tr>
         <td><img style="height: 100px;" src="{{book.image.url}}" alt=""></td>
         <td>{{book.title}}</td>
         <td>{{book.author}}</td>
         <td>{{book.category}}</td>
         <td>{{book.price}}</td>
      </tr>
      {% endfor %}
   </tbody>
</table>
<hr>
{% endcache %}
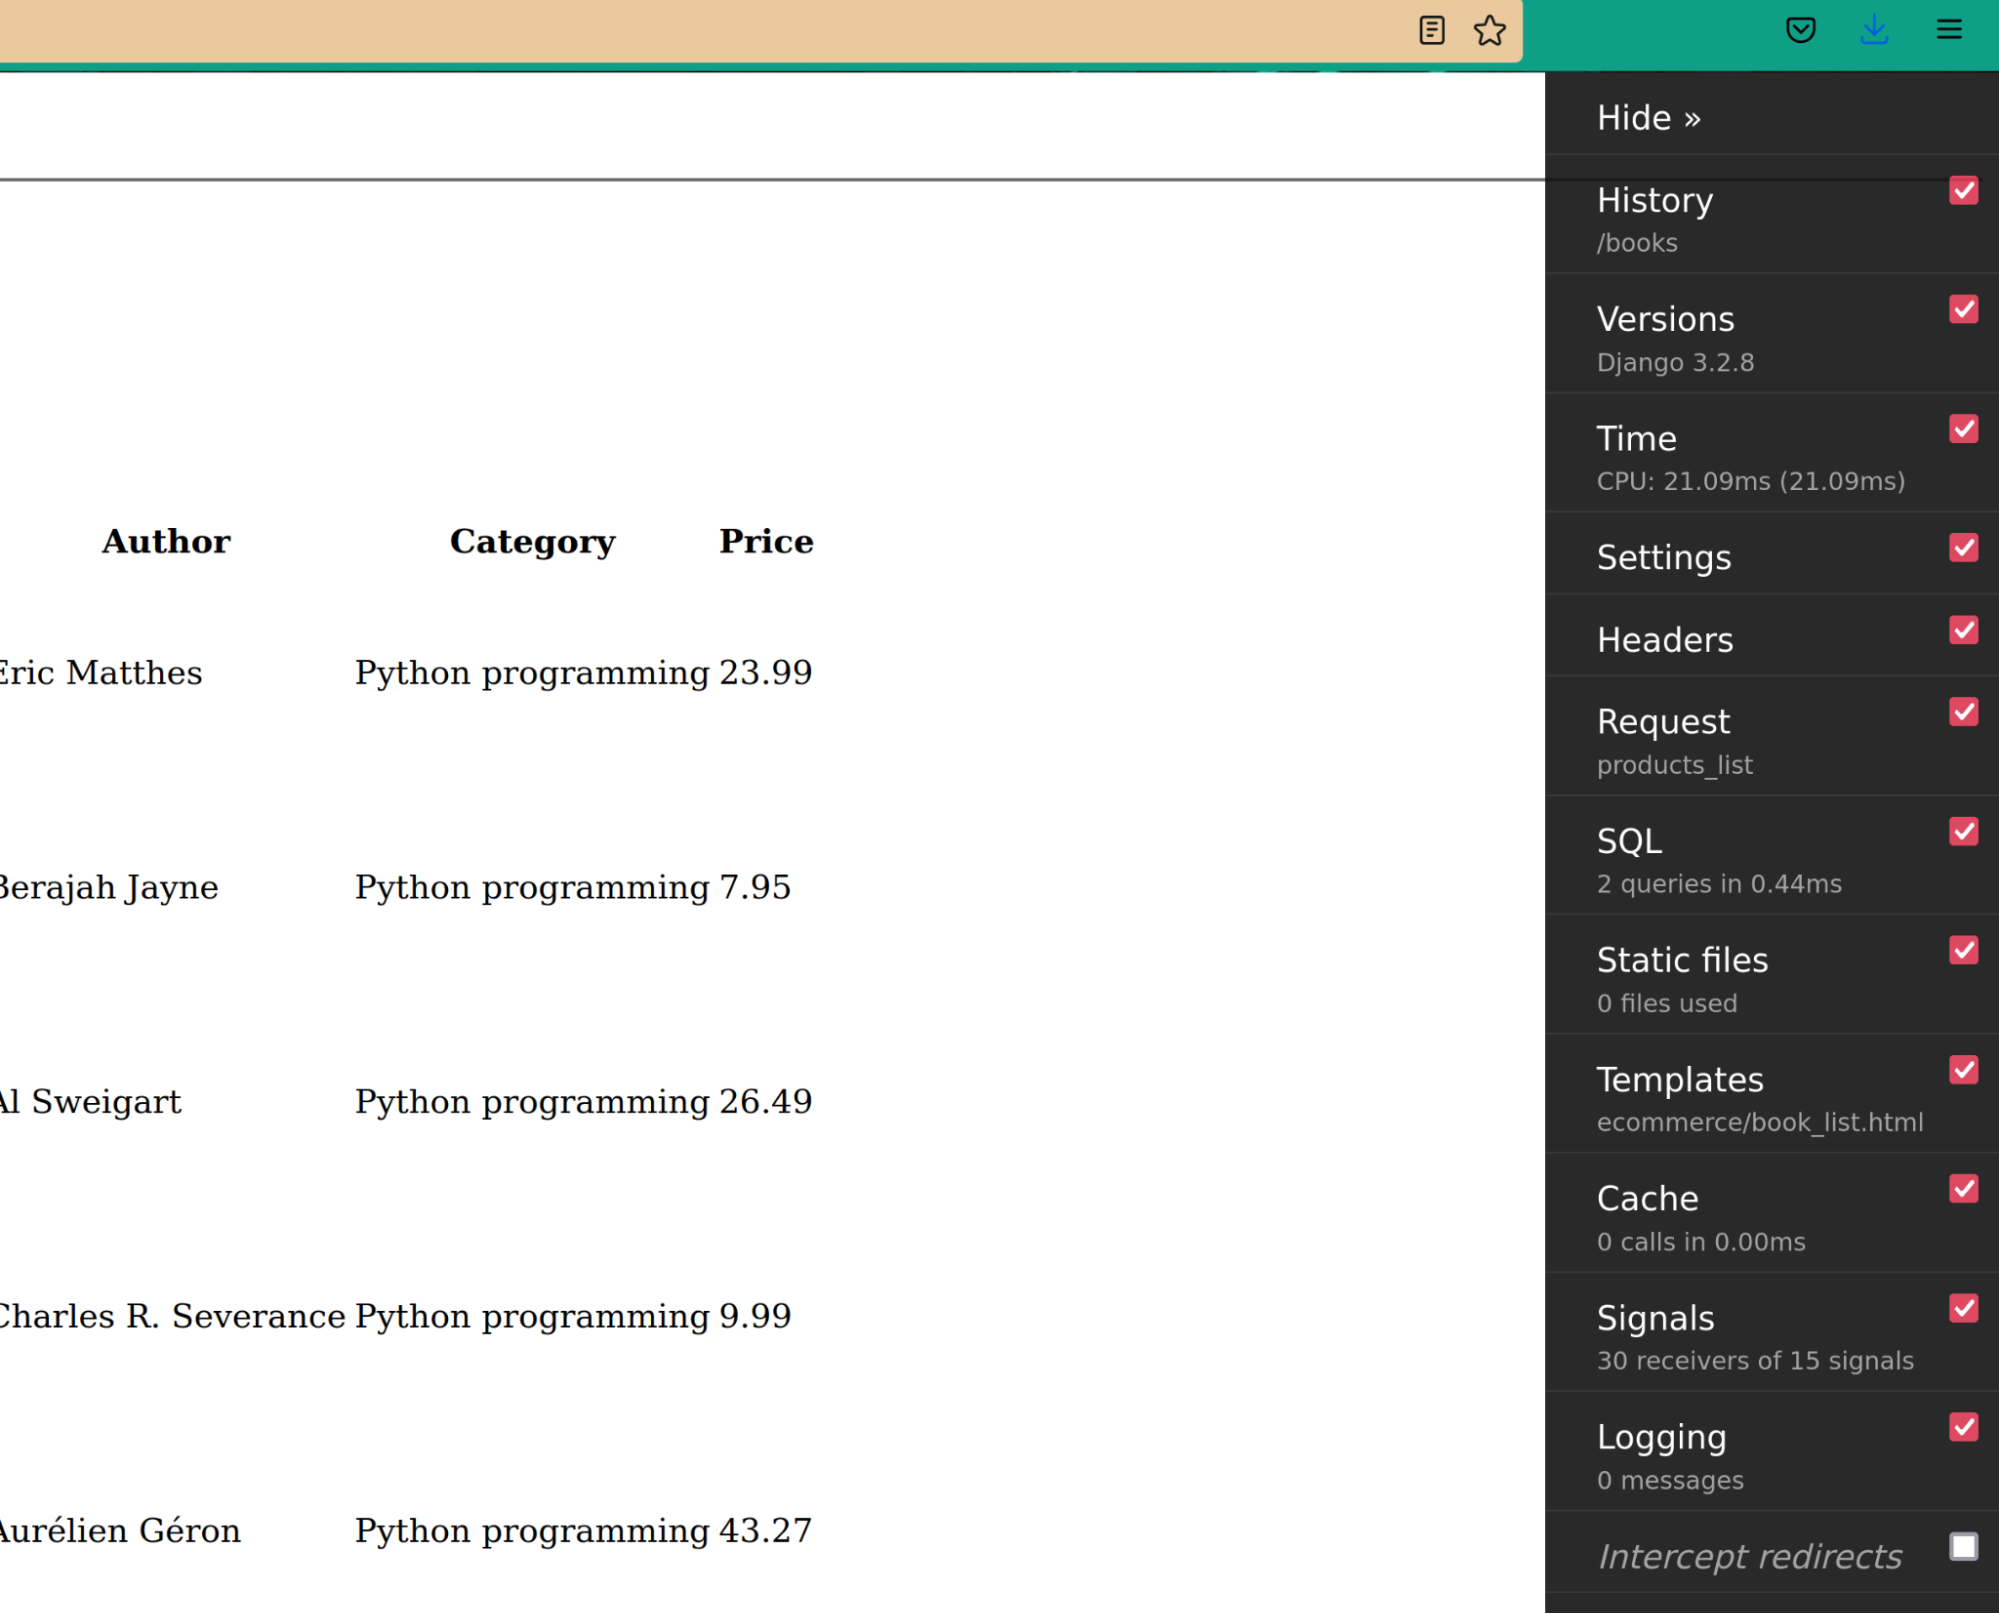
In the code above, we apply the cache to the div fragment that displays the list of books.
As you can see from the above screenshot, the database only runs 2 SQL queries and takes 0.44 ms.
RecapRecap
In this tutorial, you learned the different types of caching available in Django and how to use the different cache backends in your Django application. You have also learned how to perform per site, template, and view caching to speed up the performance of your Django site.


