How to Use Sentry & nginx to Trace Errors
To quote the timeless Ren and Stimpy jingle, "everyone needs a log." It's true — everyone does need a log, especially developers. Despite the fact that no developer looks forward to combing through logs, they're incredibly useful when unexpected performance issues, like one we recently had with file uploads, need some investigation.
In our case, the file upload issue was a challenge to capture because it happened so sporadically. The fact that we were dealing with multiple systems (load balancer, web server, etc.) didn't help either. Tracing allowed us to link these systems together while following the error's path to its root.
Unfortunately, tools (like nginx in our case) don't have a simple set of instructions that help engineers enable tracing. It's up to the engineer to figure out how best to stitch systems together — so that's exactly what we did.
Here's a look at how we traced our file upload issue through nginx and Sentry with the help of a $request_id — a randomly generated string that is automatically assigned to each request.
Again, nginx doesn't give instruction on how to configure tracing. We knew we needed a thing to help trace the logs. From experience, we knew that thing was probably $request_id, so we searched the nginx docs for "how to generate a request ID" expecting to find a plugin or instructions for writing one. Instead, we found that nginx had the request ID variable already built-in.
Once we had the variable, we configured our nginx servers to include $request_id in our access logs and to pass this value downstream to our application servers. To do this, we needed to first declare a new log format, as the default log format doesn't include $request_id. In our case, Sentry also logs as JSON so we can ingest with other systems such as ElasticSearch.
log_format access_json escape=json
'{'
'"request_id":"$request_id",'
'"time_iso8601":"$time_iso8601",'
'"remote_addr":"$remote_addr",'
'"remote_user":"$remote_user",'
'"http_host":"$http_host",'
'"request":"$request",'
'"status":"$status",'
'"body_bytes_sent":"$body_bytes_sent",'
'"request_time":"$request_time",'
'"request_length":"$request_length",'
'"http_referrer":"$http_referer",'
'"http_user_agent":"$http_user_agent",'
'"request_completion":"$request_completion",'
'"upstream_bytes_received":"$upstream_bytes_received",'
'"upstream_connect_time":"$upstream_connect_time",'
'"upstream_response_length":"$upstream_response_length",'
'"upstream_response_time":"$upstream_response_time"'
'}';
access_log /var/log/nginx/access.log access_json;Now that our access logs were spitting out our request ID, we set an X-Request-Id header on all requests to pass it along to our application:
proxy_set_header X-Request-Id $request_id;Now that nginx is configured to pass along this header on all requests, the header needs to be scooped up downstream in our application so we can bind this request ID to everything else we do. We do this by setting an HTTP header, which can be read and tagged in the Sentry SDK.
Having this data means that we can stitch together the raw access log from our load balancer back into both our logging within our application and with our errors within Sentry, an application performance monitoring tool. The way to configure this will vary widely depending on the language and integration that you're using, but the concepts are the same.
Here are a few examples that might help you get started:
Python/Django example:
class RequestIdMiddleware:
        def __init__(self, get_response):
            self.get_response = get_response

        def __call__(self, request):
            # If there's an `X-Request-Id` header on the request,
            # bind it to our Sentry SDK scope.
            request_id = request.META.get("HTTP_X_REQUEST_ID")
            if request_id:
                with sentry_sdk.configure_scope() as scope:
                    scope.set_tag("request_id", request_id)
            return self.get_response(request)
Node/Express example:
    app.use((req, res, next) => {
      let requestId = req.headers['x-request-id'];
      if (requestId) {
        Sentry.configureScope((scope) => {
          scope.setTag("request_id", requestId);
        });
      }
      next();
    });
You can also see where I committed this configuration to the Sentry repository. In our case, we also bound the value to our internal logging with structlog.
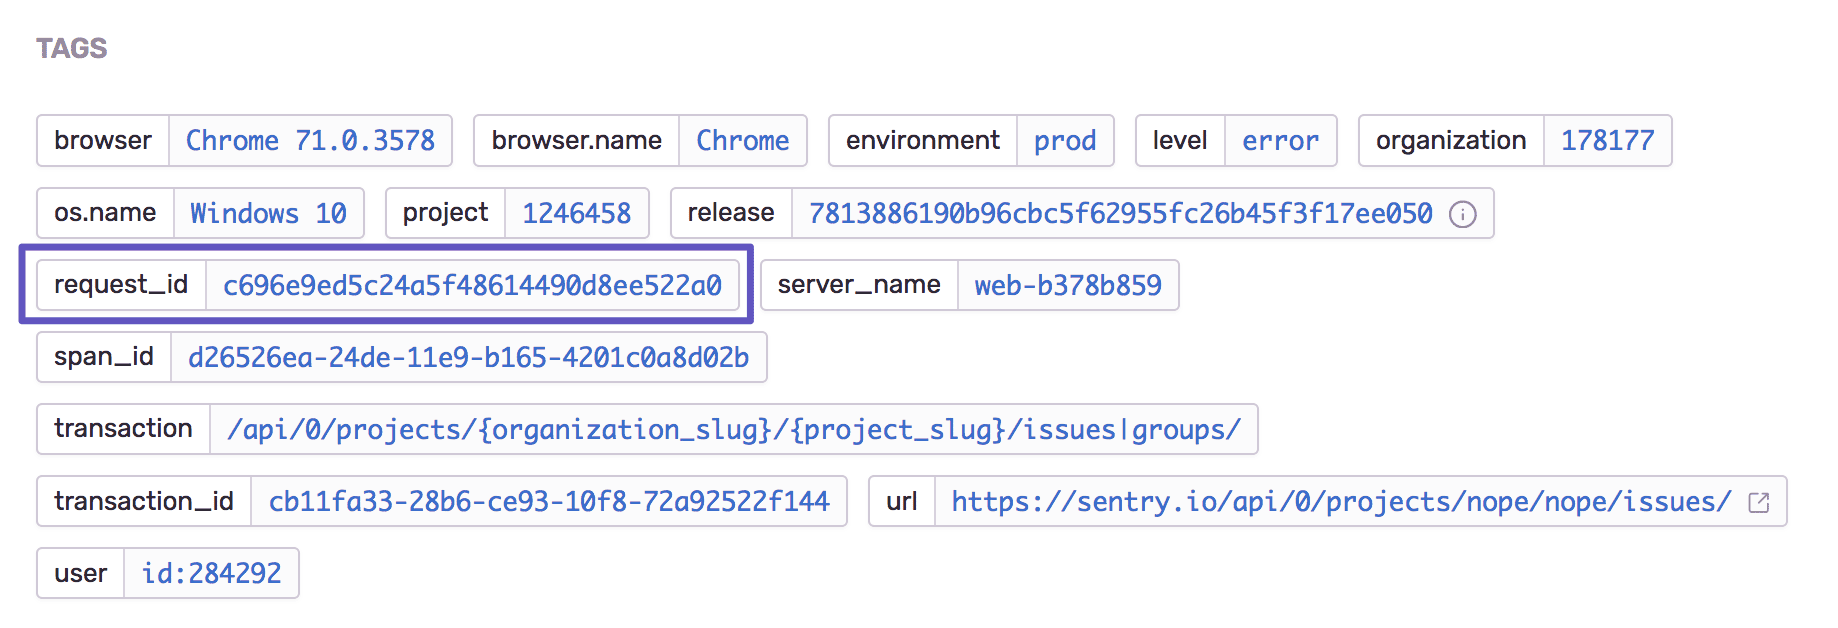
Once the variable is configured in your SDK, the variable surfaces as a tag in Sentry's UI.
At this point, we have accomplished an end-to-end request ID that we can use to stitch together errors being tracked in Sentry as well as traditional access logs, which, in our case, get ingested into ElasticSearch. By providing deeper understanding through gained data and context around our various services and systems, this data ultimately allows us to debug better. If we wanted to further extend this, it's easy to imagine continuing to pass this request ID throughout other systems as needed to link them all together.
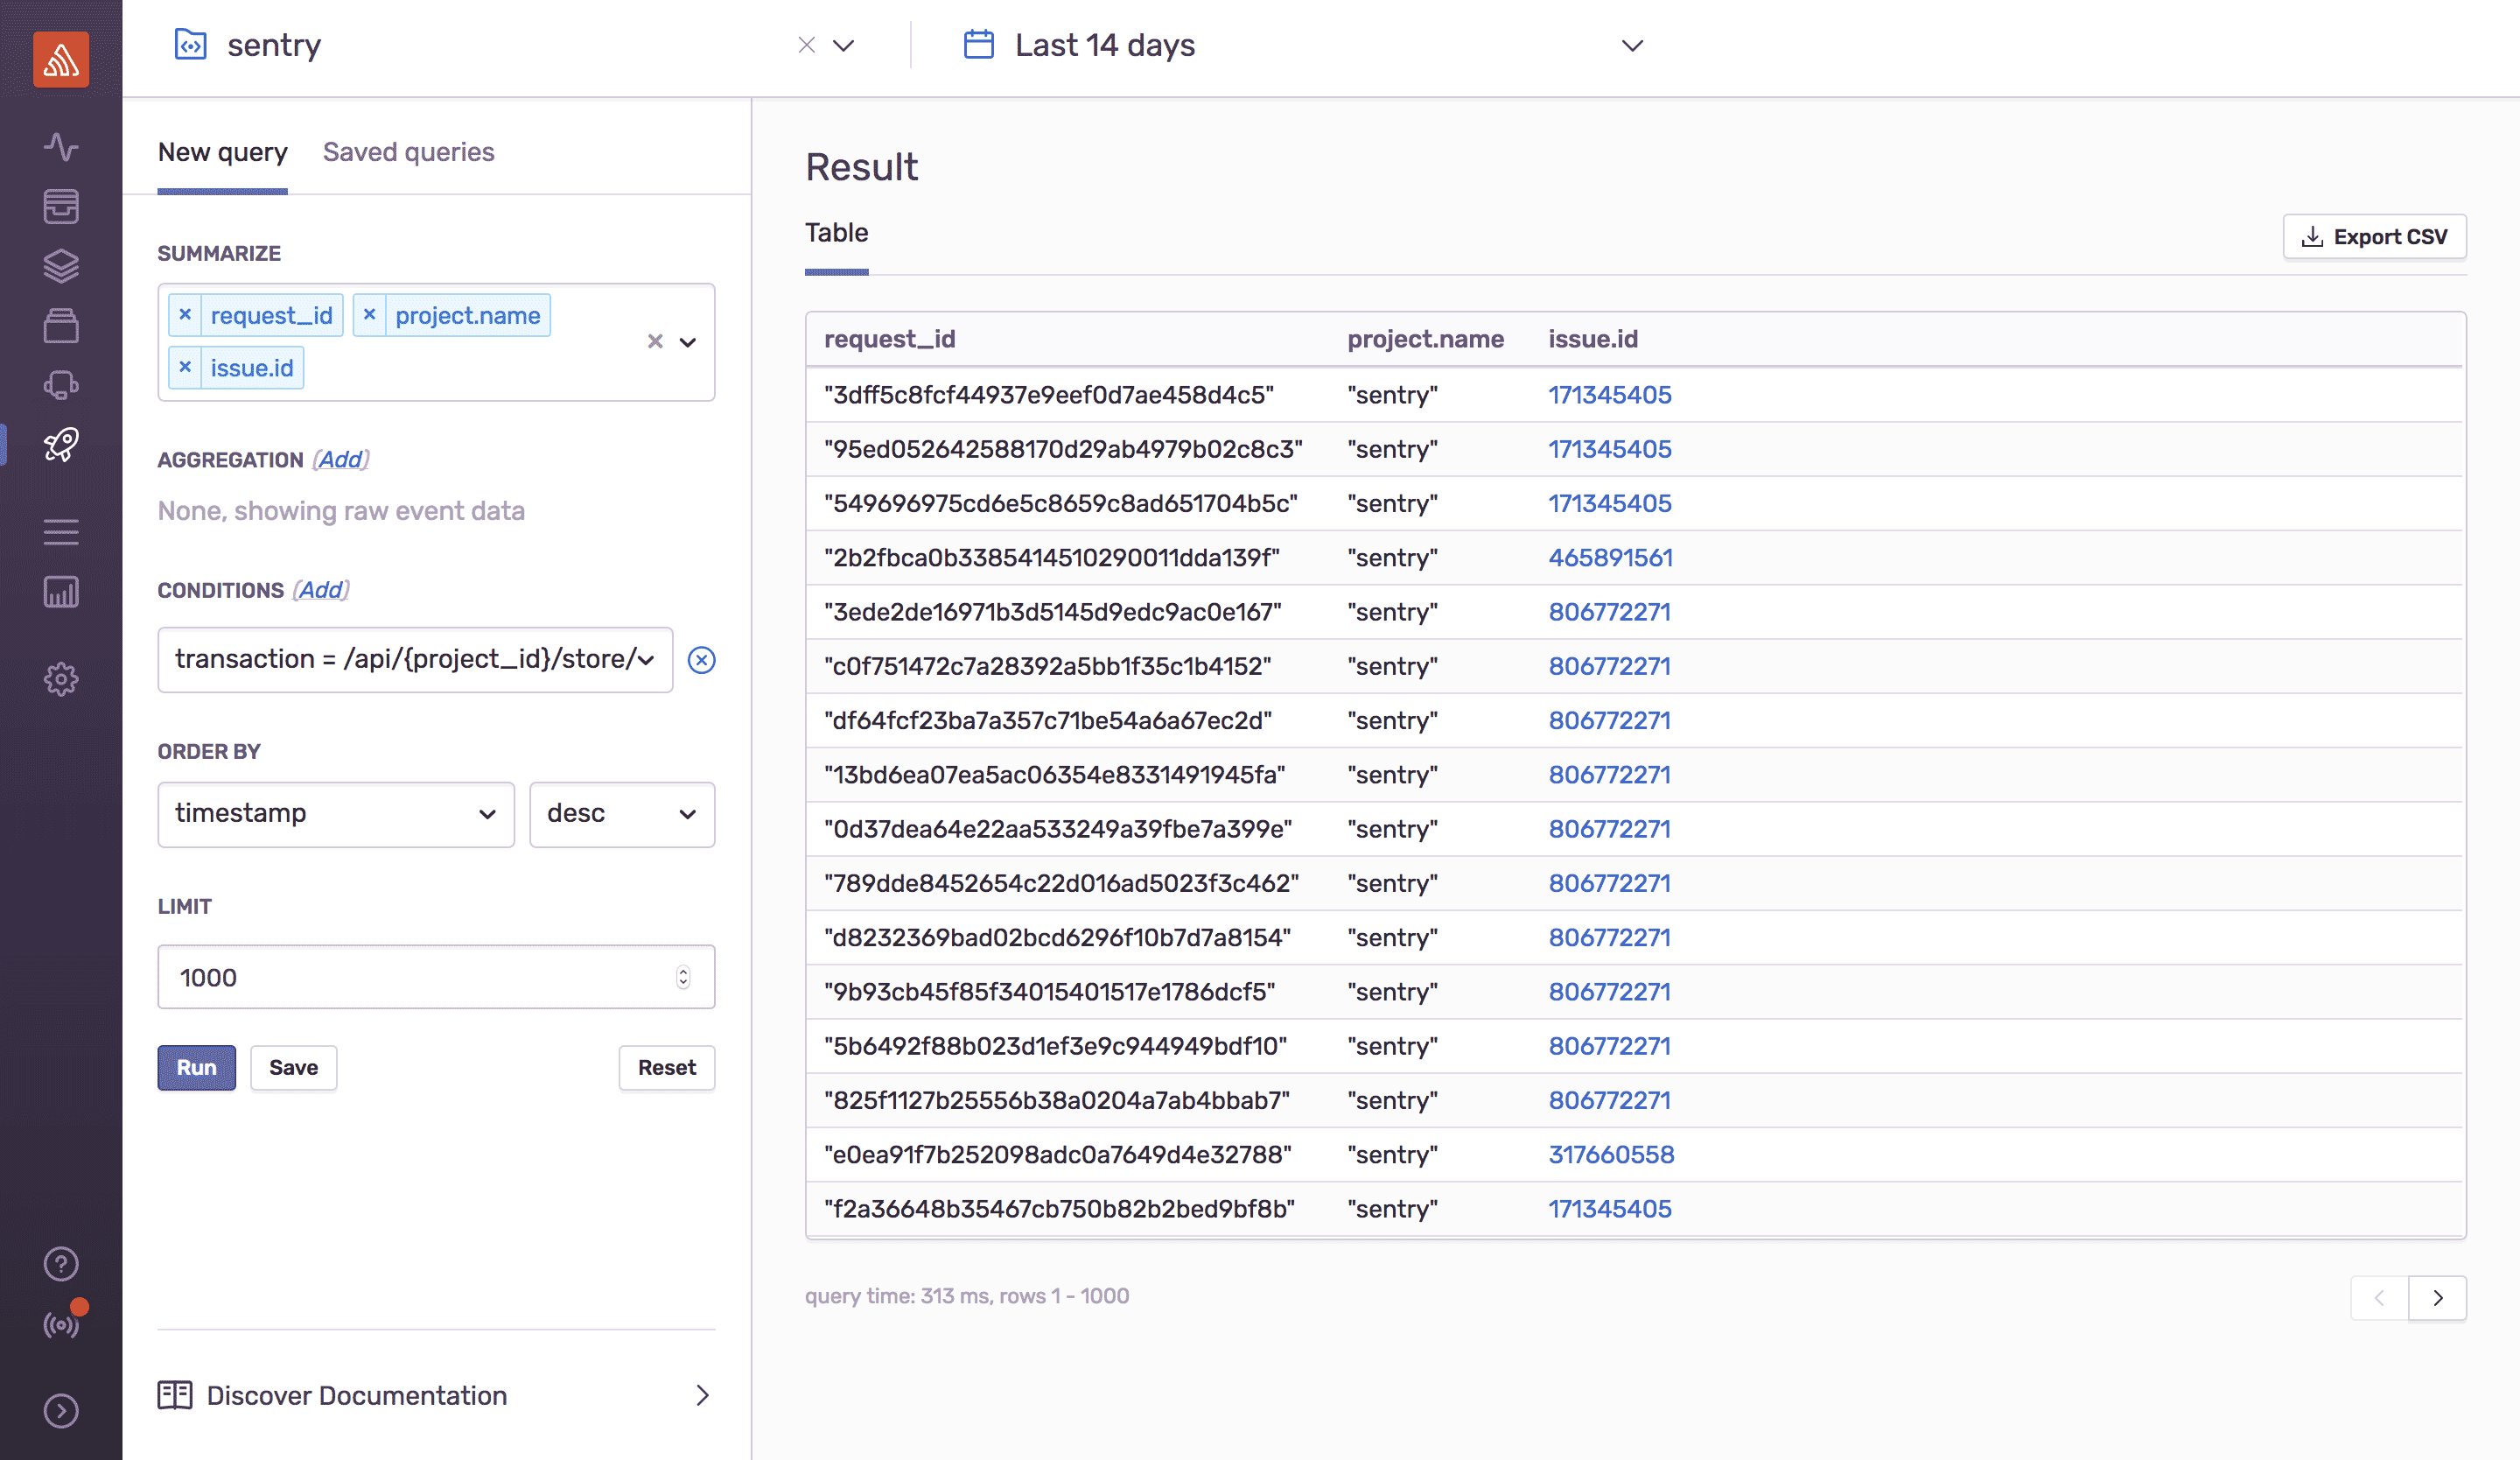
It's possible that we might also need a number of example cases to supplement this single request ID. We can use Sentry's Discover functionality to search for all request ids we've seen on a specific URL.
Now that you've run the query, you can export the results as a CSV, and then use this data however you wish. We could turn this data into an ElasticSearch query now to correlate these errors with all of our logs.
Again, this is an example of how we used tracing with logs to get to the bottom of our performance error. Hopefully, you can take the lesson learned here and apply it to your own use case. Good luck.


