Tracking Stability in a Bluetooth Low Energy-Based React-Native App
Tracking Stability in a Bluetooth Low Energy-Based React-Native App
For most of my career I’ve worked with health and wellness startups. Most of these companies have a wearable that tracks movement, heart rate, body weight or stimulates a body part. The common denominator between these apps is their use of sensor data to determine physiological progress an athlete is making. Problem is, your Bluetooth Low Energy (BLE) device does not have an internet connection and cannot send diagnostics anywhere if there are errors. This is actually quite a big problem when you consider your firmware engineers need error information to debug the Bluetooth device in production.
Never fear, the solution is to forward error information from the device to an error tracking service. In this article I’ll be walking you through how I would add error tracking to an app to get my firmware team the data they need to do their job. Some optional reading is an article I wrote a while ago about how to build a Bluetooth Low Energy app with React-Native. The code snippets I show here are modifications to that project. It’s not required to read that article, the code samples should stand alone, but it does help to provide additional context. I’ll be using Sentry.io to track errors because as a React Native performance monitoring tool, it does an excellent job of keeping debugging information in one place.
Detecting Connection Failures
The first thing you’ll want to track is BLE connection failures. This is generally simple because the react-native-ble-plx library, which we use for Bluetooth in React-Native, exposes platform independent error codes 🔥. In the TypeScript below, I forward the errorCode and errorName to Sentry. Because the BLE error codes and error names are standardized, firmware developers can interpret that information to debug connection issues. In my BluetoothLeManager.ts class I would add the following code to the scanForPeripherals method to make this possible:
logConnectionError = (error: BleError) => {
Sentry.captureEvent({
message: FAILED_TO_CONNECT,
extra: {
streaming_error: {
plx_error: error.errorCode,
error_name: error.name,
},
},
});
};
scanForPeripherals = (
onDeviceFound: (arg0: {
type: string;
payload: BleError | Device | null;
}) => void,
) => {
this.bleManager.startDeviceScan(null, null, (error, scannedDevice) => {
if (error) {
this.logConnectionError(error);
return;
}
onDeviceFound({type: 'SAMPLE', payload: scannedDevice ?? error});
return;
});
return () => {
this.bleManager.stopDeviceScan();
};
};Detecting Streaming Failures
If you subscribe to a characteristic on a BLE device, it will continuously notify you of changes to data in its sensors. In the case below, we are using a heart rate monitor where data on a user’s heart rate is updated every few seconds. Every notification that comes in has a chance it could fail. This means we need to check for errors every time we get a packet from the device. You can see a code example of this below:
logStreamError = (error: BleError) => {
  Sentry.captureEvent({
    message: FAILED_TO_STREAM_DATA,
    tags: {
      'firmware.version.number': firmwareVersion,
      'firmware.build.version': buildNumber,
    },
    extra: {
      streaming_error: {
        characteristic_uuid: HEART_RATE_CHARACTERISTIC,
        service_uuid: HEART_RATE_UUID,
        plx_error: error.errorCode,
        error_name: error.name,
      },
    },
  });
};

startStreamingData = async (
  emitter: (arg0: {payload: number | BleError}) => void,
) => {
  await this.device?.discoverAllServicesAndCharacteristics();
  this.device?.monitorCharacteristicForService(
    HEART_RATE_UUID,
    HEART_RATE_CHARACTERISTIC,
    (error, characteristic) => {
      if (error) {
        this.logStreamError(error);
        return;
      }

      this.onHeartRateUpdate(error, characteristic, emitter);
    },
  );
};
Notice in lines 8–14 I’ve added information to the tags and extras. I add the firmware version and build number to tags because I want this information to show up in the “trace” section of the error report. I use extras to pass the UUID of the characteristic and the service so that the firmware team is able to see exactly which characteristic or service is the problem. Information from the extras section will show up in the additional data section of the error report.
Detecting Bad Sensor Data
The final example I’ll demonstrate is invalid data being retrieved from the BLE device. Any sensor has a threshold of values that are sensible for the app to process. For example, a human heart rate is generally between 40–150 bpm. If you suddenly get a value of 500bpm, that’s obviously unreasonable and should be reported to the firmware team. In the Sentry event, it’s best to send the service and characteristic that failed as well as the invalid data that came from the sensor. The code looks like this:
logStreamThresholdError = (data: number) => {
  Sentry.captureEvent({
    message: VALUE_THRESHOLD_EXCEEDED,
    tags: {
      'firmware.version.number': firmwareVersion,
      'firmware.build.version': buildNumber,
    },
    extra: {
      streaming_error: {
        bad_value: data,
        characteristic_uuid: HEART_RATE_CHARACTERISTIC,
        service_uuid: HEART_RATE_UUID,
      },
    },
  });
};

onHeartRateUpdate = (
  error: BleError | null,
  characteristic: Characteristic | null,
  emitter: (arg0: {payload: number | BleError}) => void,
) => {
  if (error) {
    emitter({payload: error});
  }

  const data = base64.decode(characteristic?.value ?? '');

  let heartRate: number = -1;

  const firstBitValue: number = (<any>data[0]) & 0x01;

  if (firstBitValue === 0) {
    heartRate = data[1].charCodeAt(0);
  } else {
    heartRate =
      Number(data[1].charCodeAt(0) << 8) + Number(data[2].charCodeAt(2));
  }

  if (heartRate > HEARTRATE_THRESHOLD) {
    this.logStreamThresholdError(heartRate);
  }

  emitter({payload: heartRate});
};
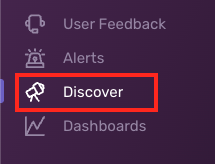
We just saw how easy it was to add BLE error tracking to our app, but this isn’t even the best part! You can actually build dashboards in Sentry to present this data in a form that’s easily digestible to your firmware team. You can start by navigating to the “Discover” section of the web app.
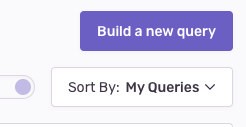
Next, click “Build a new query” in the top right hand corner of the screen.
Next, type the message from any of the message properties you used above into the search for events, users, tags and more search bar. It will look something like this:
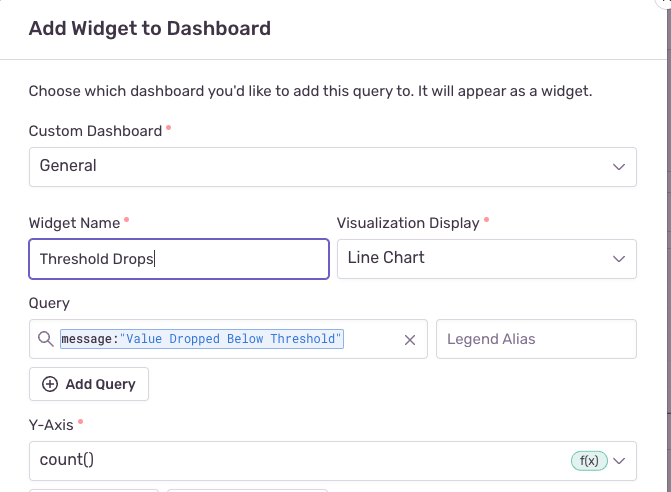
Click “Add to Dashboard” and fill in the following information:
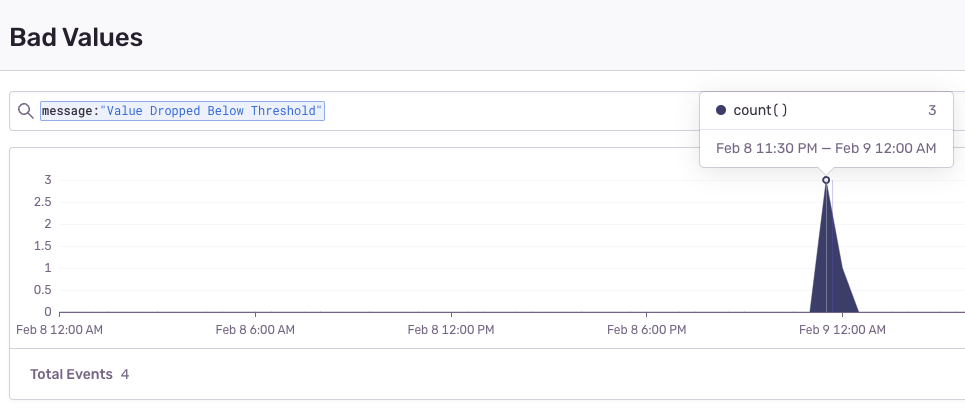
Now the magic happens 🪄! Click “Add to Dashboard” after saving your changes and you can view the number of times your data dropped below the threshold.
Finally, your firmware engineers can visualize any errors that come in from a Bluetooth device! You can repeat this process with any of the analytics tracked in this article as needed to create as many charts and visualizations as your project requires.
Final Thoughts
There you have it. A strategy to track device stability in apps that use Bluetooth Low Energy. I hope these tips and tricks were useful to you and make the difference on your next Bluetooth project.


