Enable Suspect Commits, Unminify JS, and Track Releases with Vercel and Sentry

If you're a JavaScript developer there's a very good chance you've heard of or use Vercel. In the small chance you haven't, Vercel is this awesome platform that makes building and deploying frontend frameworks like Next.js incredibly fast and easy. Next.js is gaining in popularity with 70k stars on GitHub and it's one of the most trusted stacks in the JavaScript world these days. Sentry uses Vercel internally for a number of different use cases including hosting our developer docs.
Needless to say, it was a no brainer to build an integration that makes it even easier for Sentry and Vercel to work in tandem. Now JavaScript developers can:
Automatically generate releases whenever you deploy a new version of your app on Vercel. Releases give you more context of a particular Sentry issue so you know which release introduced a bug without sleuthing through your logs and builds.
Tie your code commits to the release. Commits can be extremely helpful in figuring out why an error happened.
Generate and upload source maps. The Sentry-Vercel integration will push source maps so your stack trace looks like the original code you wrote instead of computer-generated nonsense.
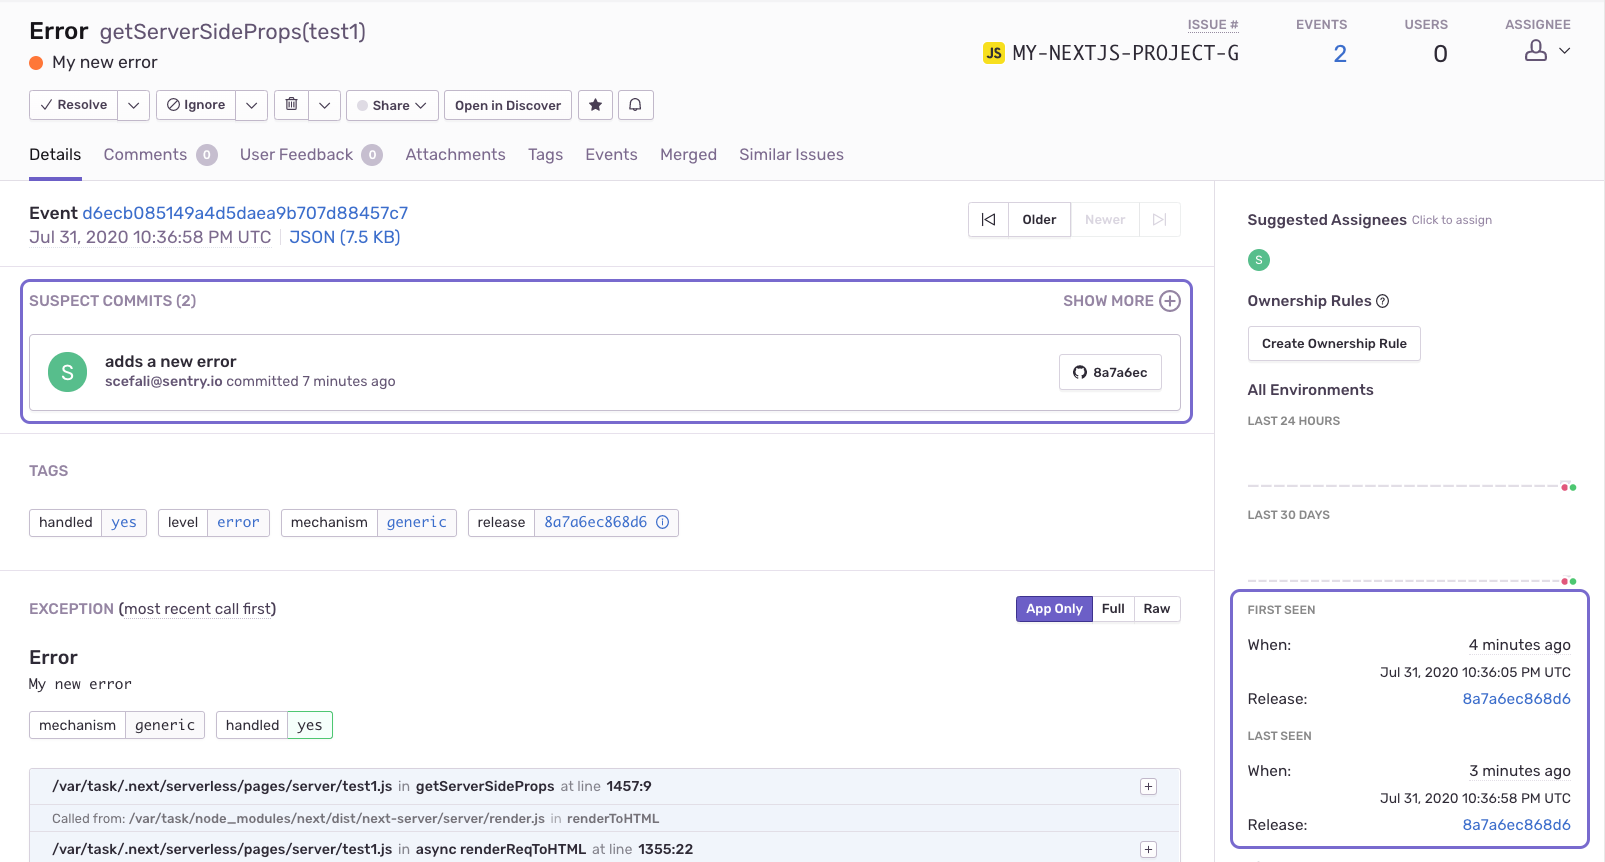
Because we have commits enabled, Sentry was able to identify the suspect commit of the error I added. This is huge because it can drastically reduce the time between spotting a bug and finding a root cause. Additionally, we surface when the error was first and last seen including which release the error is associated with.
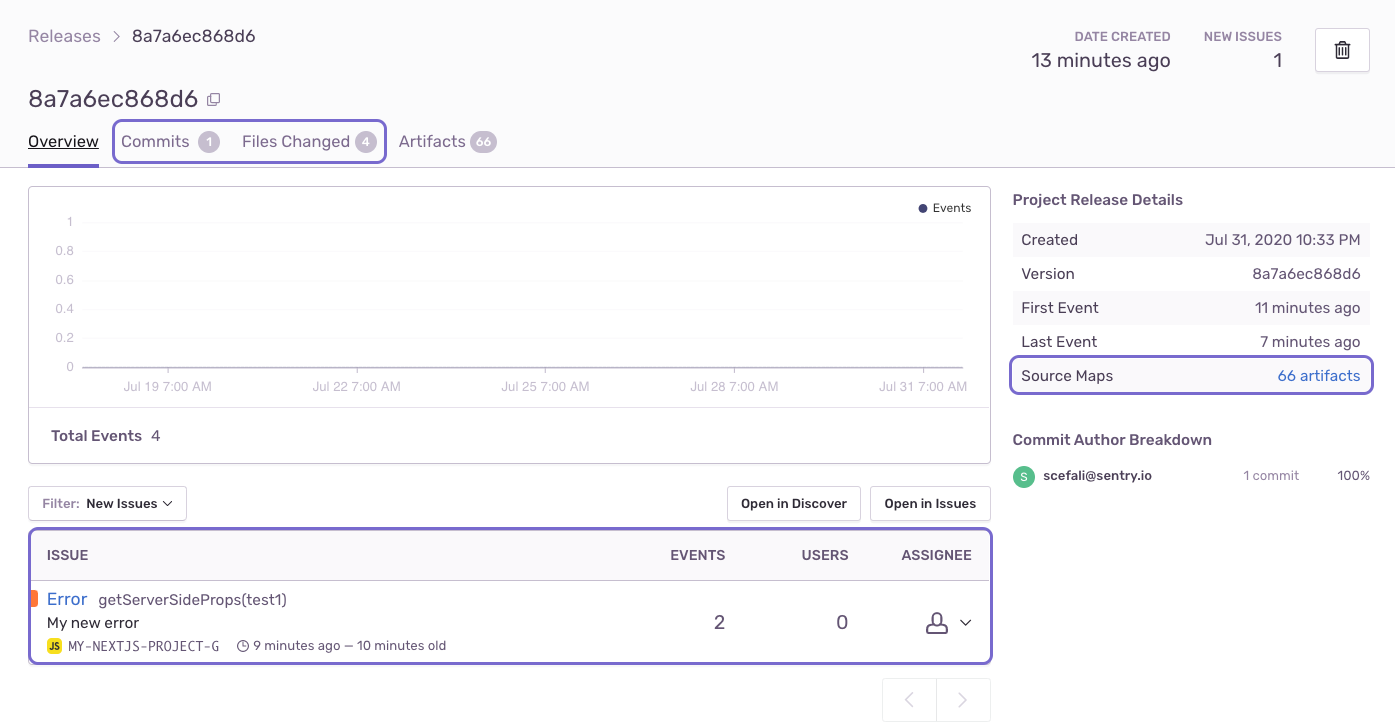
Three things to highlight:
The list of new issues seen in the release on the bottom which can give you a better sense of the health of your release
The number of commits and files changed in the release which makes it easier to understand the scope of changes going into the release
And the source maps on the right side which will enable you to see the original, unminified Javascript in the stack trace.
Get Started
Create your Next.js project here with the with-sentry example. This boilerplate already has Sentry set up with some examples of errors. If you are using another framework like Gatsby on Vercel, many of the steps will be the same but some of it will be slightly different (specifically, setting up the webpack plugin and instrumenting your code).
How it Works
In your next.config.js file, you should see some code like this (though I am redacting some code for brevity).
import * as Sentry from "@sentry/nextjs";
const SENTRY_DSN = process.env.SENTRY_DSN || process.env.NEXT_PUBLIC_SENTRY_DSN;
Sentry.init({
dsn: SENTRY_DSN || "https://examplePublicKey@o0.ingest.sentry.io/0",
// We recommend adjusting this value in production, or using tracesSampler
// for finer control
tracesSampleRate: 1.0,
// ...
// Note: if you want to override the automatic release value, do not set a
// `release` value here - use the environment variable `SENTRY_RELEASE`, so
// that it will also get attached to your source maps
});This will upload source maps whenever your deploy new changes and ensure all Sentry errors are tagged with the release corresponding to the commit sha. If you were using Gatsby, you could use the Gatsby build plugin to handle source maps and follow the instructions from this blog post.
Let's take a look at _error.js which will capture exceptions both client and server pages.
import { withSentry } from "@sentry/nextjs";

const handler = async (req, res) => {
  res.status(200).json({ name: "John Doe" });
};

export default withSentry(handler);

const MyError = async ({ statusCode, hasGetInitialPropsRun, err }) => {
  if (!hasGetInitialPropsRun && err) {
    Sentry.captureException(err)
// flush is needed after calling captureException to send server
// side errors to Sentry, otherwise the serverless function will exit before
// it's sent
    await Sentry.flush(2000)
  }

  return <NextErrorComponent statusCode={statusCode} />
}
FYI, await Sentry.flush(2000)is needed only when running Sentry in a erverless environment such as Vercel or AWS Lambda so the the function doesn't exit before Sentry has finished sending the error.
Create a Sentry Project
This is a good time to create a Sentry project to go with your Vercel Project. If you want some help with this, please check out the docs.
Set up the Source Code Integration
From Sentry, install the source code integration for whatever provider you are using (Github, Gitlab, or Bitbucket). Then add the repository for your project to get commits associated with your release.
Install Sentry-Vercel Integration
Navigate to Sentry's page in Vercel's marketplace, simply click the add button, and map your Sentry projects to their respective Vercel projects. Sentry servers will do their magic and set up environment variables for your project in Vercel.
At this point, all you need to do is generate a new deployment and you'll start seeing errors in Sentry! Thanks for reading and if you're having any problems, feel free to create an issue on our Github.


