A/B Testing is Messy, Until It's Not
So you want to A/B test your web app.
The idea is simple, but the details can get messy, and you don’t want to re-invent the wheel. Services like Optimizely are pretty good, but they can be expensive and full of features you don’t need immediately.
In this post, we’ll share how Sentry wrote an experimentation system with minimal work.
But first, system requirements
A year ago, when we began running experiments, our requirements were the following:
It should be easy to write new experiments and assign Users or Organizations to different variants.
Results of an experiment should be measurable easily and accurately.
There should be negligible performance impact.
We also wanted the following, but they weren’t priority:
Running simultaneous experiments with mutual exclusion should be easy.
In the future, we shouldn’t have completely different systems for experiments and feature flags (used for controlled rollouts of new features) as they’re conceptually related.
We eventually settled on Facebook’s PlanOut library, which makes writing simple and complex experiments equally easy and has been battle tested by a company that runs thousands of experiments daily.
Writing an experiment
If you’re unfamiliar with A/B testing, here’s a good summary. To describe our system, let’s dive into a real experiment we ran (results at the end).
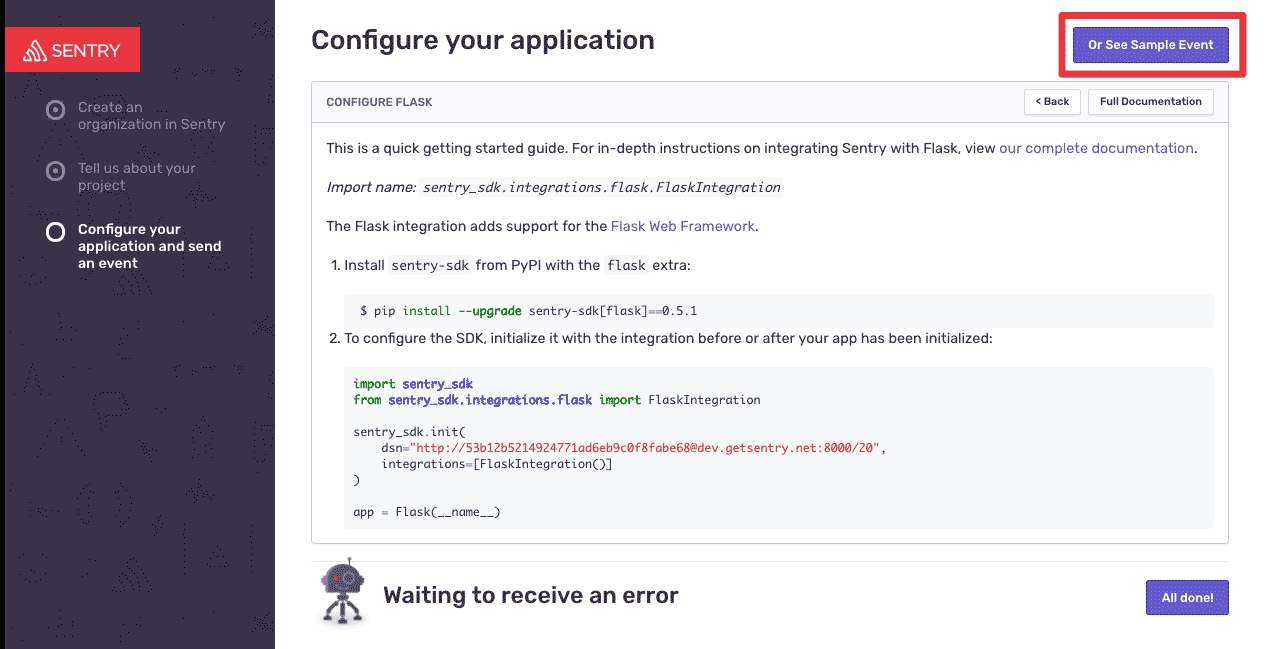
Getting started with Sentry requires, at the minimum, installing the SDK and sending an error. This can be a high-friction step. So, to get the user over the hump, we allow them to see a sample event to check out Sentry’s features. Historically, this has been much later in the new-user flow, and we wanted to see what would happen if we moved it earlier in the flow.
We decided to have two treatment groups. One would be shown a See Sample Event button at the top of the installation-instructions page.

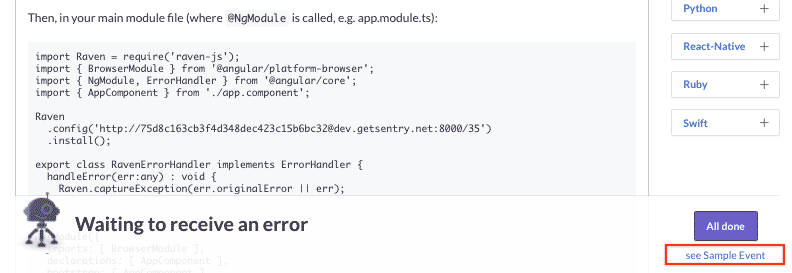
The second group would see a more subtle link with the same text at the bottom of the page. The control group would continue to see the call-to-action (CTA) later in the flow.

PlanOut allows you to write an experiment by defining a method assign() that determines which user should see which variant.
from planout.experiment import DefaultExperiment
from planout.ops.random import WeightedChoice
class SampleEventExperiment(DefaultExperiment):
def assign(params, user):
# Split users 1:1:2 between treatment 1, treatment 2, and control
params.variant = WeightedChoice(
choices=['button', 'link', 'control'],
weights=[0.25, 0.25, 0.5],
unit=user.id,
)That’s it. With just a few lines of code, we have a new experiment.
Internally, PlanOut hashes the user ID and assigns the user a variant based on the specified weights. Note the use of the WeightedChoice Operator; there are several other built-in operators like UniformChoice, BernoulliTrial, and RandomInteger you can use. You can also define your own operators.
Getting an assignment
When we want to determine the assignment for a given user, we create an instance of the experiment class and call get() on the parameter that was assigned, in this case variant:
experiment = SampleEventExperiment(user=user)
variant = experiment.get('variant')
get() internally calls assign() and caches the result for future use. This code goes into our request handler, and there are no performance implications because the assign() method is simple.
Logging: exposure and events
When running an experiment, there are generally two types of events you want to log:
Exposure: the point at which the user is subjected to the experiment and which variant they were shown, e.g., a user seeing the See Sample Event button
Events: the events you’ll record to know if your experiment was successful, e.g., clicks on the CTA.
When get() is called, PlanOut automatically logs an exposure event to the default logger. At Sentry, we override this logging to send the exposure event to our data warehouse instead. Similarly, we also log clicks on the CTA.
Integrating with the frontend
Sentry is a single-page React app with a Django backend. This means that there is one initial page load, after which navigation in the app uses AJAX requests for page-specific information. Our experiments are defined on the backend, and are cheap to compute, so we compute all assignments for the current user and send it to the React app with the initial page load. This also means that since get() is called before the user actually sees the experiment, we disable PlanOut’s auto-logging feature using set_auto_exposure_logging(False), and log exposure manually when the user visits a page with an experiment.
Analysis
Once the exposure and events are recorded, we can write a simple SQL query to tell us the click-through rate (CTR) for each variant. This is the fraction of users who were exposed to the experiment that clicked on the CTA. If you use an analytics tool, like Amplitude, this analysis is made even easier and includes automatic computation of statistical significance etc.
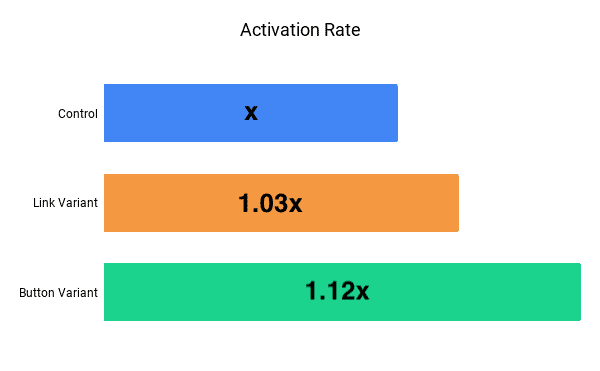
While measuring the CTR is simple, it can be a vanity metric not tied to actual outcomes. Therefore, we measured the activation rate instead — what percentage of sign ups successfully send an error to Sentry. The results were very positive, with the Button variant improving upon the control by 12%:

By having clear requirements and expectations, we simplified our A/B process and made it much less messy without reinventing the wheel. Interested in helping us with our next project? We’re hiring on the Growth team!


