Automating Sentry Releases with our Netlify Build Plugin
Automating Sentry Releases with our Netlify Build Plugin
Netlify allows developers and businesses to publish modern web projects right from your git repos. There’s nothing to set up & no servers to maintain. This past month, Netlify launched Build Plugins, which allows Netlify users to automate and customize their build processes.
We loved what the Netlify team was building and how they were automating tedious tasks for developers. So we built the Sentry Netlify Build Plugin! With Sentry for Netlify, developers can automate release management and deliver a reliable customer experience.
This will unlock some of our best features, like identifying suspect commits that likely introduced new errors, applying source maps to see the original source code within Sentry, and more. In this post, we'll walk you through the installation process.
Before proceeding, you'll want to ensure that your Sentry project is set up properly to track commit metadata. The easiest way to do that is to install a repository integration.
Install the Sentry Netlify Build Plugin
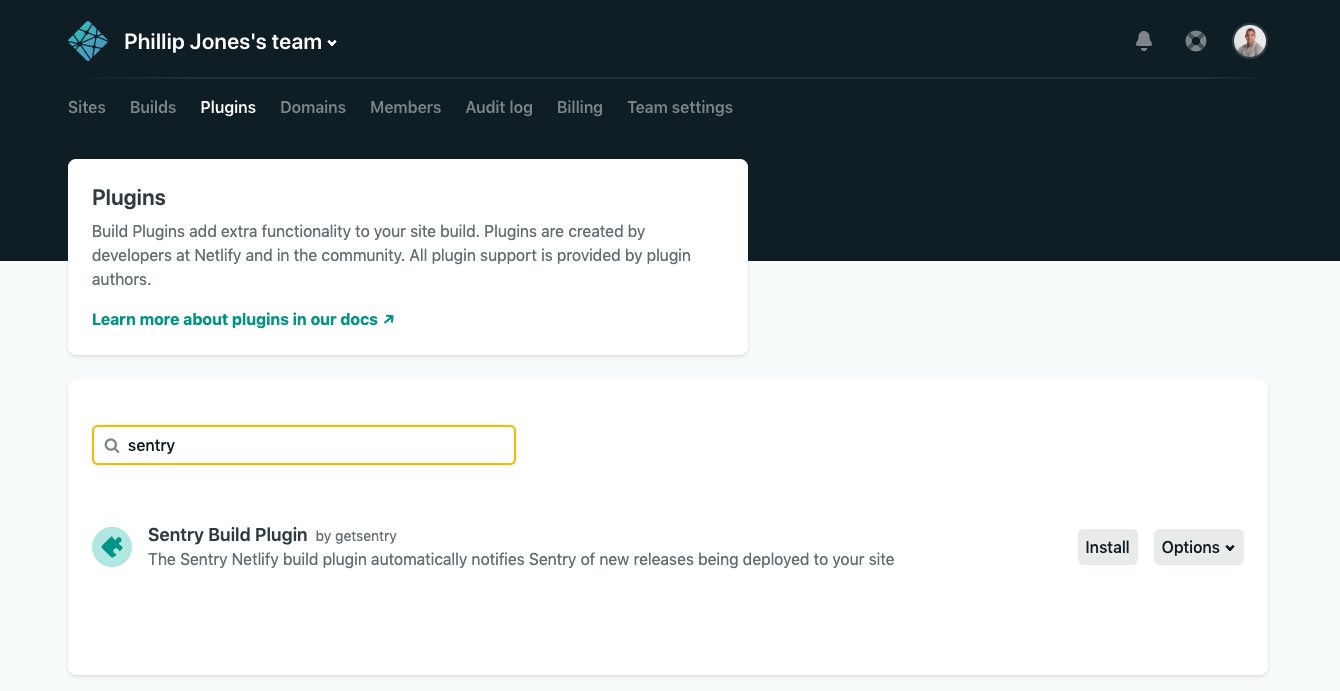
The first thing you'll need to do is install the Sentry Build Plugin on Netlify:
In Netlify, go to "Plugins".
Find the Sentry Build Plugin and click "Install".
Choose your site on Netlify you want to use the plugin with and install.
Create a Sentry Internal Integration
For Netlify to communicate securely with Sentry, you'll need to create a new internal integration. In Sentry, navigate to: Settings > Developer Settings > New Internal Integration.
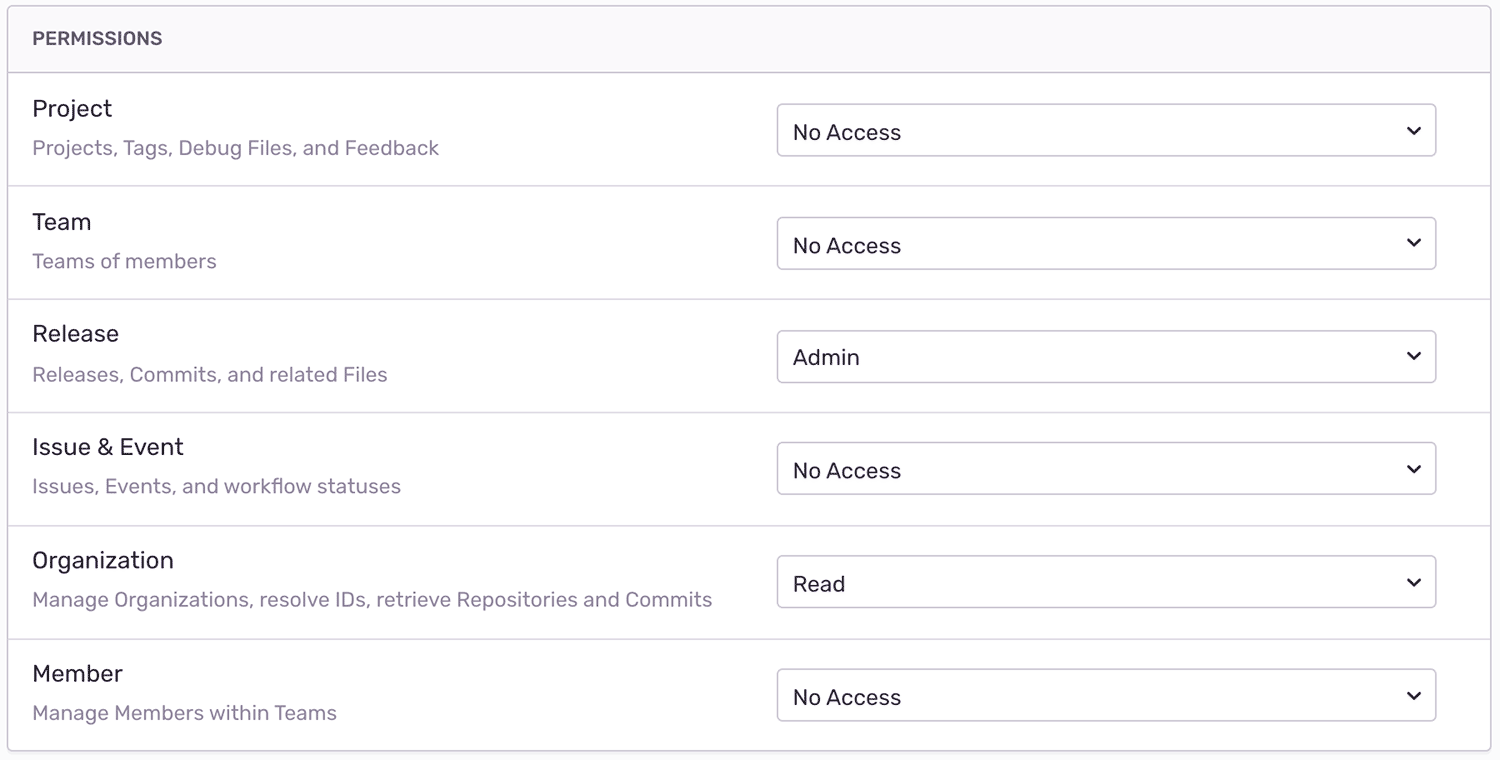
Give your new integration a name (for example, Netlify Deploy Integration”) and specify the necessary permissions. In this case, we need Admin access for “Release” and Read access for “Organization”.
Click “Save” at the bottom of the page and grab your token, which you’ll need this in the next step.
Set Environment Variables in Netlify
Next, we’ll set a few environment variables to configure our Build Plugin:
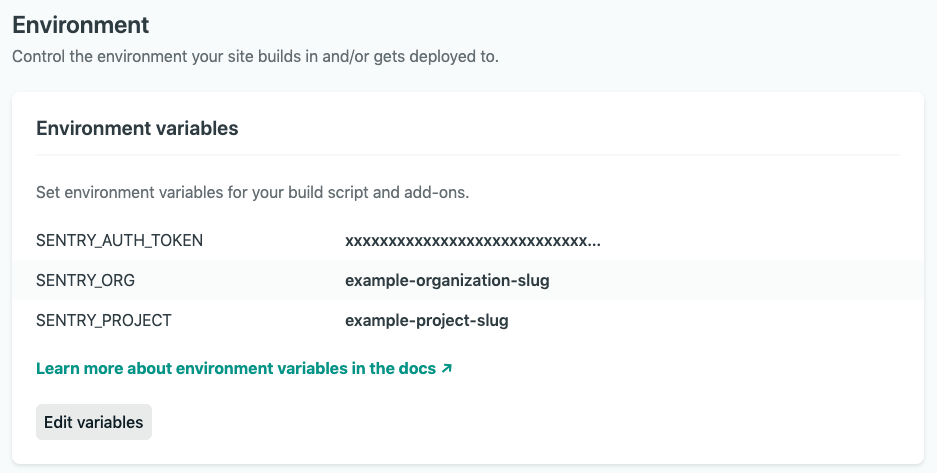
SENTRY_AUTH_TOKEN- Your Internal Integration token.SENTRY_ORG- Your Sentry organization slug.SENTRY_PROJECT- Your Sentry project slug.
To set these environment variables we'll use Netlify's site environment variables:
In Netlify, go to your site's settings.
Click on "Build & deploy".
Click "Edit variables" and add
SENTRY_AUTH_TOKEN,SENTRY_ORG, andSENTRY_PROJECTwith their respective values.
And that's it!
Now every time Netlify deploys your site, the Sentry Build Plugin will automatically notify Sentry of new releases being deployed, upload source maps to Sentry, and send Sentry commits to enable features like suspect commits.
To see more information or additional configuration options, check out the Sentry Build Plugin on GitHub.


