Common Sentry Settings Roadblocks and How to Overcome Them
Common Sentry Settings Roadblocks and How to Overcome ThemSentry helps developers monitor and fix crashes in real-time. Of course, finding and fixing bugs with Sentry is easier when Sentry itself is set up in a way that minimizes disruption. Our help center and documentation can help with that.
We've also put together a list of the most common issues our Support team works on with Sentry customers that you'll find useful (or, at least we hope you do).
Resetting two-factor authentication
Two-factor authentication(2FA) provides a layer of security from malicious attempts to access your account by requiring a password and a generated authentication code. While extra security is a good thing, there may be times when you will need to reset your 2FA, like when you get a new device.
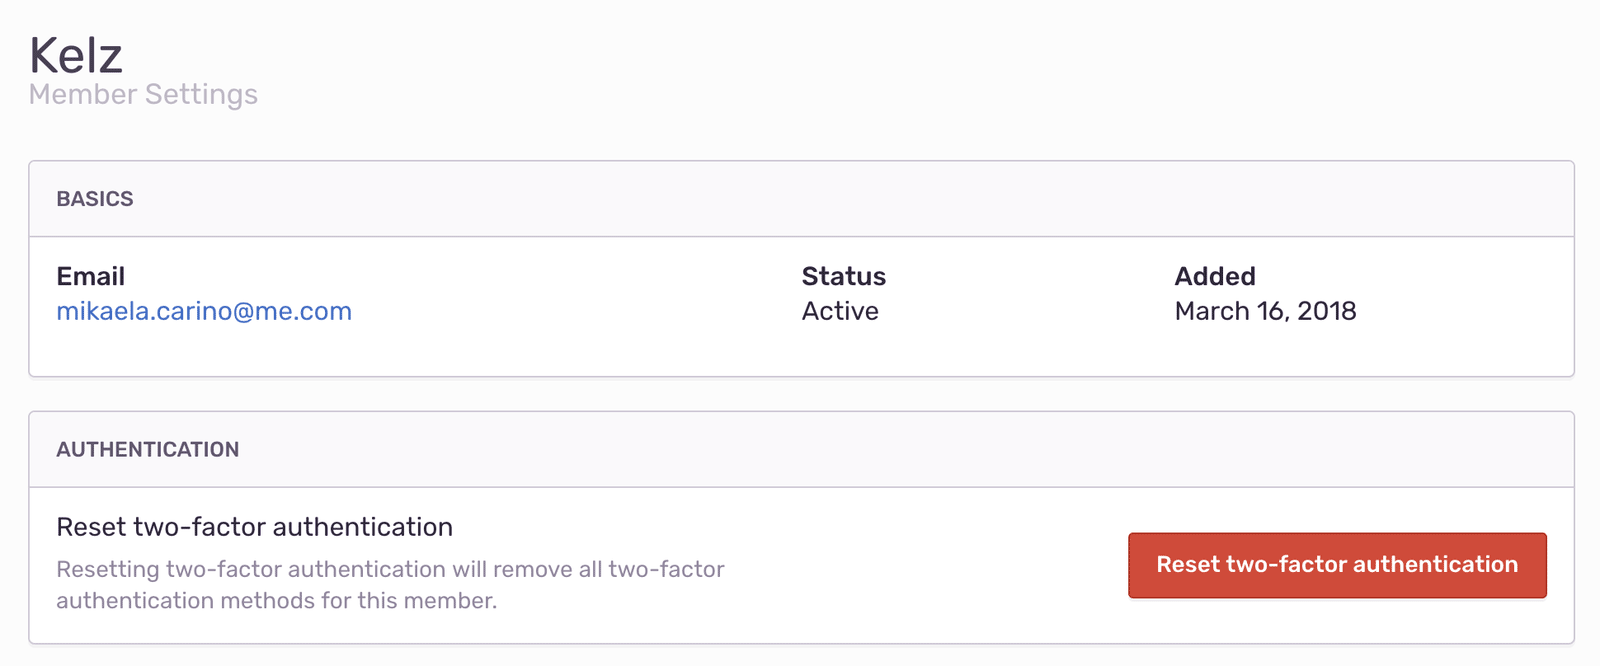
If you have a recovery code, you can enter it directly into the prompt for your authenticator app token. If not, you'll need an organization Owner or Manager to reset your 2FA. That person can reset the 2FA from your member page.
However, if you're part of multiple organizations, the organization Owner or Manager will not be able to reset it for you. Please store your recovery codes in a safe place, and we strongly recommend adding a backup phone number so you can recover your account.
Once 2FA has been removed, you can login with your regular credentials or SSO. Make sure to re-enable 2FA as soon as possible.
Managing your quota
We frequently receive questions about controlling the volume of errors sent to Sentry, which makes sense considering our pricing structure is based on event volume. You shouldn't have to deal with (or see) events that are outside of your control.
For example, maybe you want to use Sentry in a widget that other people use on their websites. If you don't customize your SDK configuration, you'll receive most errors, even if it's not actually part of the widget.
Here are a few of our recommendations for quota management.
Custom filters
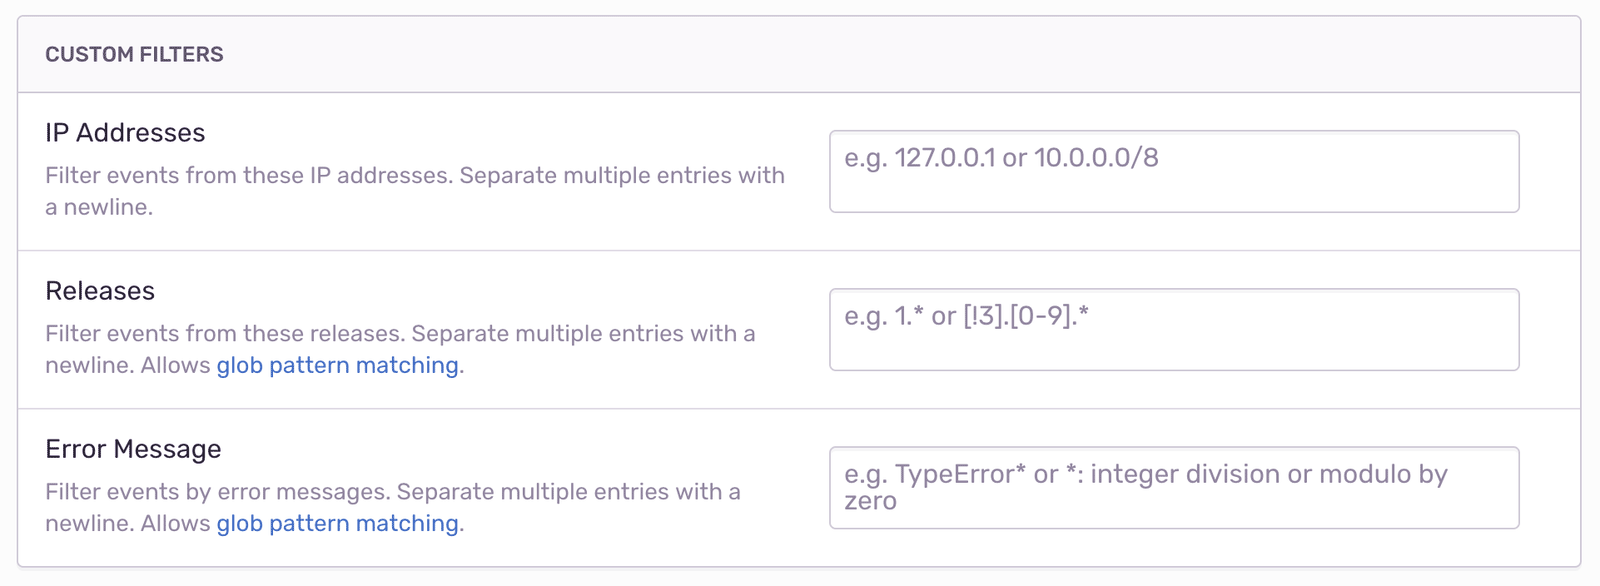
Setting custom filters is one way to manage your quota effectively. If you have a rogue client, you may find yourself simply wanting to block that IP from sending data. If you have a problematic release that is causing an excessive amount of noise, you can ignore all events from that release. You can also filter specific types of errors.
Filtering by releases and by error messages can only be done with our Business and Enterprise plans. If you'd like to try out these features, we recommend our 14-day trial.
Delete and Discard
Another available option is the Delete and Discard feature, which is a quick filter to get rid of very specific issues that you don't want to see in your stream anymore.
Discarded issues aren't gone forever, but they are separated to their own, hidden queue. If you truly never want to receive these events again, select the Trash icon.
Delete and Discard is a feature available to Business and Enterprise plans. Not on one of those plans? Try out our 14-day trial.
SDK configuration (in code)
There are also a few SDK configurations you can add to help with quota management. Apply your own filters to determine if the event should be sent to Sentry with the before-send callback:
Sentry.init({
beforeSend(event) {
// Modify the event here
if (event.user) {
// Don't send user's email address
delete event.user.email;
}
return event;
}
});Or configure the percentage of events that are sent to Sentry with sampleRate.
On-demand
You can set a maximum monthly on-demand bill amount by setting an on-demand spending cap. Once you reach the spending cap, you will still be able to access Sentry and prior event data, but any additional events you send will be rejected.
On-demand capacity is billed at the end of each billing cycle. You are charged per processed event, rounded up to the nearest cent.
Spike protection
The final option we recommend for quota management is spike protection, which helps prevent huge overages from consuming your event capacity. If it really is a spike (large and temporary increase in event volume), spike protection drops events during the spike to try and conserve your capacity. We also send an email notification to the Owner when spike protection is activated.
Receiving an “unable to fetch commits” message
If you are unable to fetch commits, your GitHub identities in Sentry may not be synced up with whoever is making the release (e.g., users that are part of the Sentry organization creating releases using the sentry-cli). If you have already connected your identity and still see this message, you may need to disconnect or reconnect your identity. All members will need to do this if they are creating releases.
Configuring integrations
In an ideal world, integration configuration is simple and painless. In reality, we all know this doesn't quite hold up. We see specific patterns where integration configuration fails.
Alert rules
Alert rules need to be configured for each project. Alert notifications in Sentry can be routed to many supported integrations (like Slack or PagerDuty) but by default are aimed at email. You will need to configure a project's Alert rules to properly route notifications to a specific integration.
Add repository
You can add any repository that you can access to Sentry. After installing a source code management platform integration, like GitHub or BitBucket, you can configure that integration from Organization Settings > Integrations page. While you're at it, make sure that you give Sentry access to the proper repositories in those source code management platforms.
Issue management
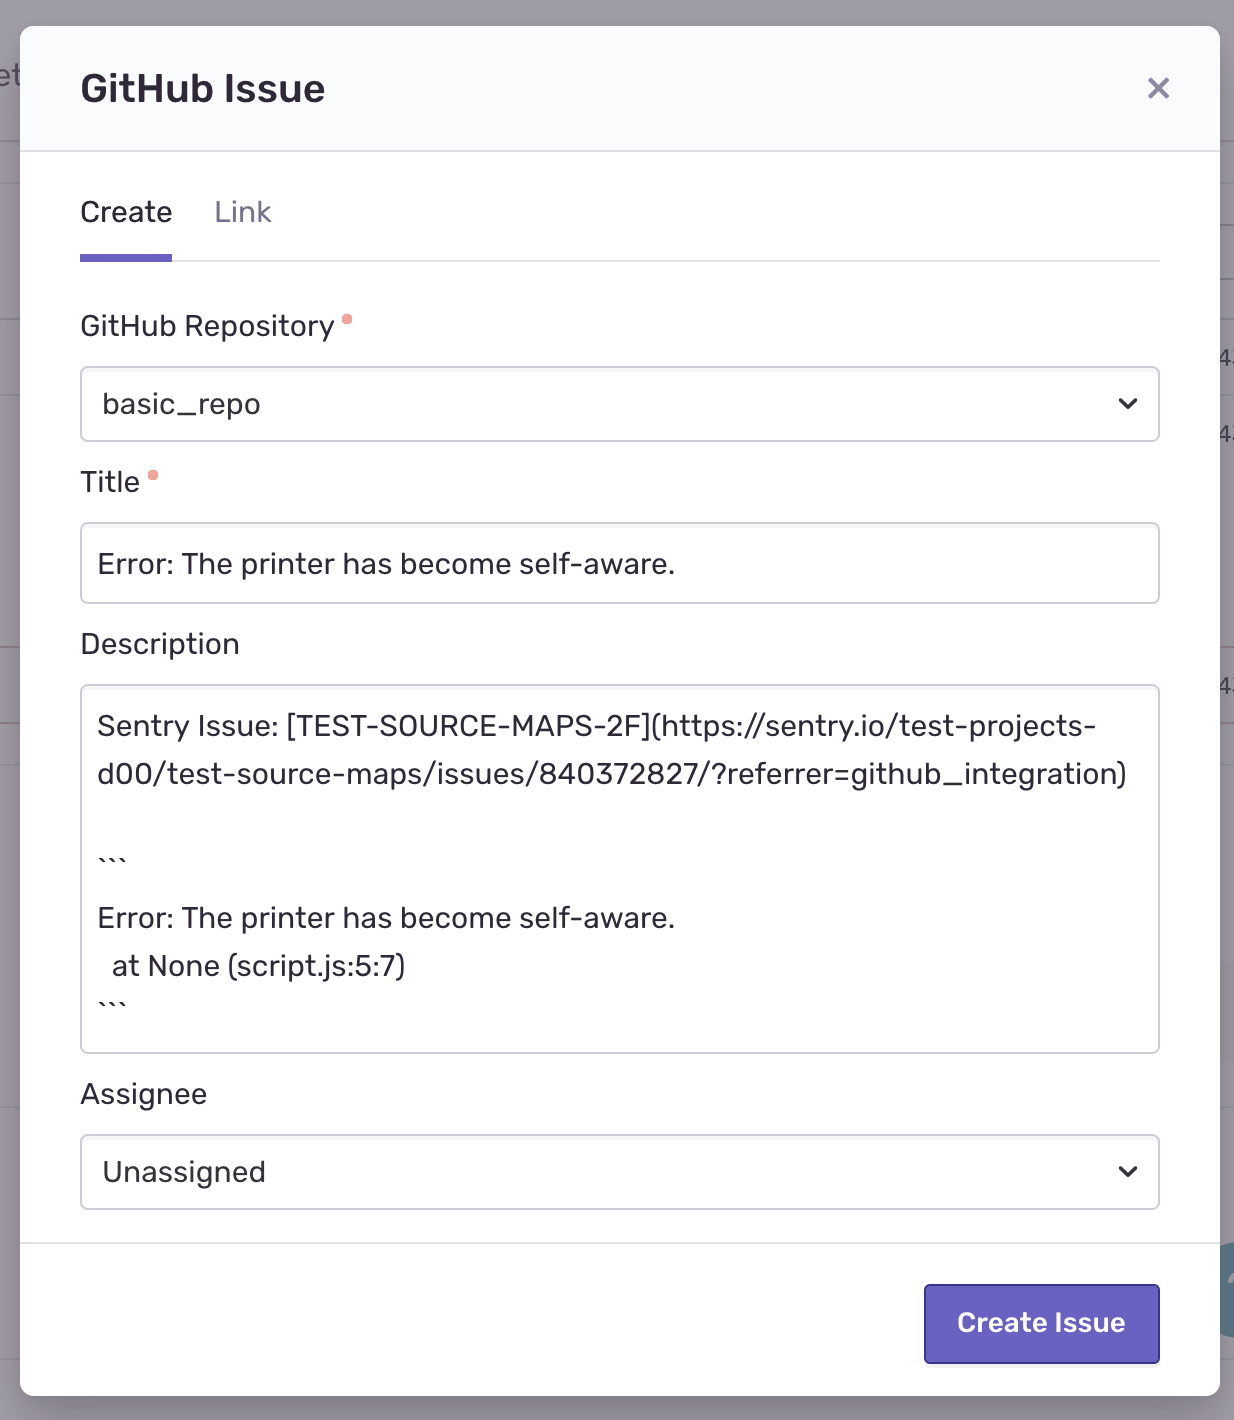
Issue tracking allows you to create issues from within Sentry and link Sentry issues to existing supported integration Issues. You can create and/or link an Issue to a global or per-project integration on the Issue Details page. In the Linked Issues section in the right-hand panel, choose the corresponding Link {integration} Issue. Hovering over the link will display the repository.
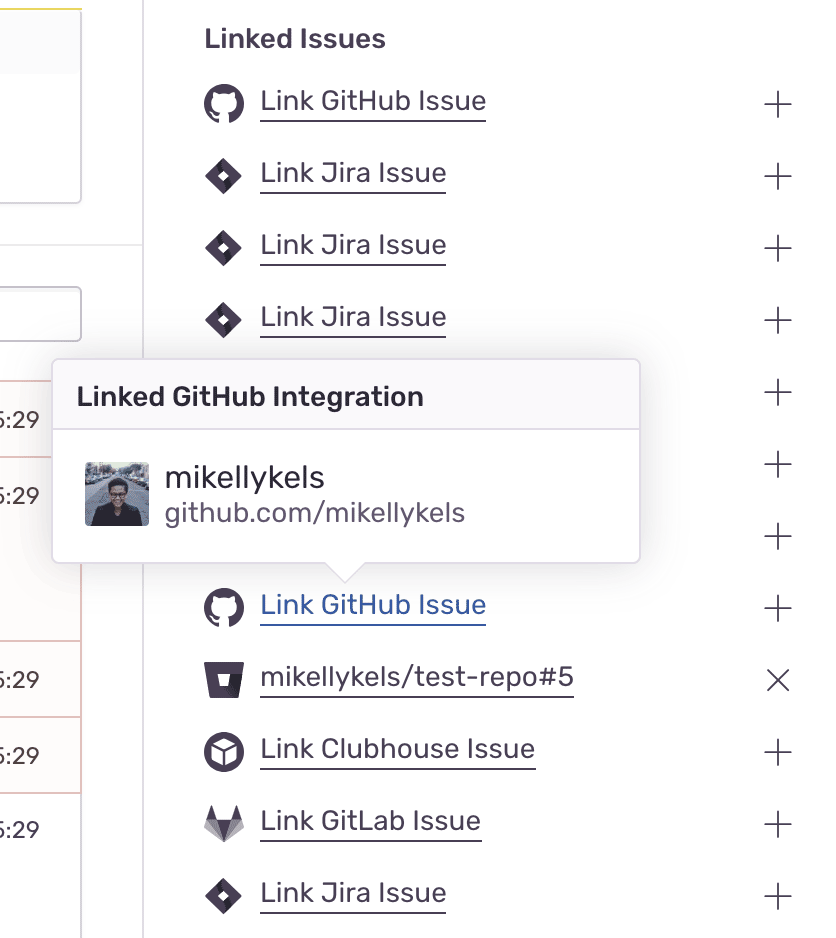
From there, creating or linking the issue can be done in a matter of steps, as seen in the screenshot below.
Billing
Finally, we come to billing issues — problems that literally no one enjoys encountering and everyone is relieved to solve.
Set billing email
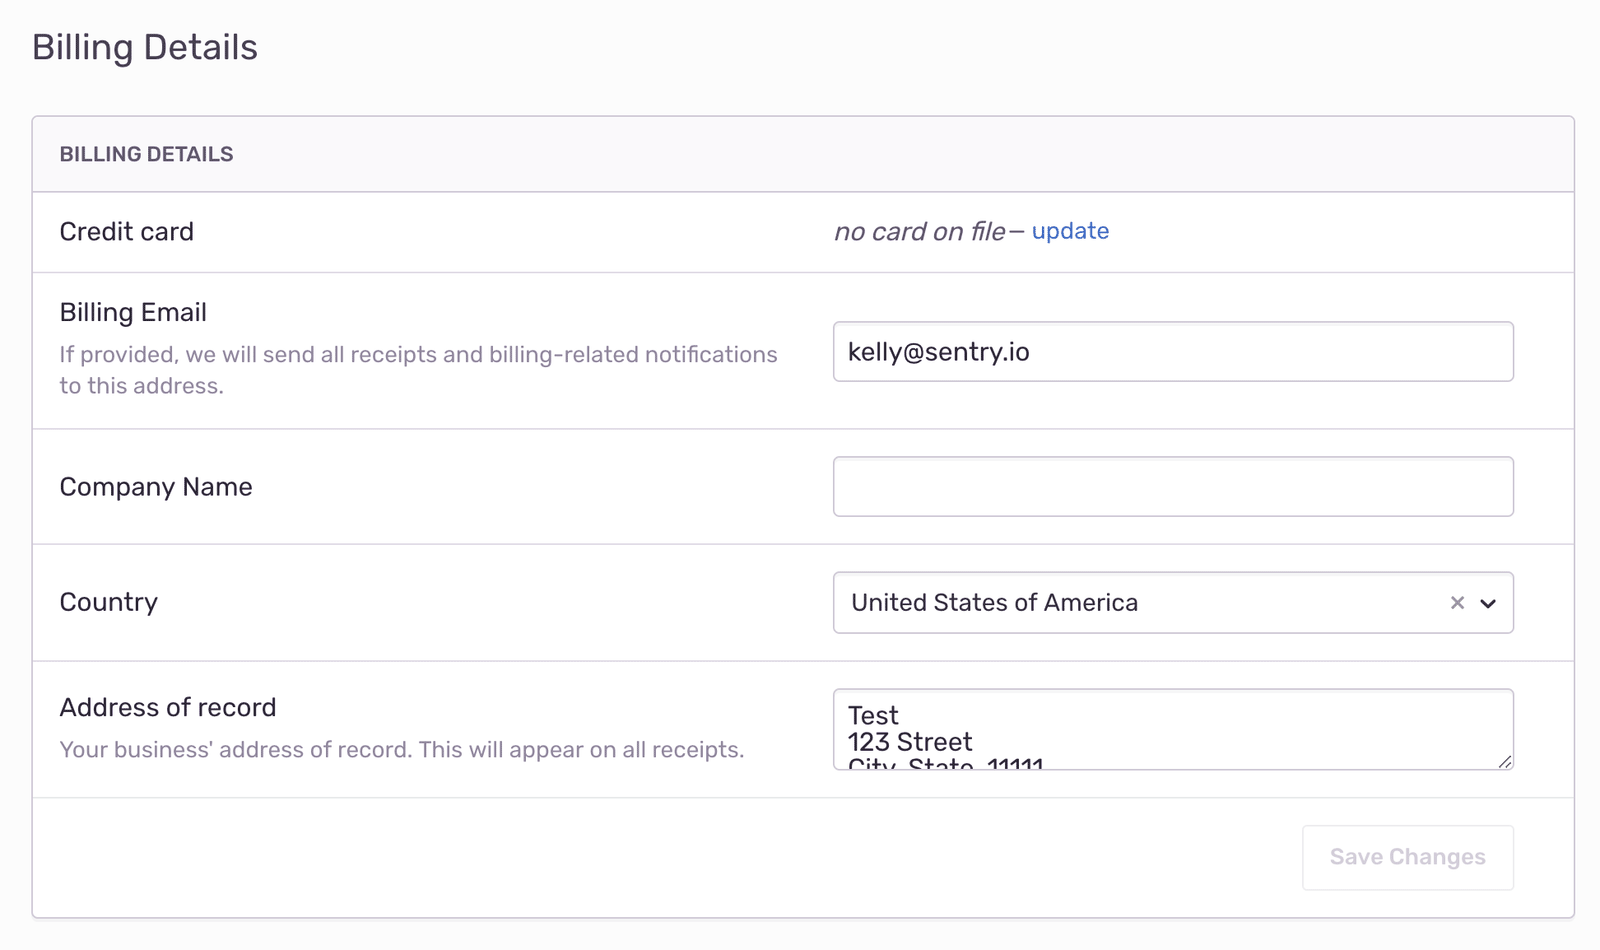
You need to set your billing email to receive invoices, receipts, etc. Please, double check your billing email to ensure correct spelling.
Add (or confirm) your billing email from Usage & Billing > Billing Details (Update Billing). Note that only one email is allowed here.
Update payment details
As you can imagine, payment information also needs to be correct. SaaS is transactional, after all.
Add (or confirm) your payment details from Usage & Billing > Billing Details (Update Billing).
Invoice information
If you'd like a receipt, we need your help with a few details, which you can add from Usage & Billing > Billing Details (Update Billing). Anything in Address of Record will appear on all receipts.
Upgrade/Downgrade
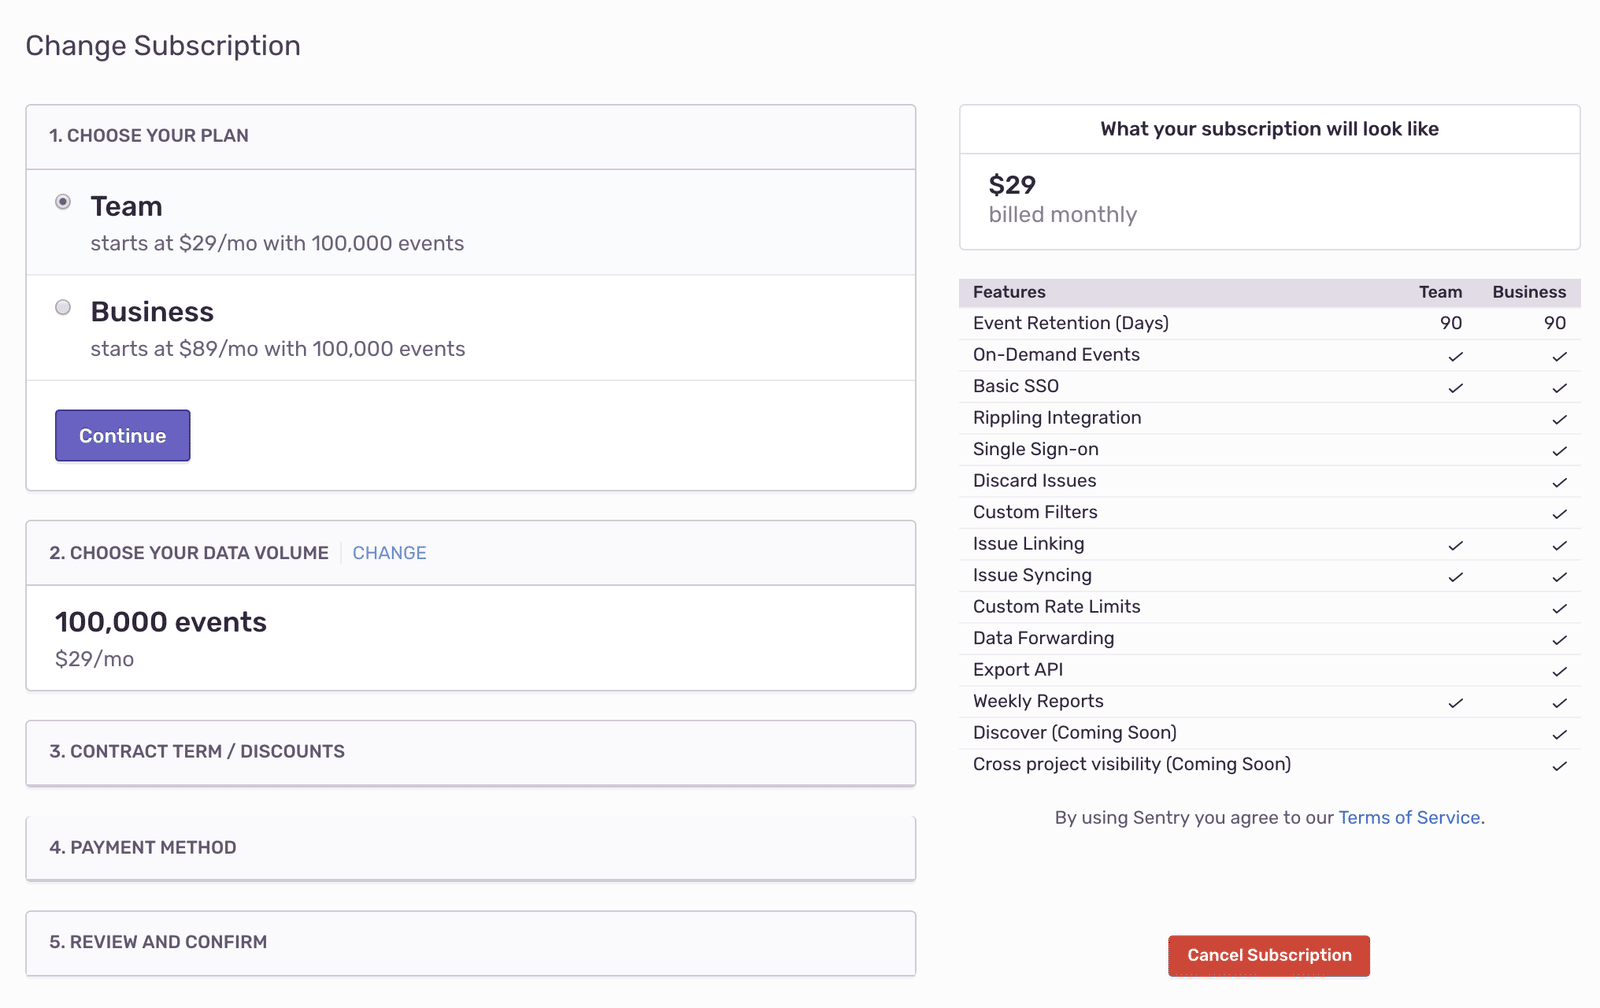
Sometimes you want more features — which is great! And sometimes you need fewer features — we get it. Upgrade or downgrade your subscription from Usage & Billing > Subscription.
Under Active Plan, you can follow the checkout flow to update your current subscription. If you need to cancel your subscription altogether, you can also do so from that checkout page.
Hopefully, at this point, you're feeling more confident about two-factor authentication, quota management, encountering "unable to fetch commits" messages, integration configuration, and billing. If you have other questions, Sentry's help center and documentation are always here to help. You can also unlock Sentry's full potential — Support team included — with a Business trial.

